If you’ve recently tried to pull up the Navionics web app to check charts or plan a route, you probably noticed something frustrating: it’s gone. The browser-based tool that thousands of boaters relied on for viewing marine maps, marking waypoints, and prepping trips has been shut down, and the redirect isn’t exactly intuitive.
We deal with Destin’s waterways every single day at Original Crab Island. Whether we’re sending pontoon boats out to the sandbar or coordinating fishing charters in the Gulf, accurate marine charts matter to us and to our customers. So when Navionics pulled the plug on its standalone web viewer, we paid attention. Many of our guests, especially those who rent boats and explore on their own, have asked us about it directly.
This article breaks down exactly what happened to the Navionics web app, where its functionality lives now under the Garmin umbrella, and what your current options are for accessing the same marine chart data online. If you’ve been searching for answers, you’re in the right place.
What the Navionics web app was used for
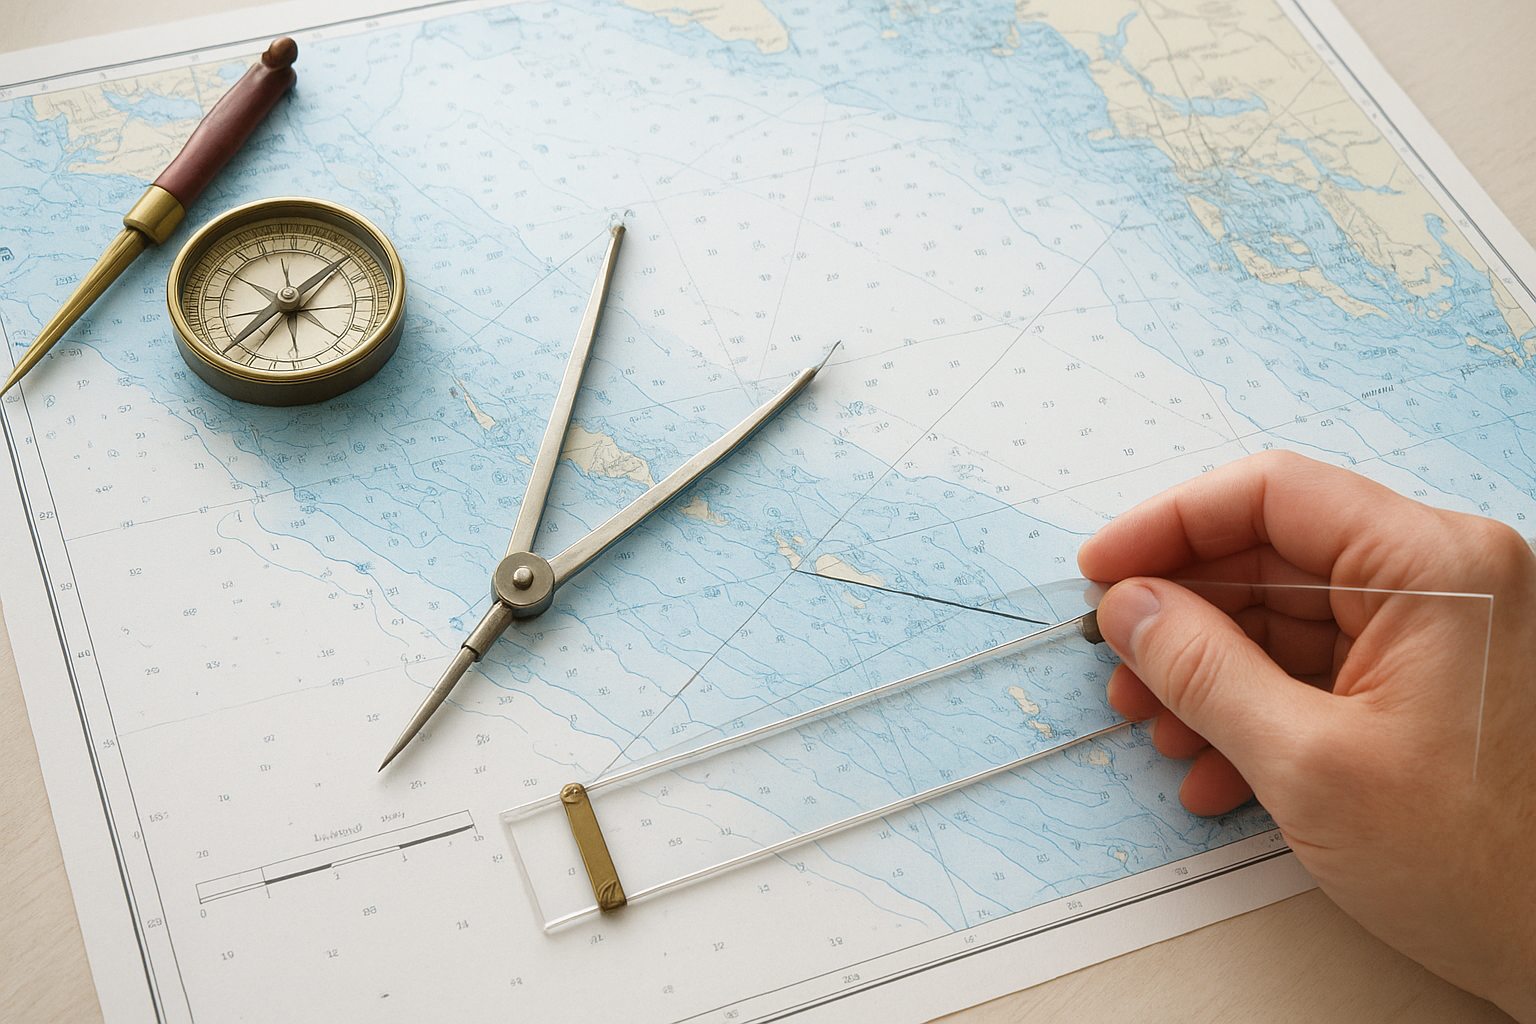
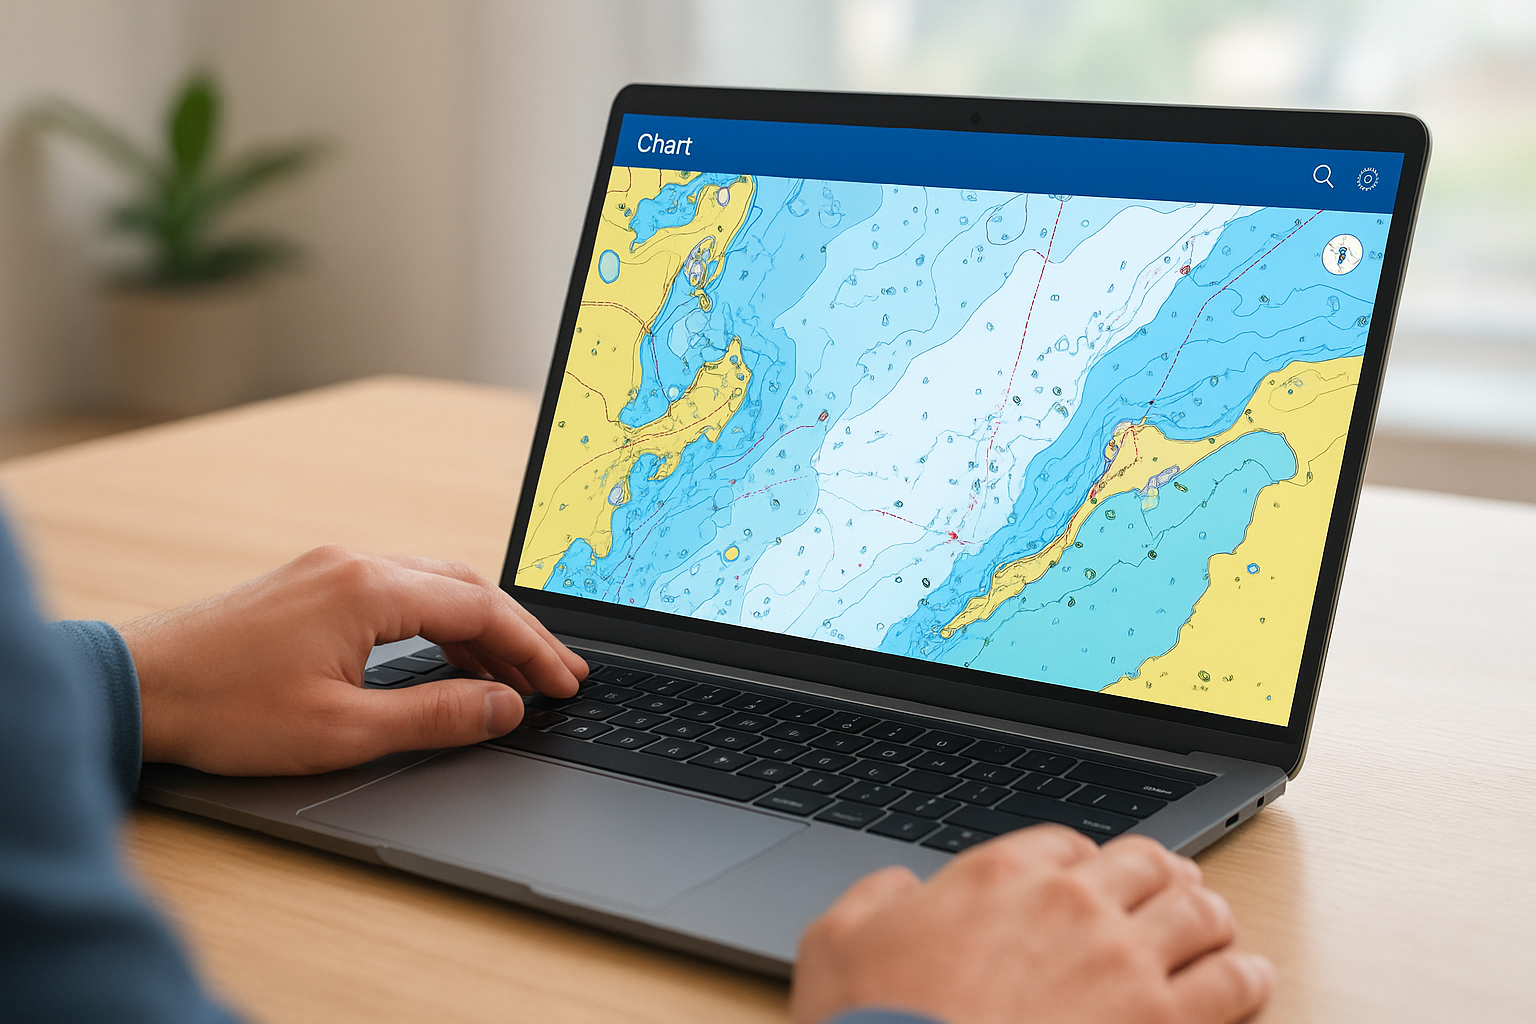
The Navionics web app gave boaters a full marine chart viewer that ran directly in any browser, no download required. You could open it on your laptop or desktop and immediately see nautical charts, depth contours, marina locations, and navigational hazards for waterways around the world. It was essentially the same chart data found in Navionics’ mobile app, just accessible from a bigger screen.
Browsing charts and checking water depths
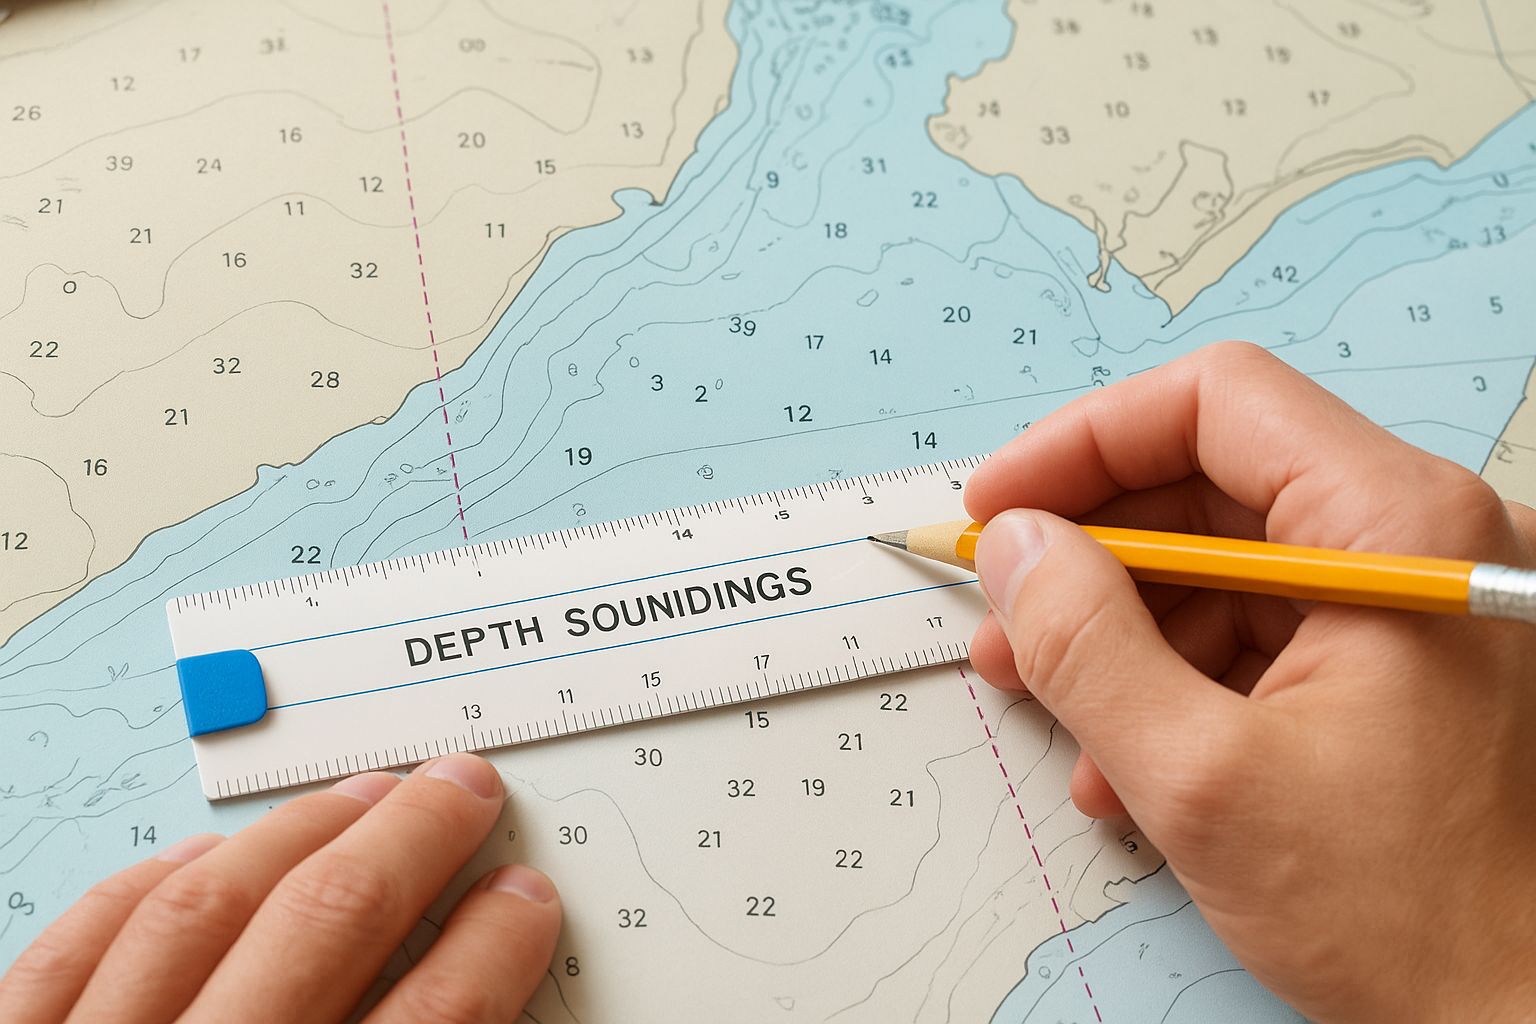
Before heading out on the water, you could use the tool to study the exact area you planned to navigate. The interface let you zoom in, inspect depth contours, and spot potential obstacles like shallow sandbars or marked hazards. For anyone exploring unfamiliar waters, that level of detail on a full computer screen was far easier to work with than squinting at a phone.
Reviewing depth charts before you launch puts you in a much stronger position, especially in areas with shifting sandbars or tricky inlet approaches.
You could also layer on additional data types, including tide and current information, weather overlays, and points of interest like fuel docks and pump-out stations. The platform let you customize what you saw on the chart, making it a practical research tool for any type of outing.
Planning routes and saving your data
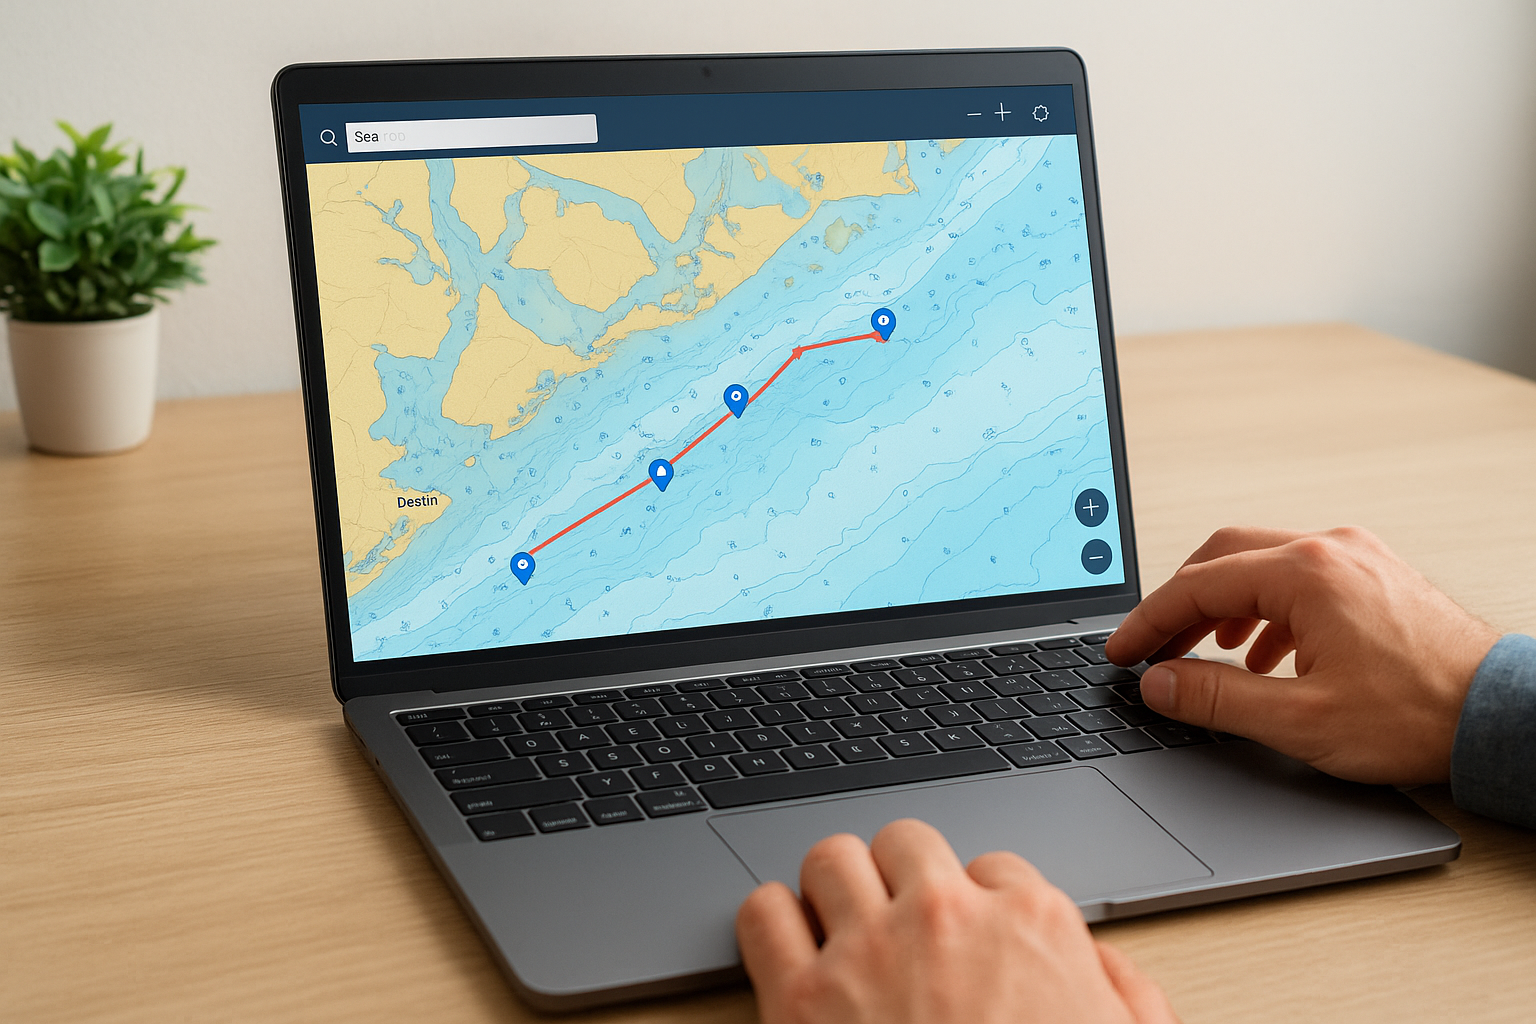
The app let you drop waypoints directly onto the chart and build complete routes from start to finish. You could measure distances, estimate travel times, and then export that data to a compatible GPS or chartplotter. If you had an active Navionics+ subscription, your routes, SonarChart recordings, and custom marks all synced to your account, so nothing was lost when you switched between devices.
Syncing also meant you could review and refine your plan on a large monitor before boarding. That workflow, planning on the web and executing on the water, is exactly how a lot of regular boaters used the platform.
What happened to the Navionics web app
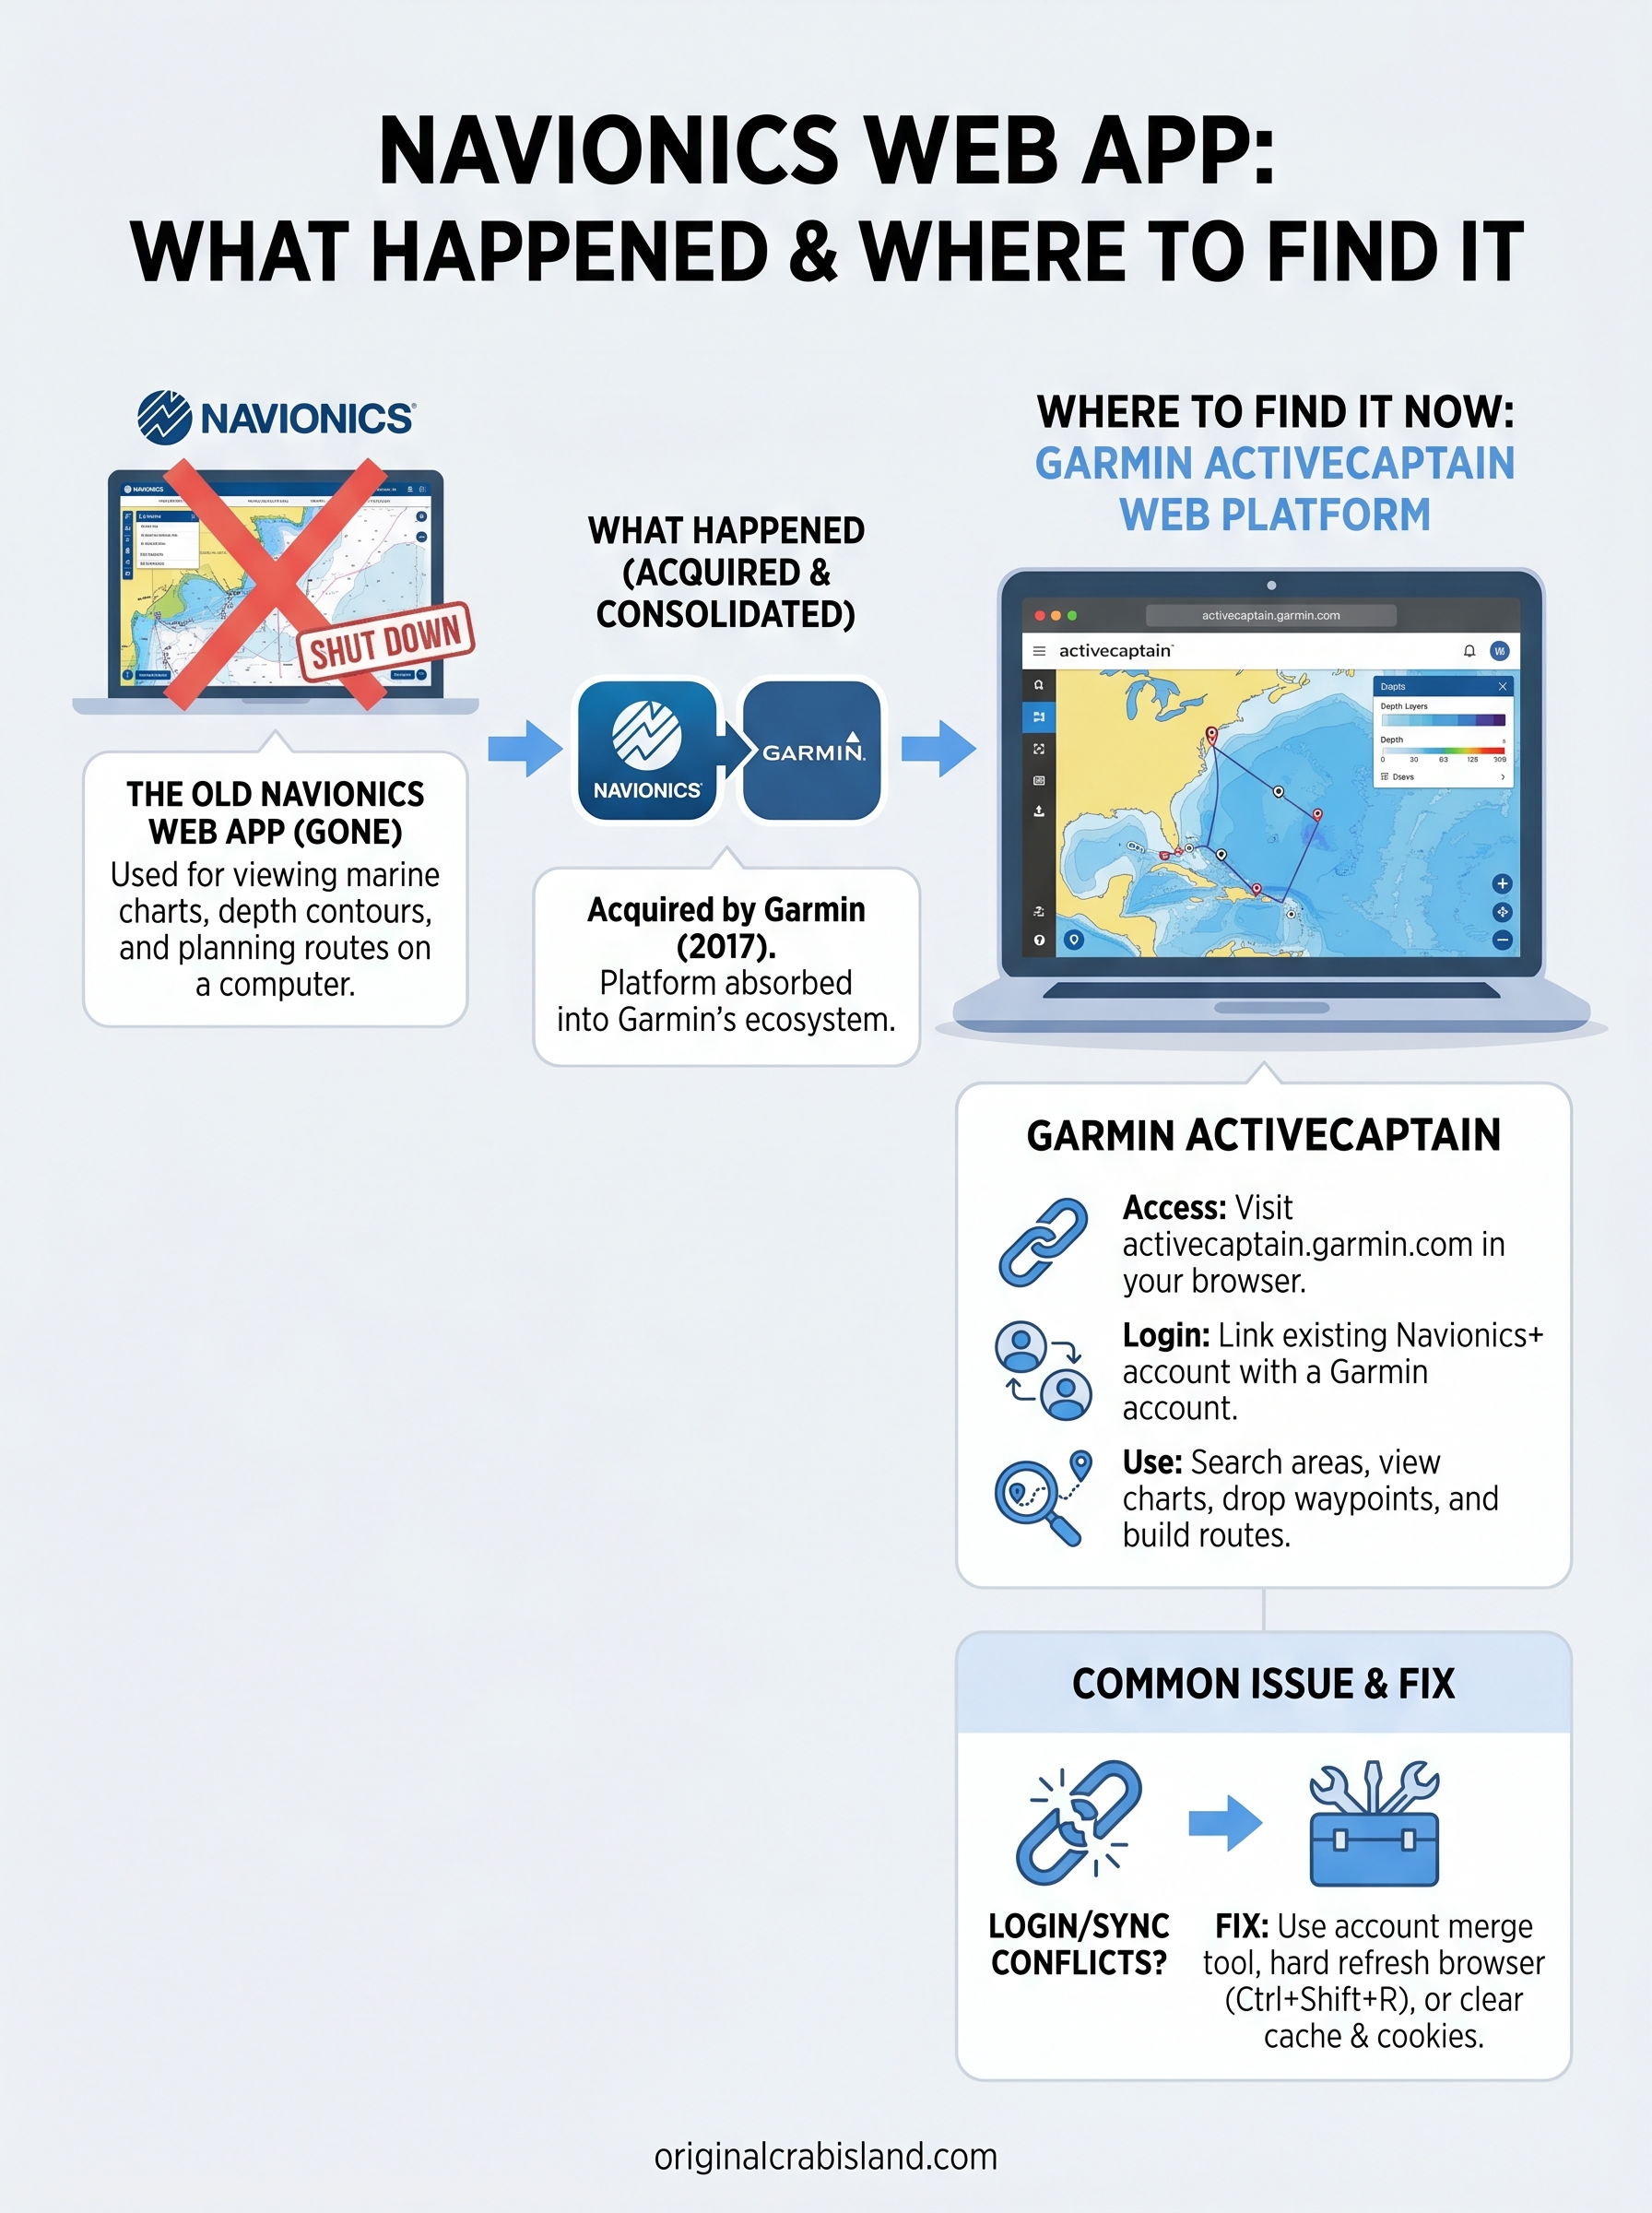
Navionics was acquired by Garmin in 2017, and the transition has been gradual ever since. For a while, the standalone Navionics web app continued to operate on its own domain, but Garmin eventually folded the functionality into its own platform. The standalone web viewer was officially shut down, and users who navigated to the old URL were redirected without much explanation.
Garmin absorbed the platform
The move was part of Garmin’s broader strategy to consolidate its marine navigation products under a single ecosystem. Rather than maintaining a separate Navionics web tool, Garmin migrated the chart-viewing functionality to its own web-based system. Your Navionics+ subscription credentials still work, but you now log in through Garmin’s platform instead of the original Navionics site.
The transition was not widely announced, which is why so many boaters still search for the original Navionics URL and end up confused.
All of the core chart data made it through the switch, including SonarChart depth layers and community edits tied to your account. Nothing was lost on the content side. The main change is simply where you go to access it, and the new interface takes a short adjustment period to navigate comfortably.
Where to find the chart viewer now
The replacement for the original navionics web app is Garmin’s ActiveCaptain web platform, which now hosts the chart viewer that used to live on the Navionics site. You can reach it by visiting activecaptain.garmin.com and selecting the chart viewer from the navigation. The underlying chart data, depth layers, and SonarChart features are all present, even though the interface looks different from what you remember.
Bookmark the Garmin ActiveCaptain URL now so you stop losing time chasing the old Navionics redirect.
Accessing charts through Garmin’s platform
Once you land on Garmin’s ActiveCaptain site, the chart viewer opens directly in your browser with no software to install. The map loads your regional nautical charts and depth data the same way the old tool did.
You can also toggle on tide overlays and weather layers for a complete pre-trip picture before you ever leave the dock.
Logging in with your existing account
Connecting your Navionics+ subscription to a Garmin account is straightforward, and the login screen walks you through the merge process if your accounts aren’t linked yet. Here’s what that step requires:
Your original Navionics login email
A Garmin account (free to create if you don’t have one)
Confirmation to transfer your subscription and saved data
How to use it on a computer
Once you’re logged in on Garmin’s ActiveCaptain, the chart viewer works much like the old navionics web app did. The map loads directly in your browser window and responds to standard zoom controls, so you can scroll to zoom in and out or use the on-screen buttons. Click anywhere on the chart to pull up depth data, hazard notes, or point-of-interest details for that specific location.
Searching for a specific area
Type a location name or set of coordinates into the search bar at the top of the screen and the chart jumps directly to that spot. From there, you can zoom to the level of detail you need, whether that’s a broad regional view or a tight look at a specific marina entrance or inlet.
Use the search function to pull up Destin’s Crab Island area and check the depth contours before your trip out to the sandbar.
Dropping waypoints and building a route
Select the route-building tool from the toolbar and click your starting point on the chart. Each additional click adds a new waypoint to your route. The tool automatically calculates the total distance as you build, so you can estimate travel time and fuel needs before you ever leave the dock.
Common problems and practical workarounds
Many users hit the same snags when moving from the original navionics web app to Garmin’s ActiveCaptain. The most common issue is a login conflict when your old Navionics email is already tied to a separate Garmin account. Use the account merge tool on the Garmin login page to link both profiles before you try to access your saved data.
Chart not loading or showing a blank screen
If the chart loads blank or freezes mid-session, start with a hard browser refresh (Ctrl+Shift+R on Windows or Cmd+Shift+R on Mac). Clearing your browser’s cached data and cookies specifically for the Garmin domain resolves most loading errors without any further troubleshooting.
If the problem continues across multiple browsers, confirm that your browser is updated to its latest version, since older versions often block the map tiles from rendering.
Saved routes not appearing after login
Your waypoints and saved routes carry over during the account merge, but they sometimes take a few minutes to sync. Refresh the page once the merge completes, then log out and back in if the data still does not appear. If the issue persists, try these steps:
Clear site data for activecaptain.garmin.com in your browser settings
Switch to a different browser to rule out an extension conflict
Verify that your Navionics subscription is still active inside your Garmin account profile
Final takeaways
The navionics web app you remember is gone, but its core functionality lives on through Garmin’s ActiveCaptain platform. The chart data, depth layers, and SonarChart recordings all transferred over. Your saved routes and waypoints are still accessible once you link your Navionics credentials to a Garmin account. The main adjustment is a new URL and a slightly different interface, both of which take only a few minutes to get comfortable with.
Planning your trip on a full screen before you hit the water is still one of the most practical steps you can take, especially in areas with shifting sandbars, tight inlets, or heavy boat traffic. Check your depths, build your route, and confirm your waypoints before you leave the dock.
Picking the best wakeboard for beginners can feel overwhelming when you’re staring at dozens of options with different rockers, flex patterns, and base designs. The wrong board makes learning harder than it needs to be, the right one gets you up on your first try and keeps you progressing all summer.
At Original Crab Island, we put people on the water every day in Destin, Florida, from pontoon cruises to jet ski adventures. We see firsthand how much the right gear matters when someone’s trying a water sport for the first time. That perspective shaped how we approached this guide: practical recommendations based on what actually helps new riders build confidence and have fun.
Below, we break down six beginner wakeboards worth your money in 2026. Each one was selected for stability, forgiveness, and ease of use, the three things that matter most when you’re still finding your balance. We also cover what to look for before you buy so you can match a board to your size, riding style, and budget.
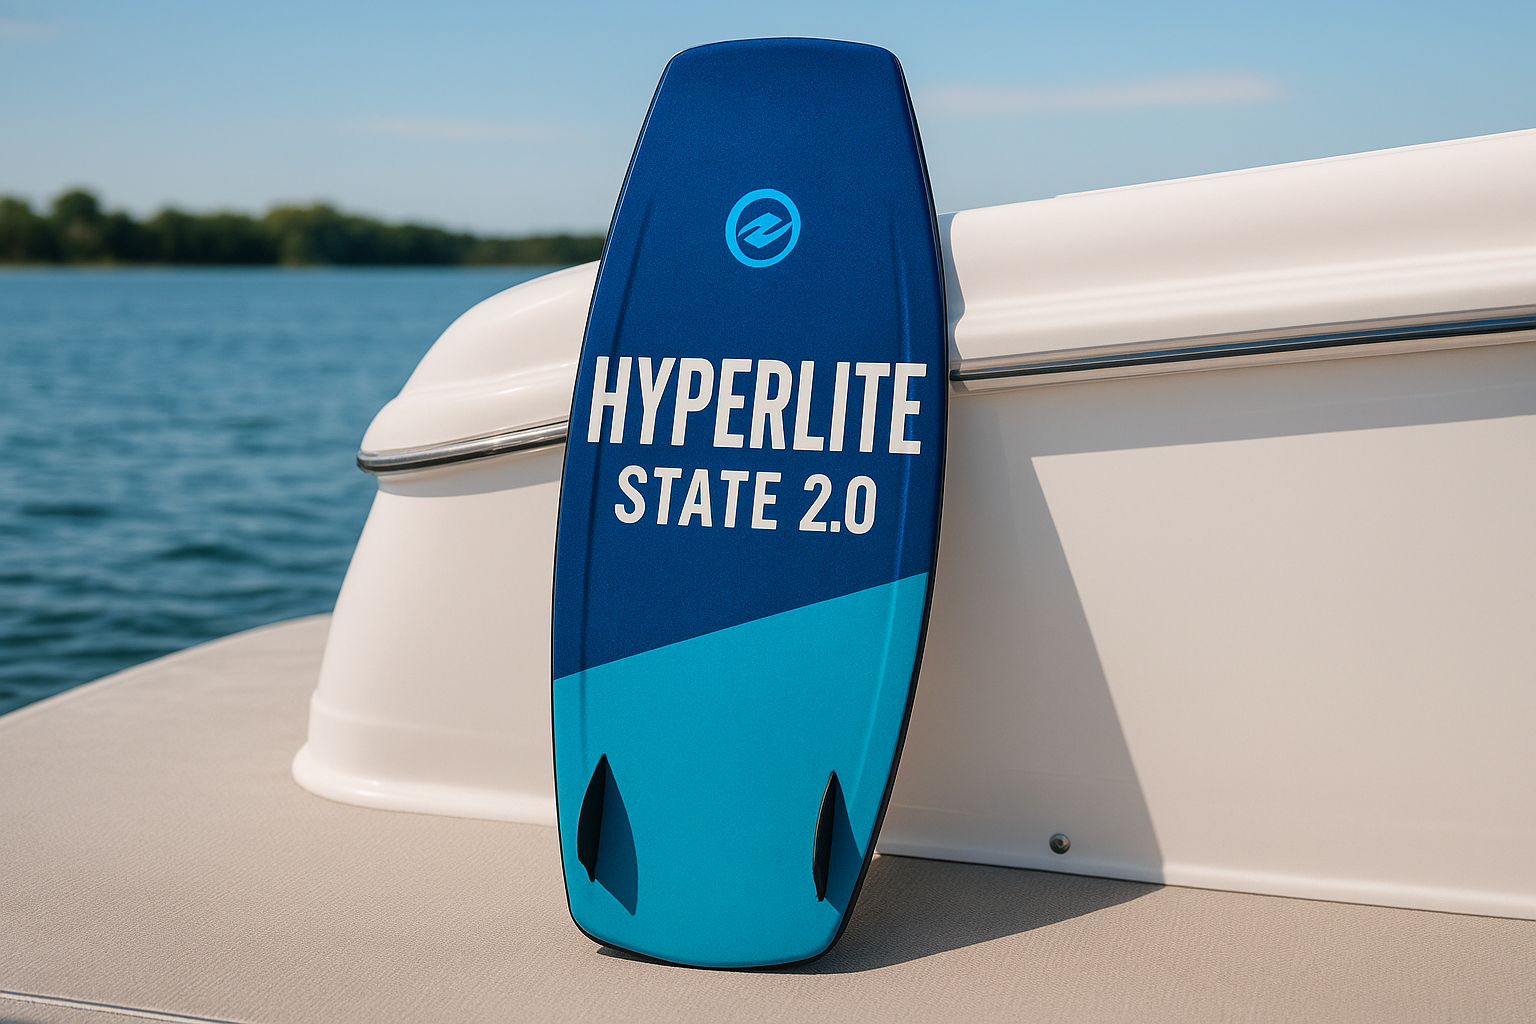
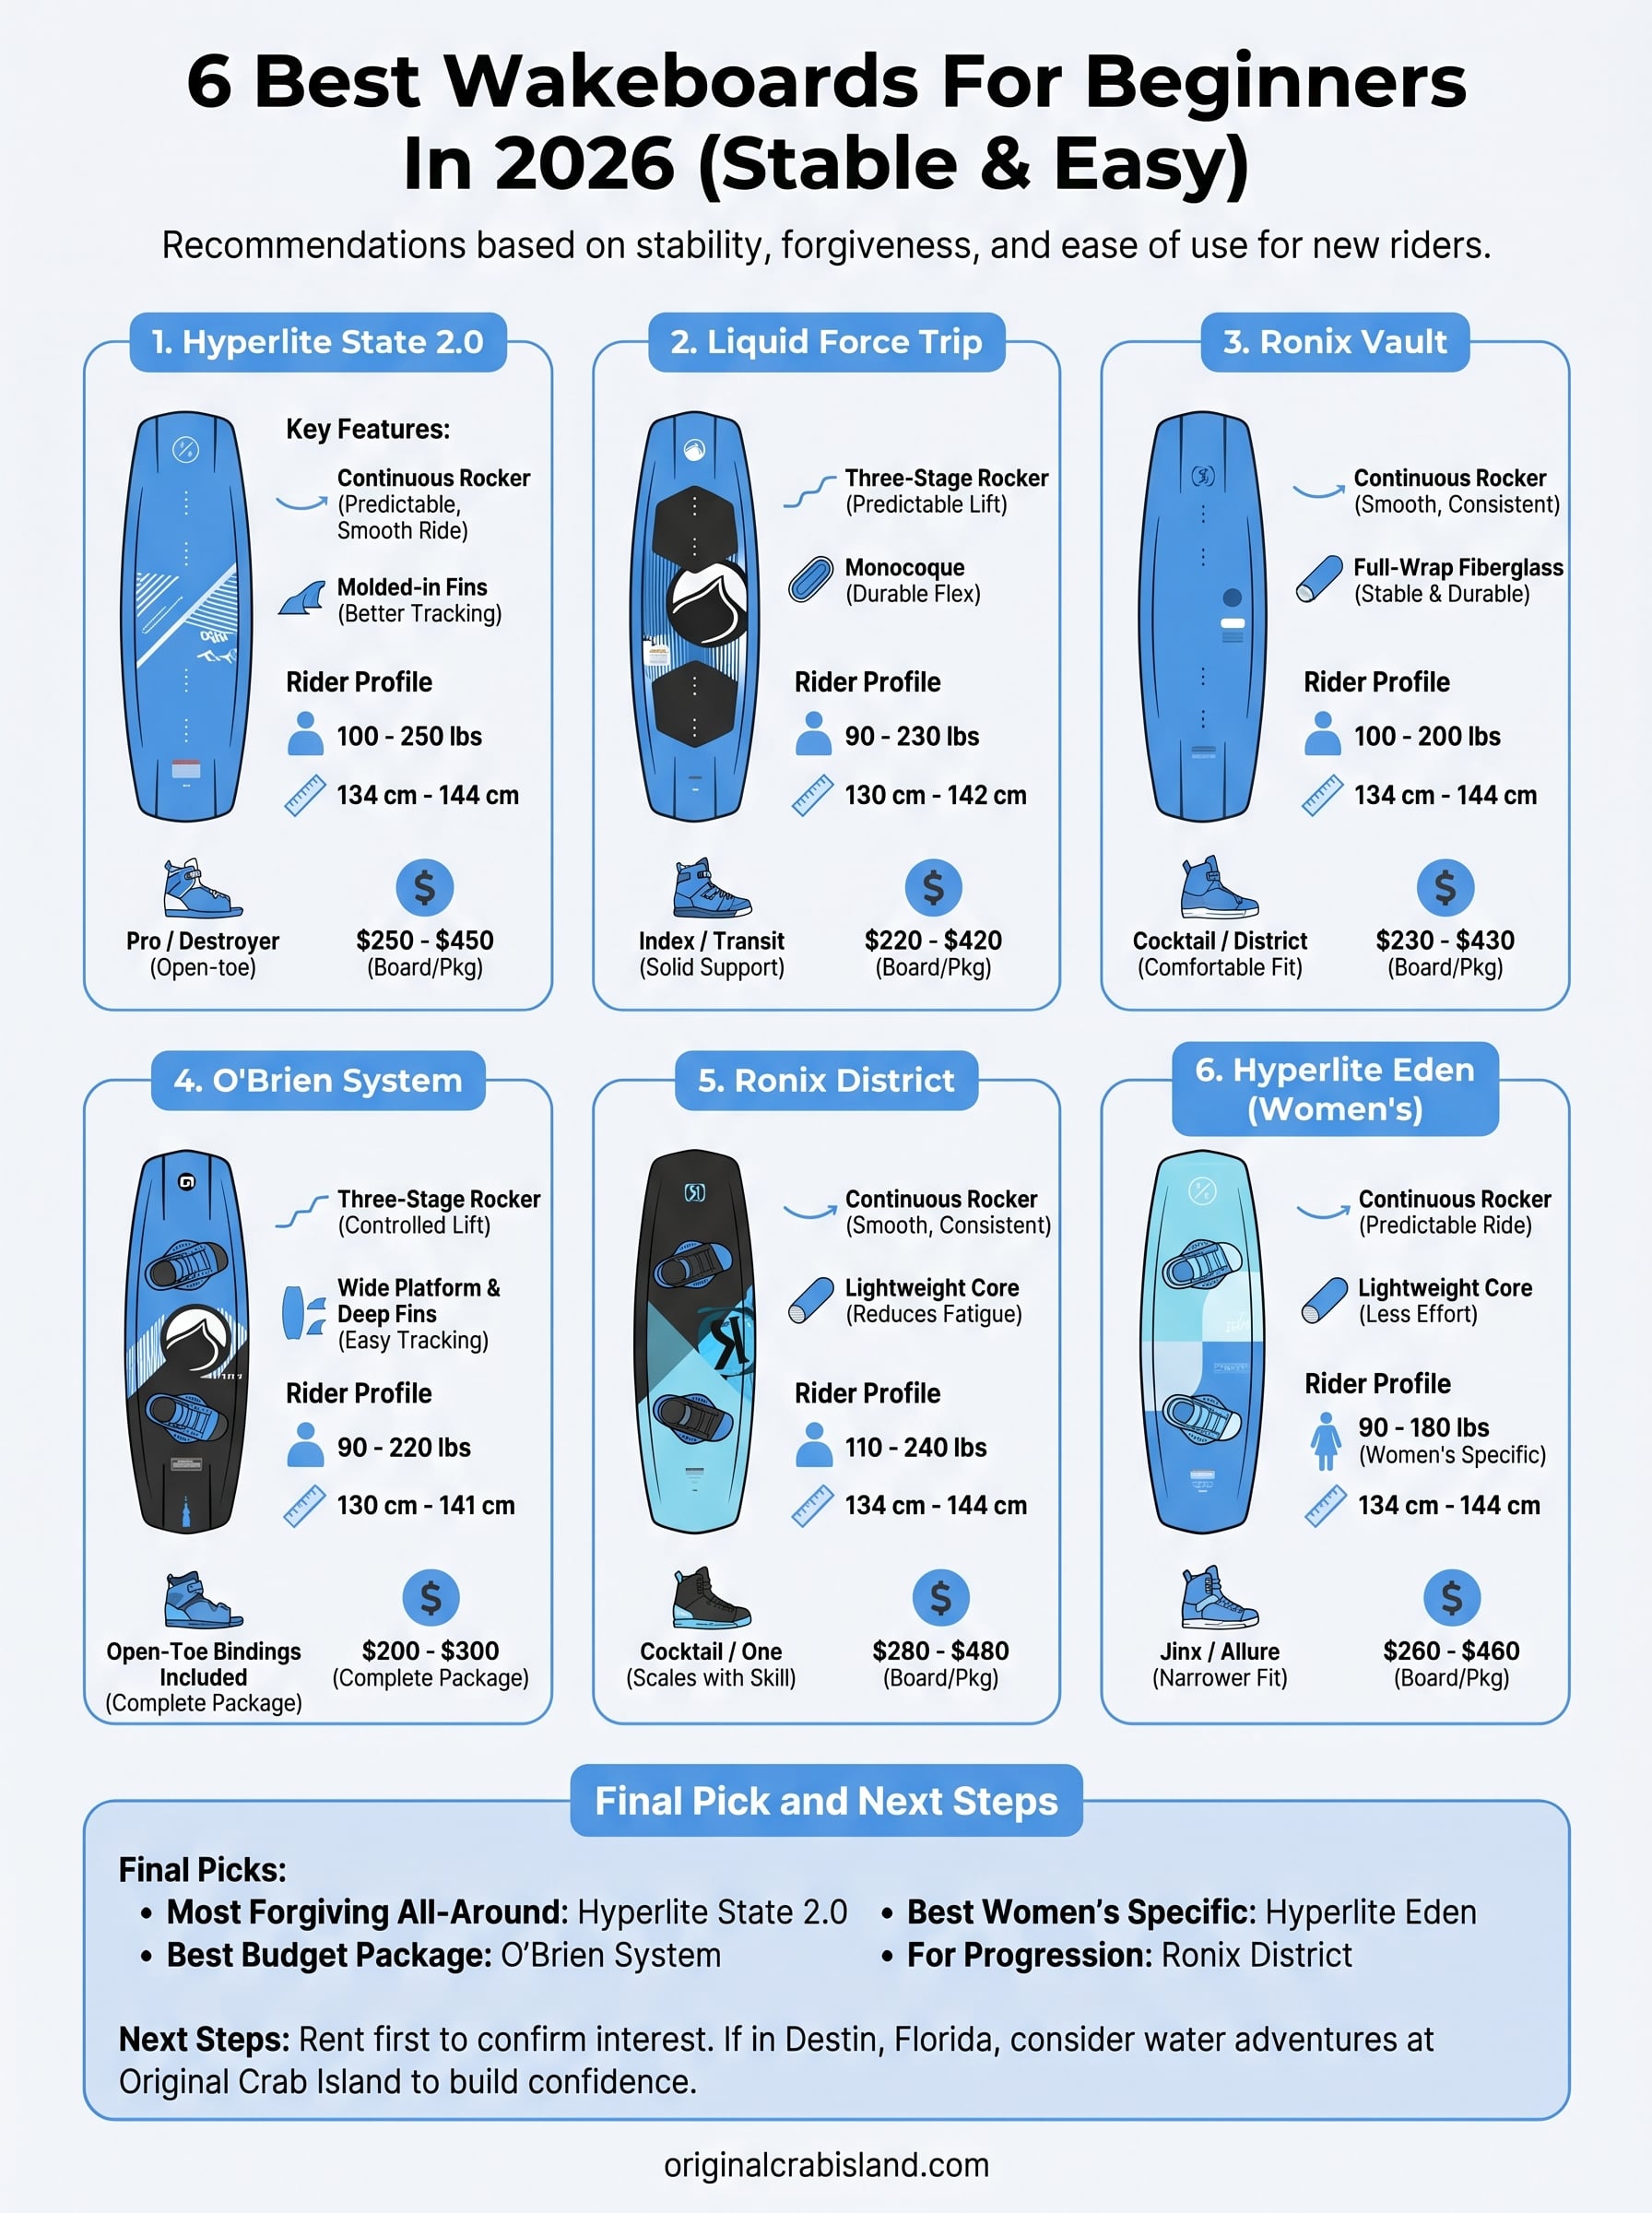
1. Hyperlite State 2.0
The Hyperlite State 2.0 consistently earns its spot on best wakeboard for beginners lists, and for good reason. It pairs forgiving flex with a stable platform that helps new riders get up and stay up without fighting the board.
What makes it beginner-friendly
This board uses a continuous rocker design, which means it curves smoothly from tip to tail without any abrupt changes. That gives you a predictable, smooth ride behind the boat and makes edge transitions feel natural rather than sudden. The base also features molded-in fins that track well at slower speeds, which is exactly what you need when you’re still dialing in your stance.
A continuous rocker is one of the best features to look for on your first board, because it removes the unpredictable pop that catches new riders off guard.
Best rider profile and sizing
The State 2.0 suits riders between 100 and 250 lbs, with sizes ranging from 134 cm to 144 cm. If you weigh under 150 lbs, the 134 cm or 138 cm version gives you better control. Heavier riders, or anyone who wants a more stable platform at higher speeds, should go with the 141 cm or 144 cm option for added surface area underfoot.
Bindings and setup tips
Hyperlite’s Pro or Destroyer bindings pair well with the State 2.0, and both come in open-toe designs that fit a wide range of foot sizes. Set your bindings at shoulder-width apart with a slight outward angle (around 15 degrees per foot) to stay balanced and reduce ankle strain. Keep the fins installed until you feel comfortable riding the wake consistently before experimenting with fin removal.
Typical price range
You can find the Hyperlite State 2.0 board-only for $250 to $350, depending on size and retailer. Complete packages with bindings run $350 to $450, which gives you everything you need to hit the water without buying pieces separately.
2. Liquid Force Trip
The Liquid Force Trip earns a spot on any best wakeboard for beginners list because it was built specifically for new riders. It pairs lasting durability with a forgiving flex pattern that absorbs small mistakes rather than punishing them.
What makes it beginner-friendly
The Trip uses a three-stage rocker that transitions smoothly, giving you a predictable lift off the wake without throwing you off balance. Its monocoque construction keeps the board stiff where you need stability and flexible where forgiveness matters most.
A board that forgives mistakes early on lets you focus entirely on technique rather than just staying upright.
Best rider profile and sizing
The Trip fits riders from 90 to 230 lbs, with sizes running from 130 cm to 142 cm. Lighter riders perform well on the 130 cm or 134 cm versions, while heavier riders should step up to the 138 cm or 142 cm for better float and control during longer runs behind the boat.
Bindings and setup tips
Pair the Trip with Liquid Force’s Index or Transit bindings, both of which offer solid ankle support without locking your feet in too aggressively. A few quick setup tips to follow from the start:
Set your stance at shoulder-width apart
Angle each foot outward 12 to 15 degrees for natural balance
Keep the center fin installed until you ride the wake consistently
Typical price range
The board alone runs $220 to $300, and complete packages with bindings land between $320 and $420 depending on binding choice and board size.
3. Ronix Vault
The Ronix Vault holds a strong position among the best wakeboard for beginners options because it pairs lasting durability with a forgiving ride that handles the inevitable falls and rough handling that come with learning the sport.
What makes it beginner-friendly
This board uses a continuous rocker profile that keeps your ride smooth and predictable behind the boat. Its full-wrap fiberglass construction adds pop off the wake without sacrificing the stability new riders need to build confidence during their first few sessions.
A board that stays predictable at different speeds lets you focus on your body position rather than reacting to the board.
Best rider profile and sizing
The Vault works well for riders between 100 and 200 lbs, with sizes running from 134 cm to 144 cm. Lighter riders should stick with the 134 cm or 138 cm versions, while heavier riders will get better float and edge hold from the 141 cm or 144 cm option.
Bindings and setup tips
Pair the Vault with Ronix’s Cocktail or District bindings for a comfortable fit that doesn’t restrict your ankle movement. Set your feet at shoulder-width apart with a 12 to 15-degree outward angle to keep your knees relaxed and reduce fatigue during longer sessions on the water.
Typical price range
The Vault board-only runs $230 to $320, with complete packages landing between $330 and $430 depending on binding selection and board size.
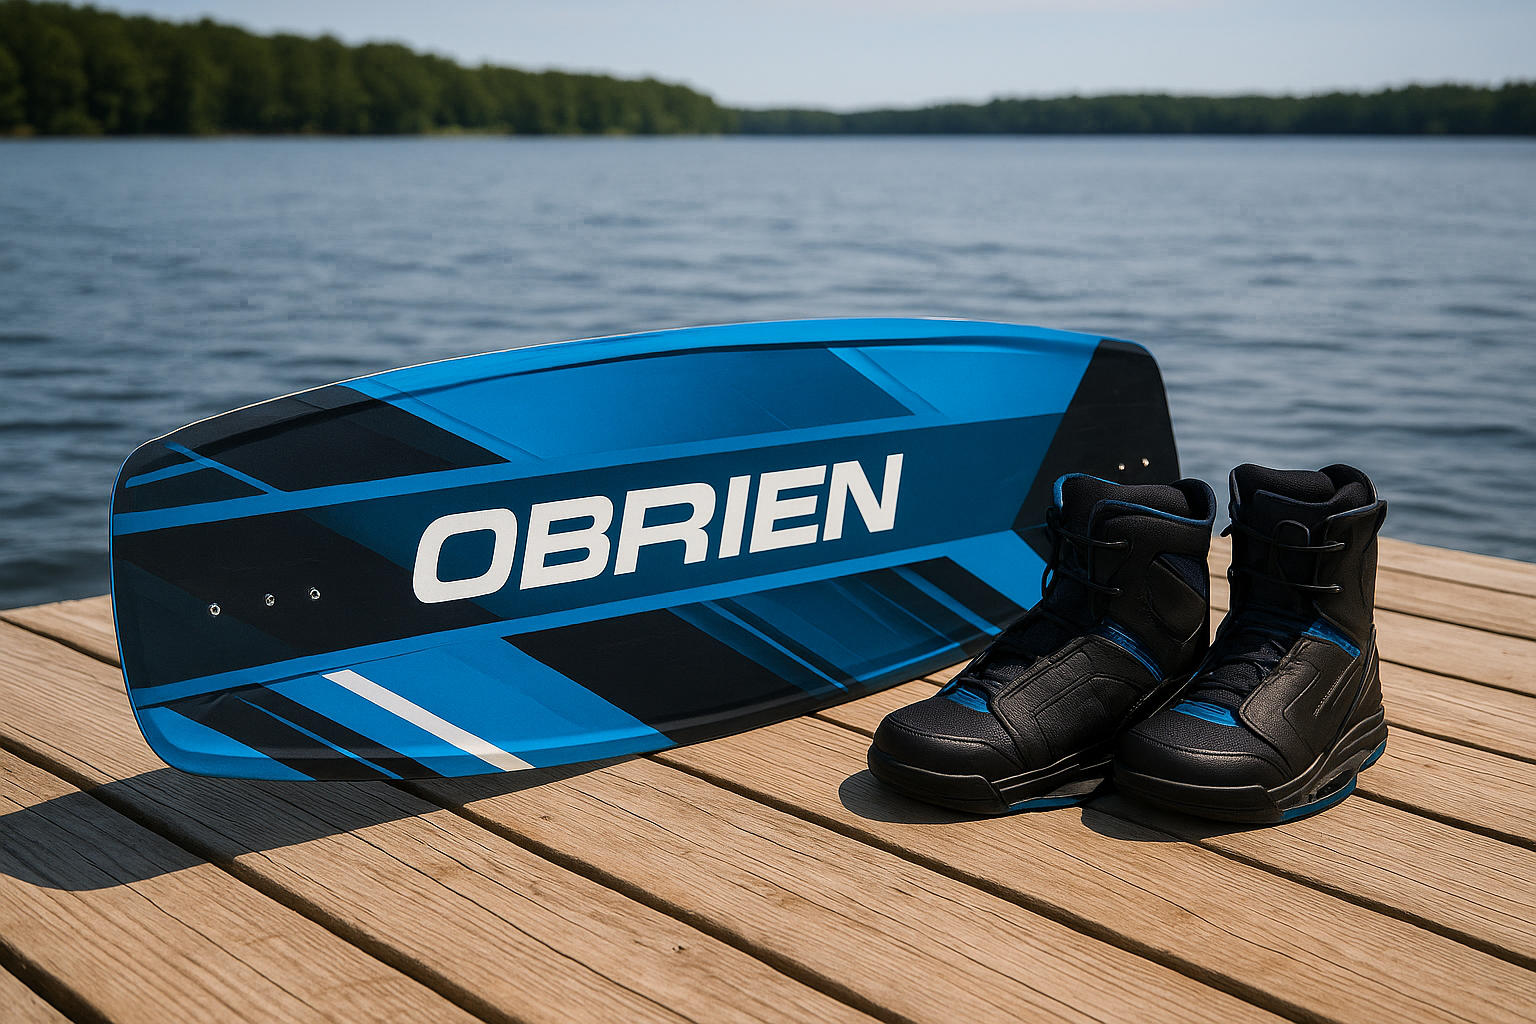
4. O’Brien System
The O’Brien System earns its place among the best wakeboard for beginners options because it ships as a complete package, eliminating the guesswork of matching separate board and binding components before you even hit the water.
What makes it beginner-friendly
This board features a three-stage rocker that delivers a smooth, controlled lift off the wake, giving you time to react rather than scrambling to stay upright. Its wide platform and deep side fins keep the board tracking straight at lower boat speeds, which matters most when you’re first learning to cross the wake.
A wide platform paired with deep fins is one of the fastest ways to shorten the learning curve for first-time riders.
Best rider profile and sizing
The System fits riders between 90 and 220 lbs, with sizes running from 130 cm to 141 cm. Lighter riders perform best on the 130 cm or 134 cm versions, while heavier riders get better float and edge hold from the 138 cm or 141 cm option.
Bindings and setup tips
O’Brien includes open-toe bindings with the System that fit a wide range of foot sizes out of the box. Follow these setup basics to start right:
Set your stance at shoulder-width apart
Angle each foot outward 12 to 15 degrees
Keep all fins installed until you ride the wake consistently
Typical price range
The complete O’Brien System package runs $200 to $300, making it one of the most budget-friendly all-in-one options on this list for riders who want solid gear without buying bindings separately.
5. Ronix District
The Ronix District sits in a slightly different category among the best wakeboard for beginners picks because it bridges the gap between entry-level boards and progression boards. If you plan to ride more than a few times this summer, the District gives you room to grow without needing to upgrade early.
What makes it beginner-friendly
This board features a continuous rocker that keeps your ride smooth and consistent across different water conditions. Its lightweight core construction reduces fatigue during longer sessions, which helps you practice more without wearing out before your technique actually improves.
A board that lets you ride longer without physical strain gives you more time to build muscle memory and real progress on the water.
Best rider profile and sizing
The District suits riders between 110 and 240 lbs, with sizes ranging from 134 cm to 144 cm. Lighter riders should choose the 134 cm or 138 cm version for responsive handling, while heavier riders benefit from the 141 cm or 144 cm for better stability at speed.
Bindings and setup tips
Pair the District with Ronix’s Cocktail or One bindings for comfortable support that scales with your skill level. Set your stance at shoulder-width apart with a 12 to 15-degree outward angle on each foot to stay balanced during your early sessions on the water.
Typical price range
Board-only pricing runs $280 to $370, with complete packages landing between $380 and $480 depending on binding choice and board size.
6. Hyperlite Eden
The Hyperlite Eden rounds out our list of the best wakeboard for beginners as the top women-specific option available in 2026. It combines lightweight construction with a smooth, forgiving ride that makes early sessions on the water far less frustrating.
What makes it beginner-friendly
The Eden uses a continuous rocker profile that keeps your ride predictable and smooth behind the boat. Its lightweight core reduces the physical effort required to control the board, which means you spend less energy fighting equipment and more time building actual technique.
A lighter board reduces arm and leg fatigue noticeably, giving you more quality time on the water before you wear out.
Best rider profile and sizing
This board is designed specifically for female riders between 90 and 180 lbs, with sizes running from 134 cm to 144 cm. Lighter riders perform best on the 134 cm version, while taller or heavier riders should move up to the 138 cm or 144 cm for better float and edge control during longer runs behind the boat.
Bindings and setup tips
Pair the Eden with Hyperlite’s Jinx or Allure bindings, both shaped around a narrower women’s foot for a more secure and comfortable fit. Set your stance at shoulder-width apart with a 12 to 15-degree outward angle on each foot to stay balanced and reduce ankle strain during your first sessions.
Typical price range
Board-only pricing runs $260 to $350, with complete packages landing between $360 and $460 depending on binding selection and board size.
Final Pick and Next Steps
Finding the best wakeboard for beginners comes down to three things: your weight, your budget, and how often you plan to ride. If you want the most forgiving all-around option, the Hyperlite State 2.0 is hard to beat. Riders looking for a complete package at a lower price point should consider the O’Brien System, and women riders wanting a board shaped for their proportions will get the most out of the Hyperlite Eden. The Ronix District is worth the extra cost if you plan to ride enough to outgrow a true starter board within a season.
Before you commit to buying gear, consider whether you’ll ride often enough to justify the upfront cost. Renting first puts you on the water immediately and confirms the sport is worth the investment before you spend several hundred dollars on equipment. If you’re heading to Destin, Florida, book a water adventure at Original Crab Island and experience the Emerald Coast before you build out your full wakeboard setup.
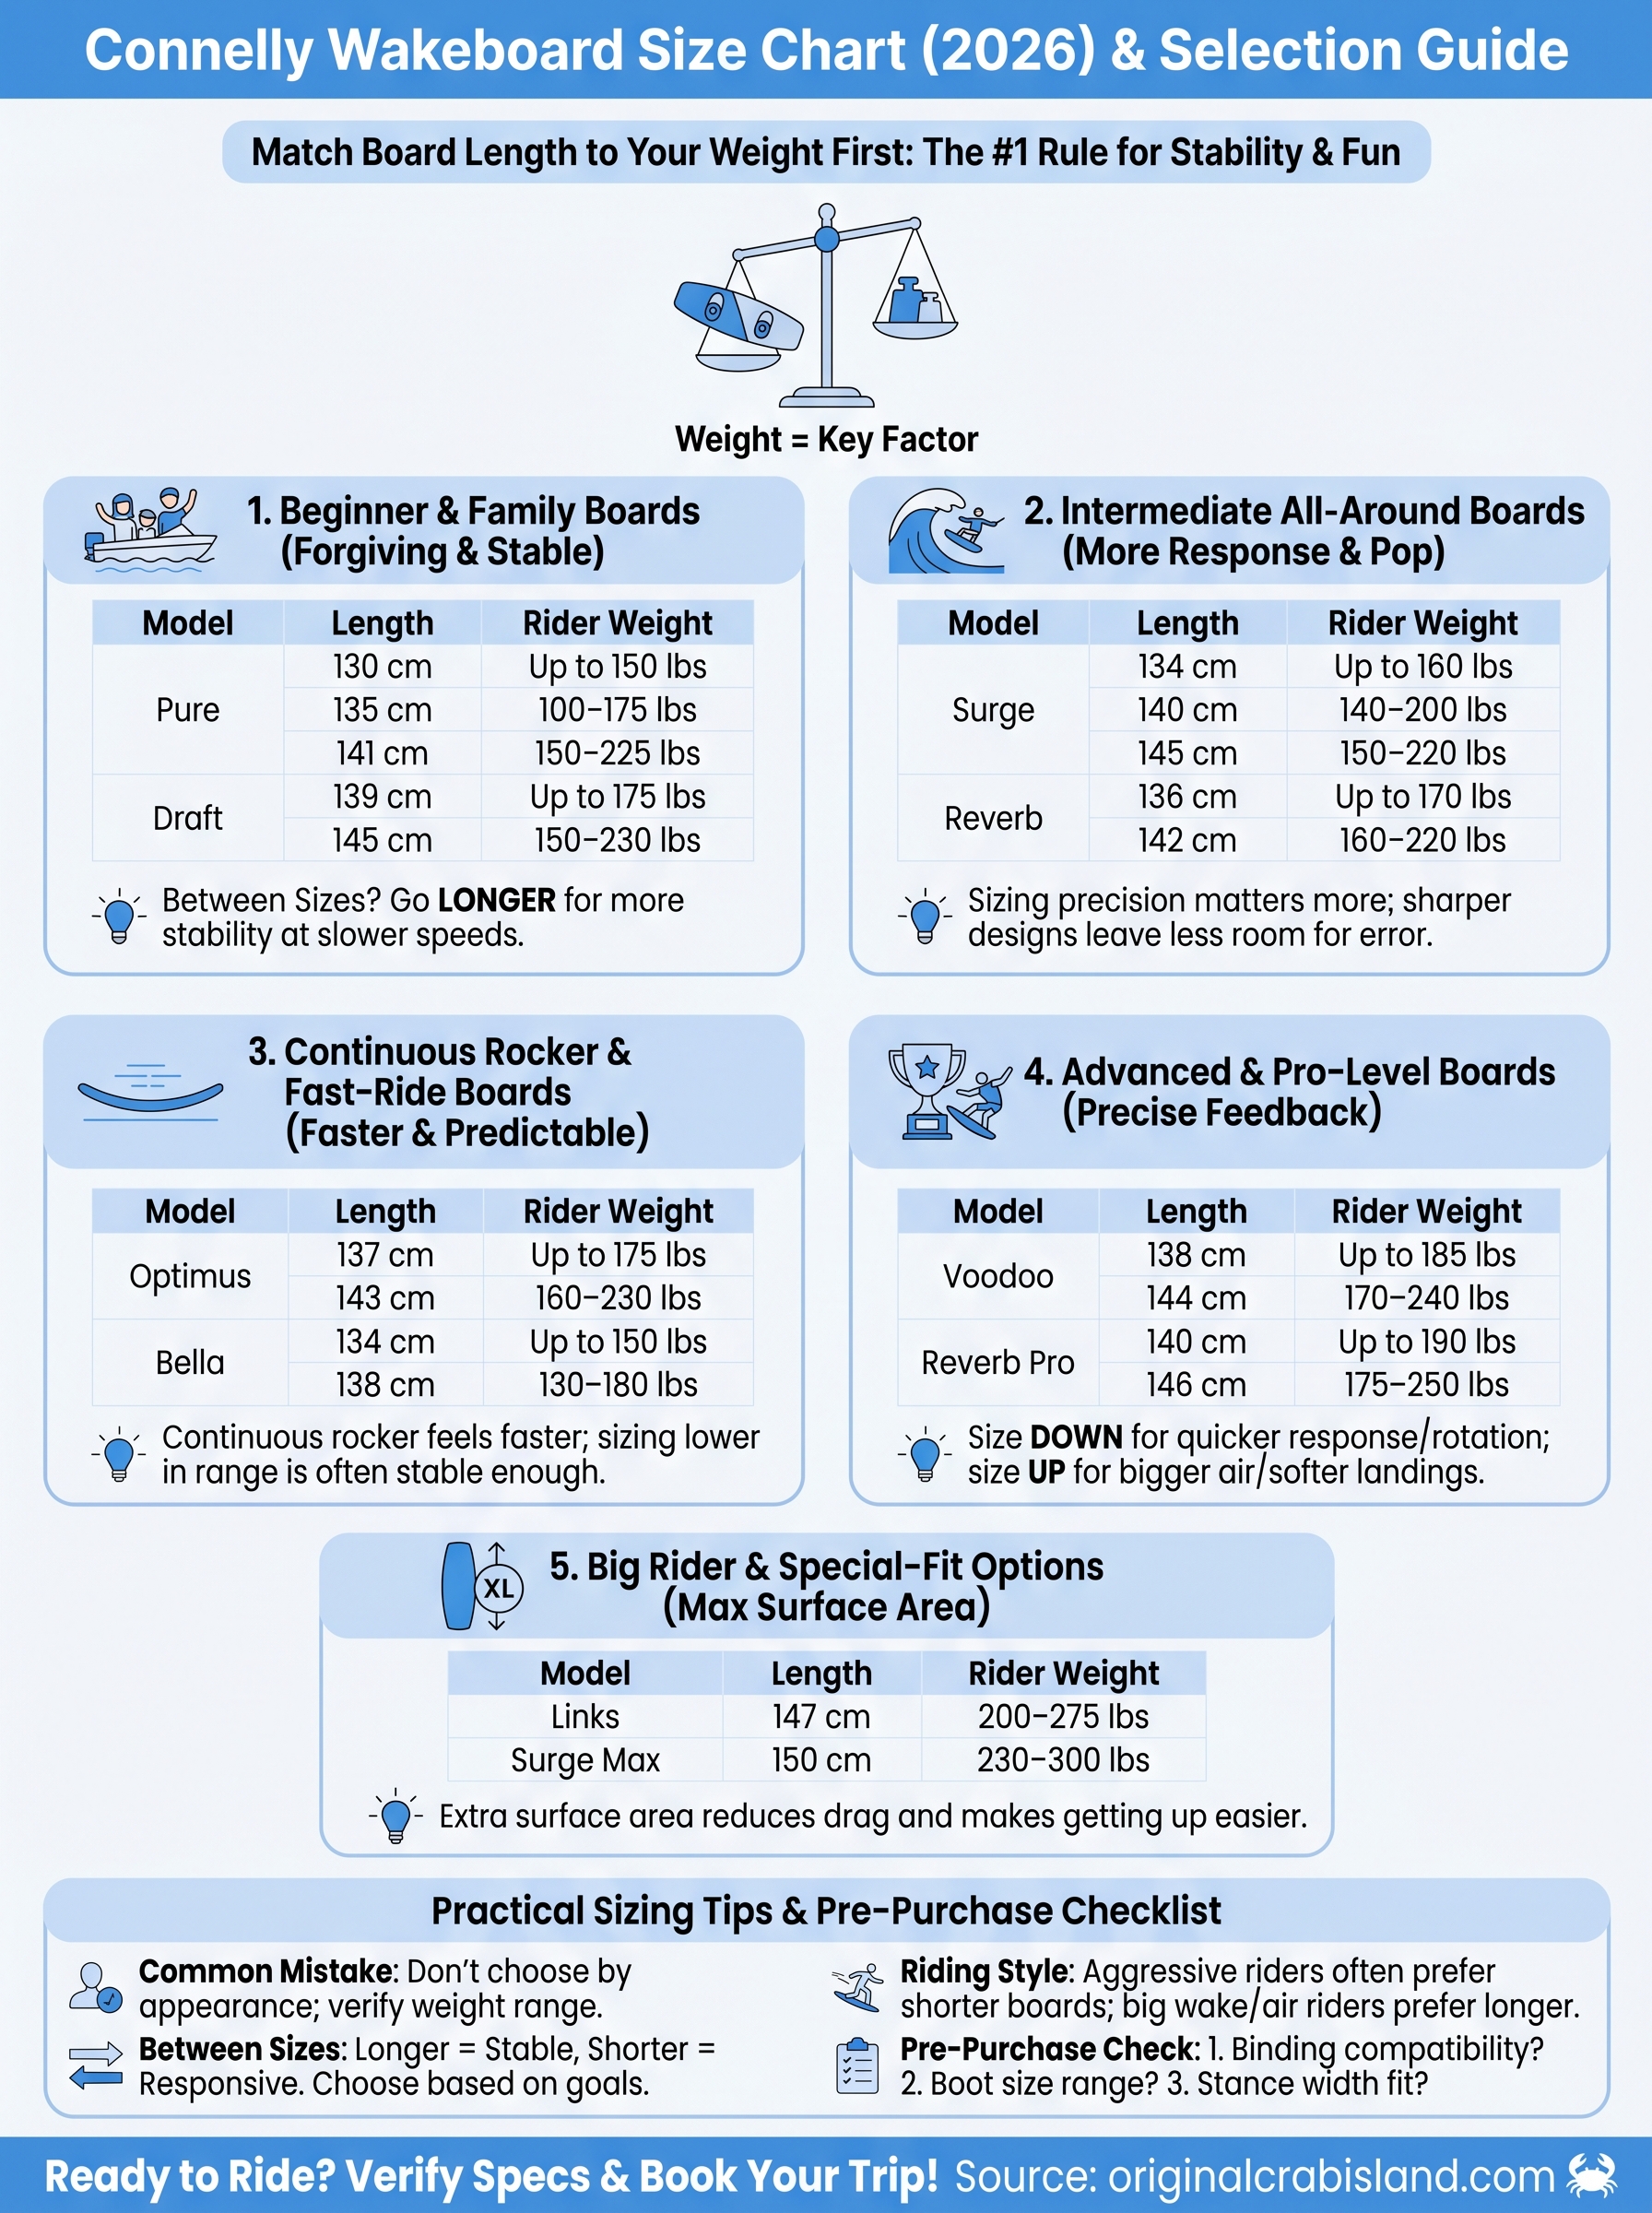
Picking the wrong wakeboard size can turn a great day on the water into a frustrating one. Too short and you’ll struggle with stability; too long and every turn feels sluggish. If you’re searching for a Connelly wakeboard size chart, you’re already on the right track, because matching board length to your weight is the single most important decision you’ll make before strapping in.
Connelly has been building wakeboards for decades, and their current lineup covers everything from beginner-friendly cruisers to aggressive pro-level shapes. Each model rides a little differently, which means sizing recommendations can shift from board to board. We put this guide together at Original Crab Island because we see it firsthand, visitors hit the waters off Destin, Florida every week ready to ride, and the right equipment makes all the difference in how much fun they actually have.
Below, you’ll find Connelly’s recommended size ranges broken down by model and rider weight, along with practical tips to help you zero in on the correct board length. Whether you’re gearing up for a trip to the Emerald Coast or shopping for your own setup, this chart gives you everything you need to choose with confidence.
1. Beginner and family boards
Connelly’s beginner and family lineup is built to be forgiving and stable, which means sizing matters even more at this level. A board that’s too short will have you fighting to stay upright, while one that’s too long makes it harder to initiate a turn. The Connelly Pure and Draft are the two models you’ll most likely be comparing in this category, and both are designed to get new riders up and riding without unnecessary frustration.
Models and rider weight ranges
The table below reflects the standard Connelly wakeboard size chart recommendations for their beginner and family models. These ranges give you a reliable starting point before factoring in your riding style or skill level.
Model
Length
Rider Weight
Connelly Pure
130 cm
Up to 150 lbs
Connelly Pure
135 cm
100–175 lbs
Connelly Pure
141 cm
150–225 lbs
Connelly Draft
139 cm
Up to 175 lbs
Connelly Draft
145 cm
150–230 lbs
Both boards use three-stage rocker designs that help beginners generate pop off the wake without requiring advanced technique or strong edge control.
How to choose your length if you are between sizes
If your weight falls at the overlap between two sizes, go with the longer option. Beginner riders benefit from the extra surface area because it keeps the board more stable at slower boat speeds, which is exactly where most first-timers spend the bulk of their time. The added length costs you very little in maneuverability at this stage of learning.
When in doubt, size up. A beginner on a slightly longer board will progress faster than one who is constantly fighting to stay balanced.
Common fit mistakes to avoid for first-timers
The most common error first-timers make is choosing a board based on appearance rather than what actually fits their weight. Another frequent mistake is borrowing a friend’s board without checking the size, then assuming their struggles are a skill problem when it’s really an equipment problem. Always verify the weight range printed on the board or listed on the manufacturer’s spec sheet before you strap in.
2. Intermediate all-around boards
When you’ve got the basics down and want more response from your board, Connelly’s intermediate lineup gives you a noticeable step up in performance. The Connelly Surge and Reverb are the standout models here, offering a balance between forgiveness and a sharper, more reactive feel on the water.
Models and rider weight ranges
The table below lays out the standard size recommendations from the Connelly wakeboard size chart for their intermediate all-around models.
Model
Length
Rider Weight
Connelly Surge
134 cm
Up to 160 lbs
Connelly Surge
140 cm
140–200 lbs
Connelly Reverb
136 cm
Up to 170 lbs
Connelly Reverb
142 cm
160–220 lbs
What changes when you move up from a beginner board
Intermediate boards use more aggressive rocker profiles and sharper edges compared to beginner shapes. You’ll notice the board responds faster to your weight shifts, which means sizing precision matters more at this level.
Choosing the wrong size on an intermediate board is more punishing because the sharper design leaves less room for error than a beginner model would.
Picking a size for faster progression and more pop
At the intermediate level, your riding goals should guide your size choice as much as your weight does. If you’re focused on boosting higher off the wake, stay in the middle of your weight range rather than pushing toward the top end, where extra board length can slow down your pop timing.
3. Continuous rocker and fast-ride boards
Continuous rocker boards have a smooth, uninterrupted curve from tip to tail, which gives them a faster, more predictable ride than three-stage designs. Connelly’s Optimus and Bella models fall into this category, built for riders who want consistent speed through the wake and a carvy, fluid feel on the water.
Models and rider weight ranges
The table below pulls from the connelly wakeboard size chart for their continuous rocker models so you can match your weight to the correct length before you hit the water.
Model
Length
Rider Weight
Connelly Optimus
137 cm
Up to 175 lbs
Connelly Optimus
143 cm
160–230 lbs
Connelly Bella
134 cm
Up to 150 lbs
Connelly Bella
138 cm
130–180 lbs
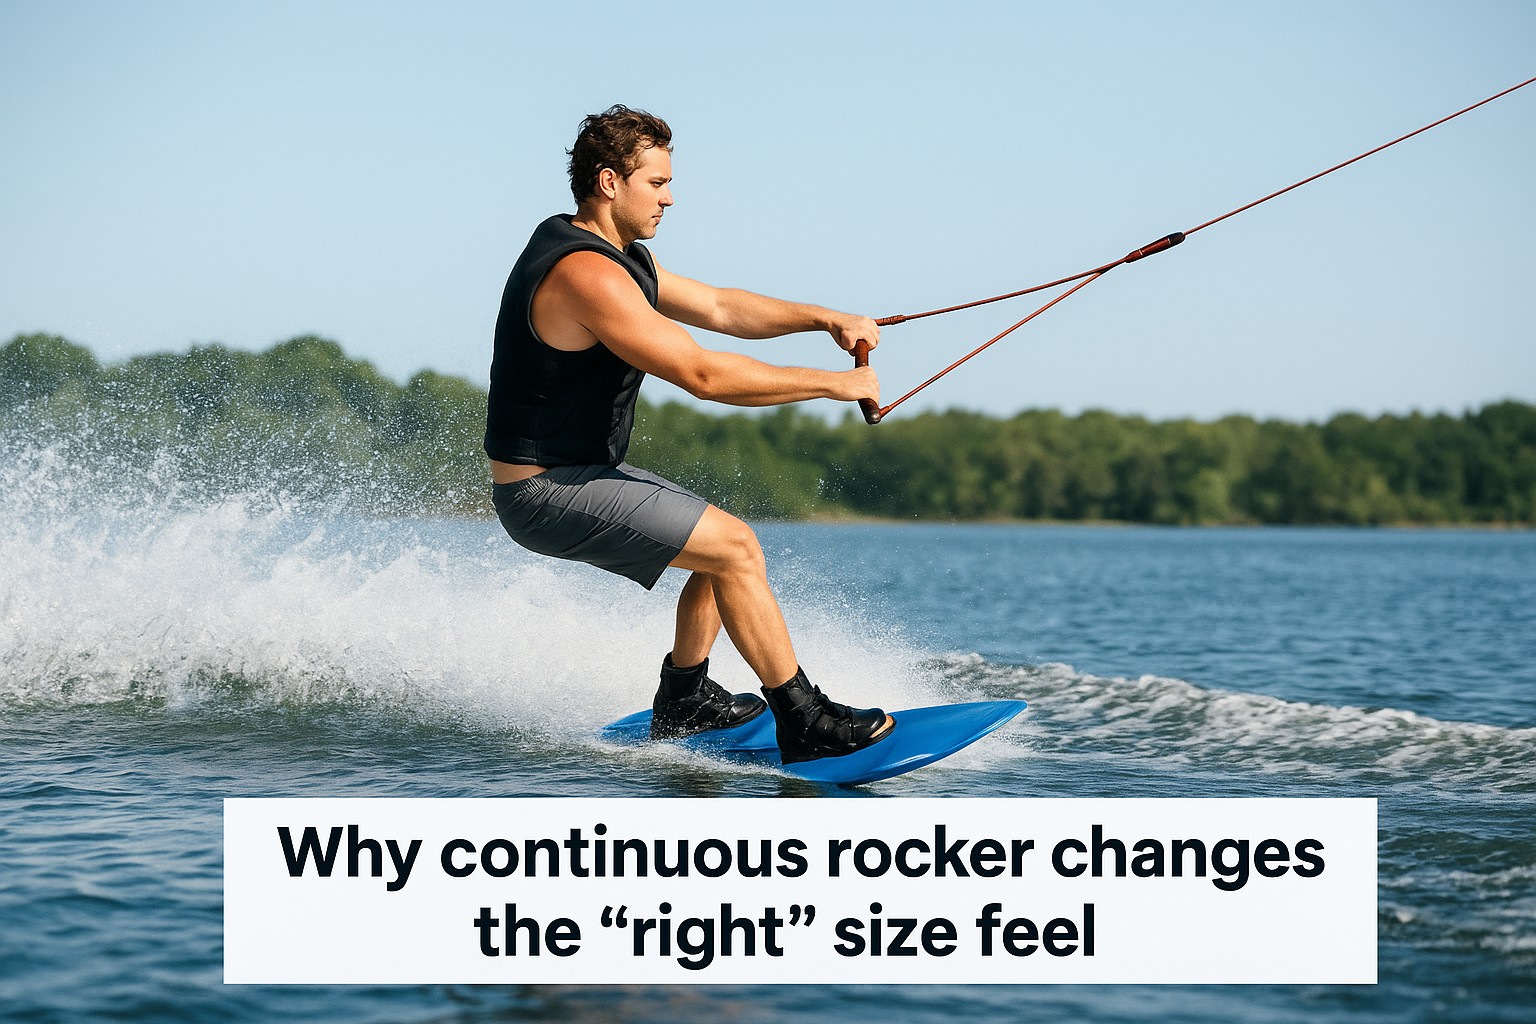
Why continuous rocker changes the "right" size feel
Continuous rocker boards carry more speed through the wake, which makes them feel livelier than a three-stage board of the same length. Because of this, you may find that sizing toward the lower end of your weight range still feels plenty stable.
If you’re used to a three-stage board, expect the same size to feel faster and slightly looser underfoot.
Sizing tips for speed, edging, and softer landings
A longer continuous rocker board gives you a bigger edge to work with, which translates to better hold during hard carves. Shorter lengths reward aggressive riders who want quick response and tighter turns, but they require more precise weight distribution on landings.
4. Advanced and pro-level boards
At this level, you already know how a board should feel, which makes the Connelly wakeboard size chart a starting point rather than the final word. The Connelly Voodoo and Reverb Pro are built for riders who push hard at the wake and expect precise, immediate feedback from their equipment.
Models and rider weight ranges
Advanced boards run narrower and stiffer than recreational shapes, so weight-to-length matching stays critical even when you have the skills to compensate for minor sizing errors.
Model
Length
Rider Weight
Connelly Voodoo
138 cm
Up to 185 lbs
Connelly Voodoo
144 cm
170–240 lbs
Connelly Reverb Pro
140 cm
Up to 190 lbs
Connelly Reverb Pro
146 cm
175–250 lbs
When to size down for control vs size up for stability
Sizing down gives you faster edge-to-edge response and tighter rotation on tricks, making it the right call when your riding prioritizes technical performance. Size up when you ride large, steep wakes or spend most sessions hitting big air where a stable landing platform matters more than quick transitions.
If you land hard and often, the extra surface area of a longer board will reduce cumulative impact on your knees over a full day on the water.
How riding style and wake size affect length choice
Your wake size and boat speed directly influence which end of the size range suits you best. Riders behind large boats with tall, steep wakes benefit from a shorter board because the wake does more of the work. Behind a smaller boat with a flatter wake, a longer board helps you generate momentum and hold clean lines through the flats.
5. Big rider and special-fit options
Riders over 230 lbs need boards with real surface area and structural rigidity, not just the longest option in the standard lineup. Connelly builds dedicated models that hold up under heavier loads without sacrificing edge control.
Models and rider weight ranges
The Connelly Links and Surge Max are the primary options for bigger riders, and both sit at the top end of the connelly wakeboard size chart with extended lengths designed specifically for heavier weights.
Model
Length
Rider Weight
Connelly Links
147 cm
200–275 lbs
Connelly Surge Max
150 cm
230–300 lbs
How to pick a board when you want more surface area
More surface area keeps you higher on the water plane, which reduces drag and makes getting up from a dead stop much easier. If your weight sits at the upper end of the Links range, move straight to the Surge Max rather than staying on a board working too hard to support you.
A board that’s undersized for your weight will feel sluggish and wear you out faster, regardless of your skill level.
Extra checks before you buy: stance, boots, and fit
Board length is only part of the equation. Binding size and stance width need to match your boot size and shoulder width, or you’ll stress your knees and ankles unevenly. Confirm that the boots rated for your weight class are compatible with the board’s insert pattern before buying.
Run a quick checklist before committing to a purchase:
Verify binding compatibility with the board’s insert spacing
Check that your boot size falls within the recommended range
Confirm your natural stance width fits the board’s usable insert range
Ready to pick your size
You now have everything from the connelly wakeboard size chart laid out in one place, covering beginner shapes all the way through big-rider options. The core rule stays the same across every model: match your board length to your weight first, then adjust based on your skill level and riding goals. When you fall between two sizes, lean toward the longer option if stability is your priority, or the shorter one if you want quicker response and tighter control.
Before you book your next trip or place an order, run through your weight range, confirm your binding compatibility, and double-check your stance width against the board’s insert spacing. Getting those three things right means you’ll spend your time on the water actually riding instead of fighting your equipment. If you’re planning a trip to the Florida Panhandle, book a water activity rental in Destin and put your sizing knowledge to work on the Emerald Coast.
Riding a wakeboard that’s too short leaves you sinking on landings, while one that’s too long feels sluggish and hard to control. A Hyperlite wakeboard size chart matches your body weight to the right board length, and getting this match right is the single biggest factor in how the board performs under your feet. Whether you’re gearing up for a trip to Destin’s waters with us at Original Crab Island or shopping for your own setup, nailing your size makes everything, from your first deep-water start to your first wake jump, significantly easier.
Hyperlite builds boards across a wide range of lengths, and each model can ride slightly differently even at the same size. That means a generic "pick any 140" approach doesn’t cut it. Your weight determines the baseline length, but factors like riding style, skill level, and the specific Hyperlite model you’re eyeing can shift that recommendation up or down. We see riders out on the Emerald Coast every season struggling with borrowed or poorly sized gear, and the fix is almost always a simple size adjustment.
This guide breaks down Hyperlite’s sizing recommendations by weight, covers their most popular board models for 2026, and explains when you might want to size up or down from the standard chart. By the end, you’ll know exactly what length to look for, so you spend your time on the water actually riding instead of fighting your equipment.
What wakeboard size numbers mean
Wakeboard lengths are measured in centimeters, and Hyperlite boards for adults typically range from around 130 cm to 147 cm. These numbers represent the total length from tip to tail, and every centimeter affects how the board floats, edges, and responds under your feet. A longer board carries more surface area, generating more lift and stability. A shorter board sits lower in the water and pivots faster, which suits a more aggressive riding style.
How length affects performance
The length of your board directly controls two things: float and maneuverability. A longer board planes up more easily during deep-water starts because it displaces more water under your feet. That same length slows your edge-to-edge transitions, making sharp cuts feel heavier. A shorter board flips and spins faster, but you need more speed and technique to pop cleanly off the wake.
The right board length won’t make you a better rider overnight, but the wrong length will make every session harder than it needs to be.
Longer boards (139 cm and up): More float, easier starts, stable landings
Mid-range boards (135-138 cm): Balanced performance for most recreational riders
Body weight determines how much board surface you need to stay above the water. Riders using a board sized for someone 40 pounds lighter will struggle to plane up and sink on landings. The Hyperlite wakeboard size chart builds all its recommendations on weight first, then adjusts for riding style and skill, which gives you the most reliable starting point.
Your skill level then fine-tunes that baseline. A beginner at 170 lbs will want to stay at the top of the recommended range for their weight, while a more experienced rider at the same weight might prefer the smaller end for added responsiveness.
Use the Hyperlite wakeboard size chart
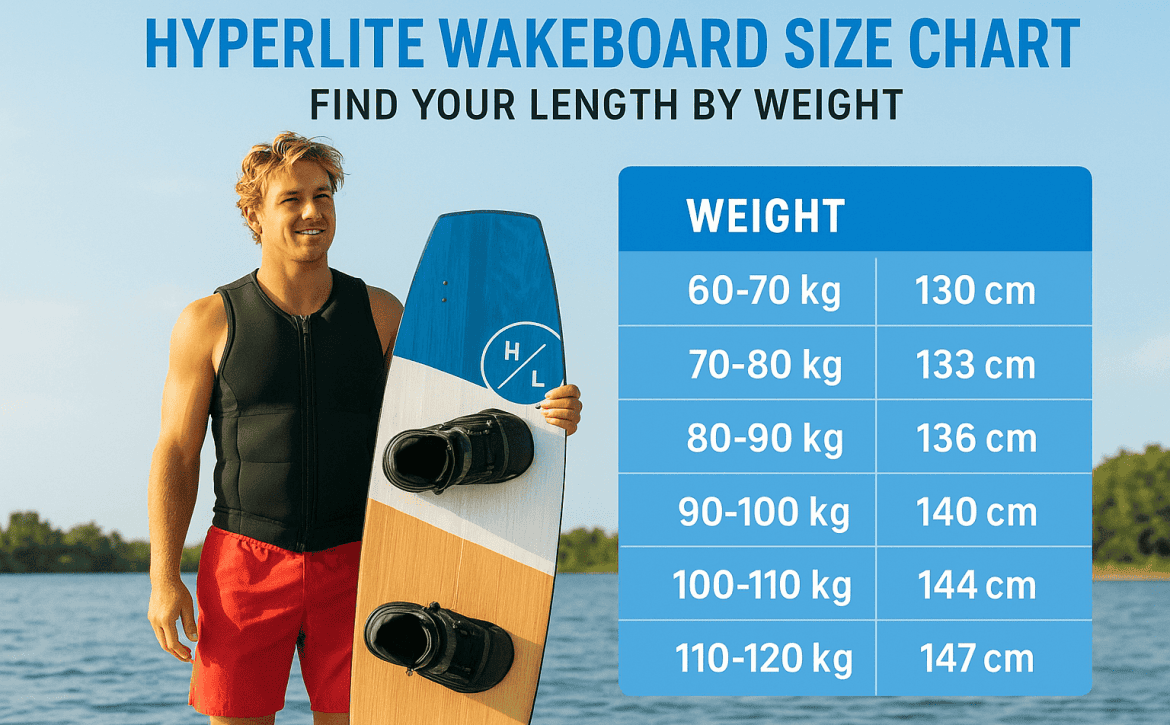
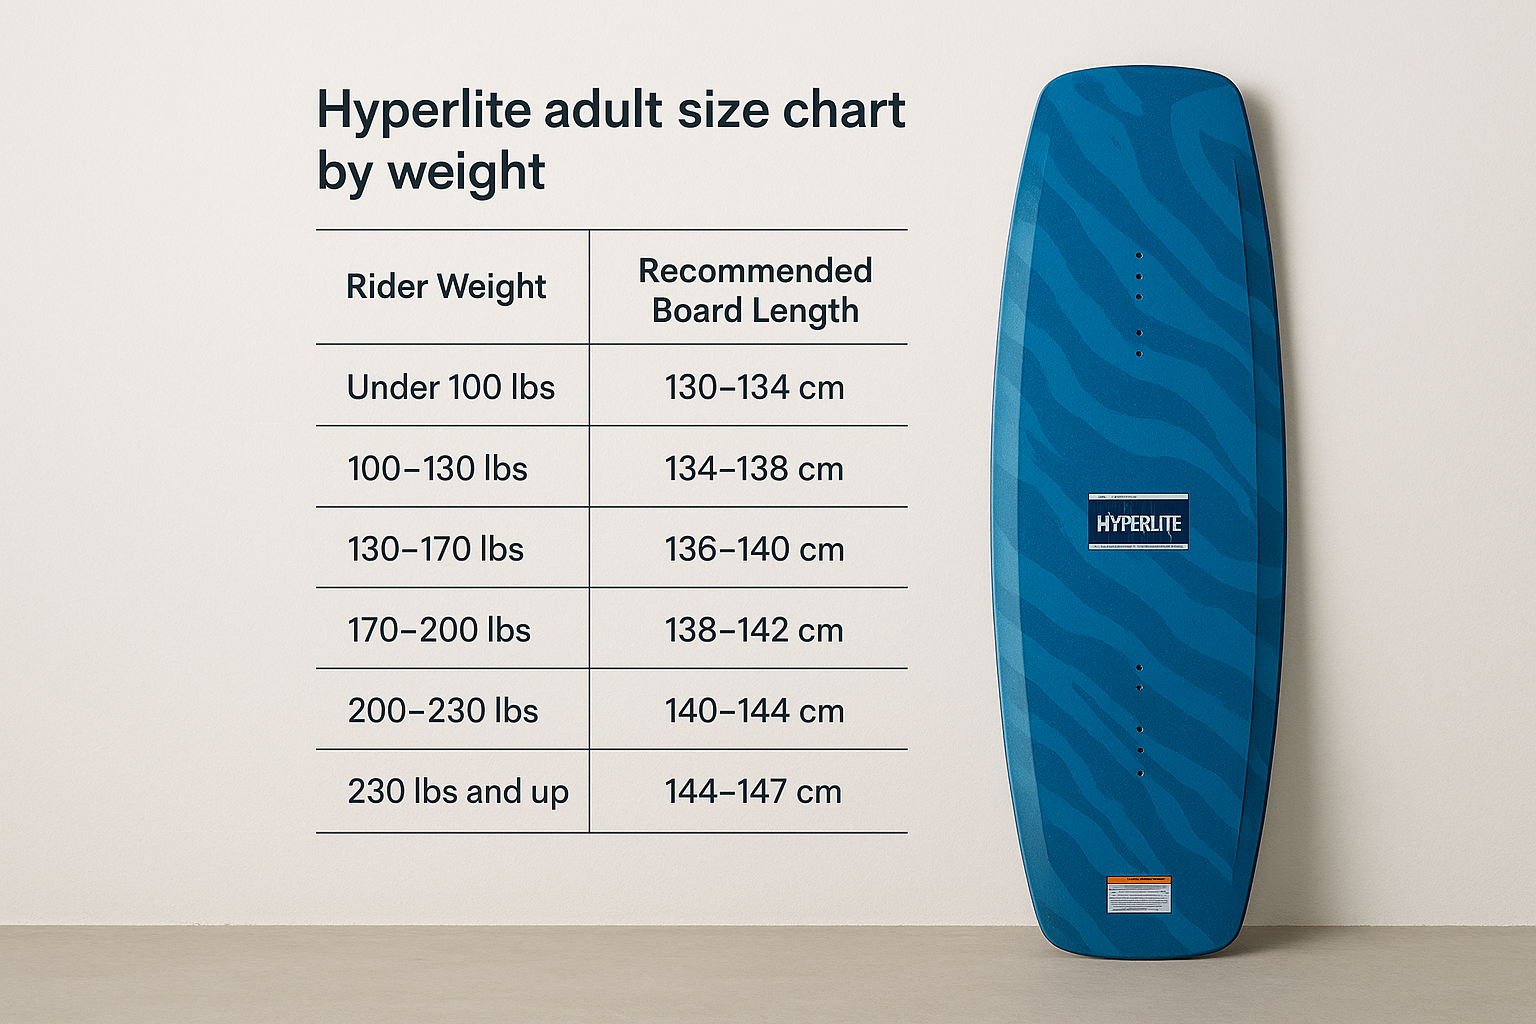
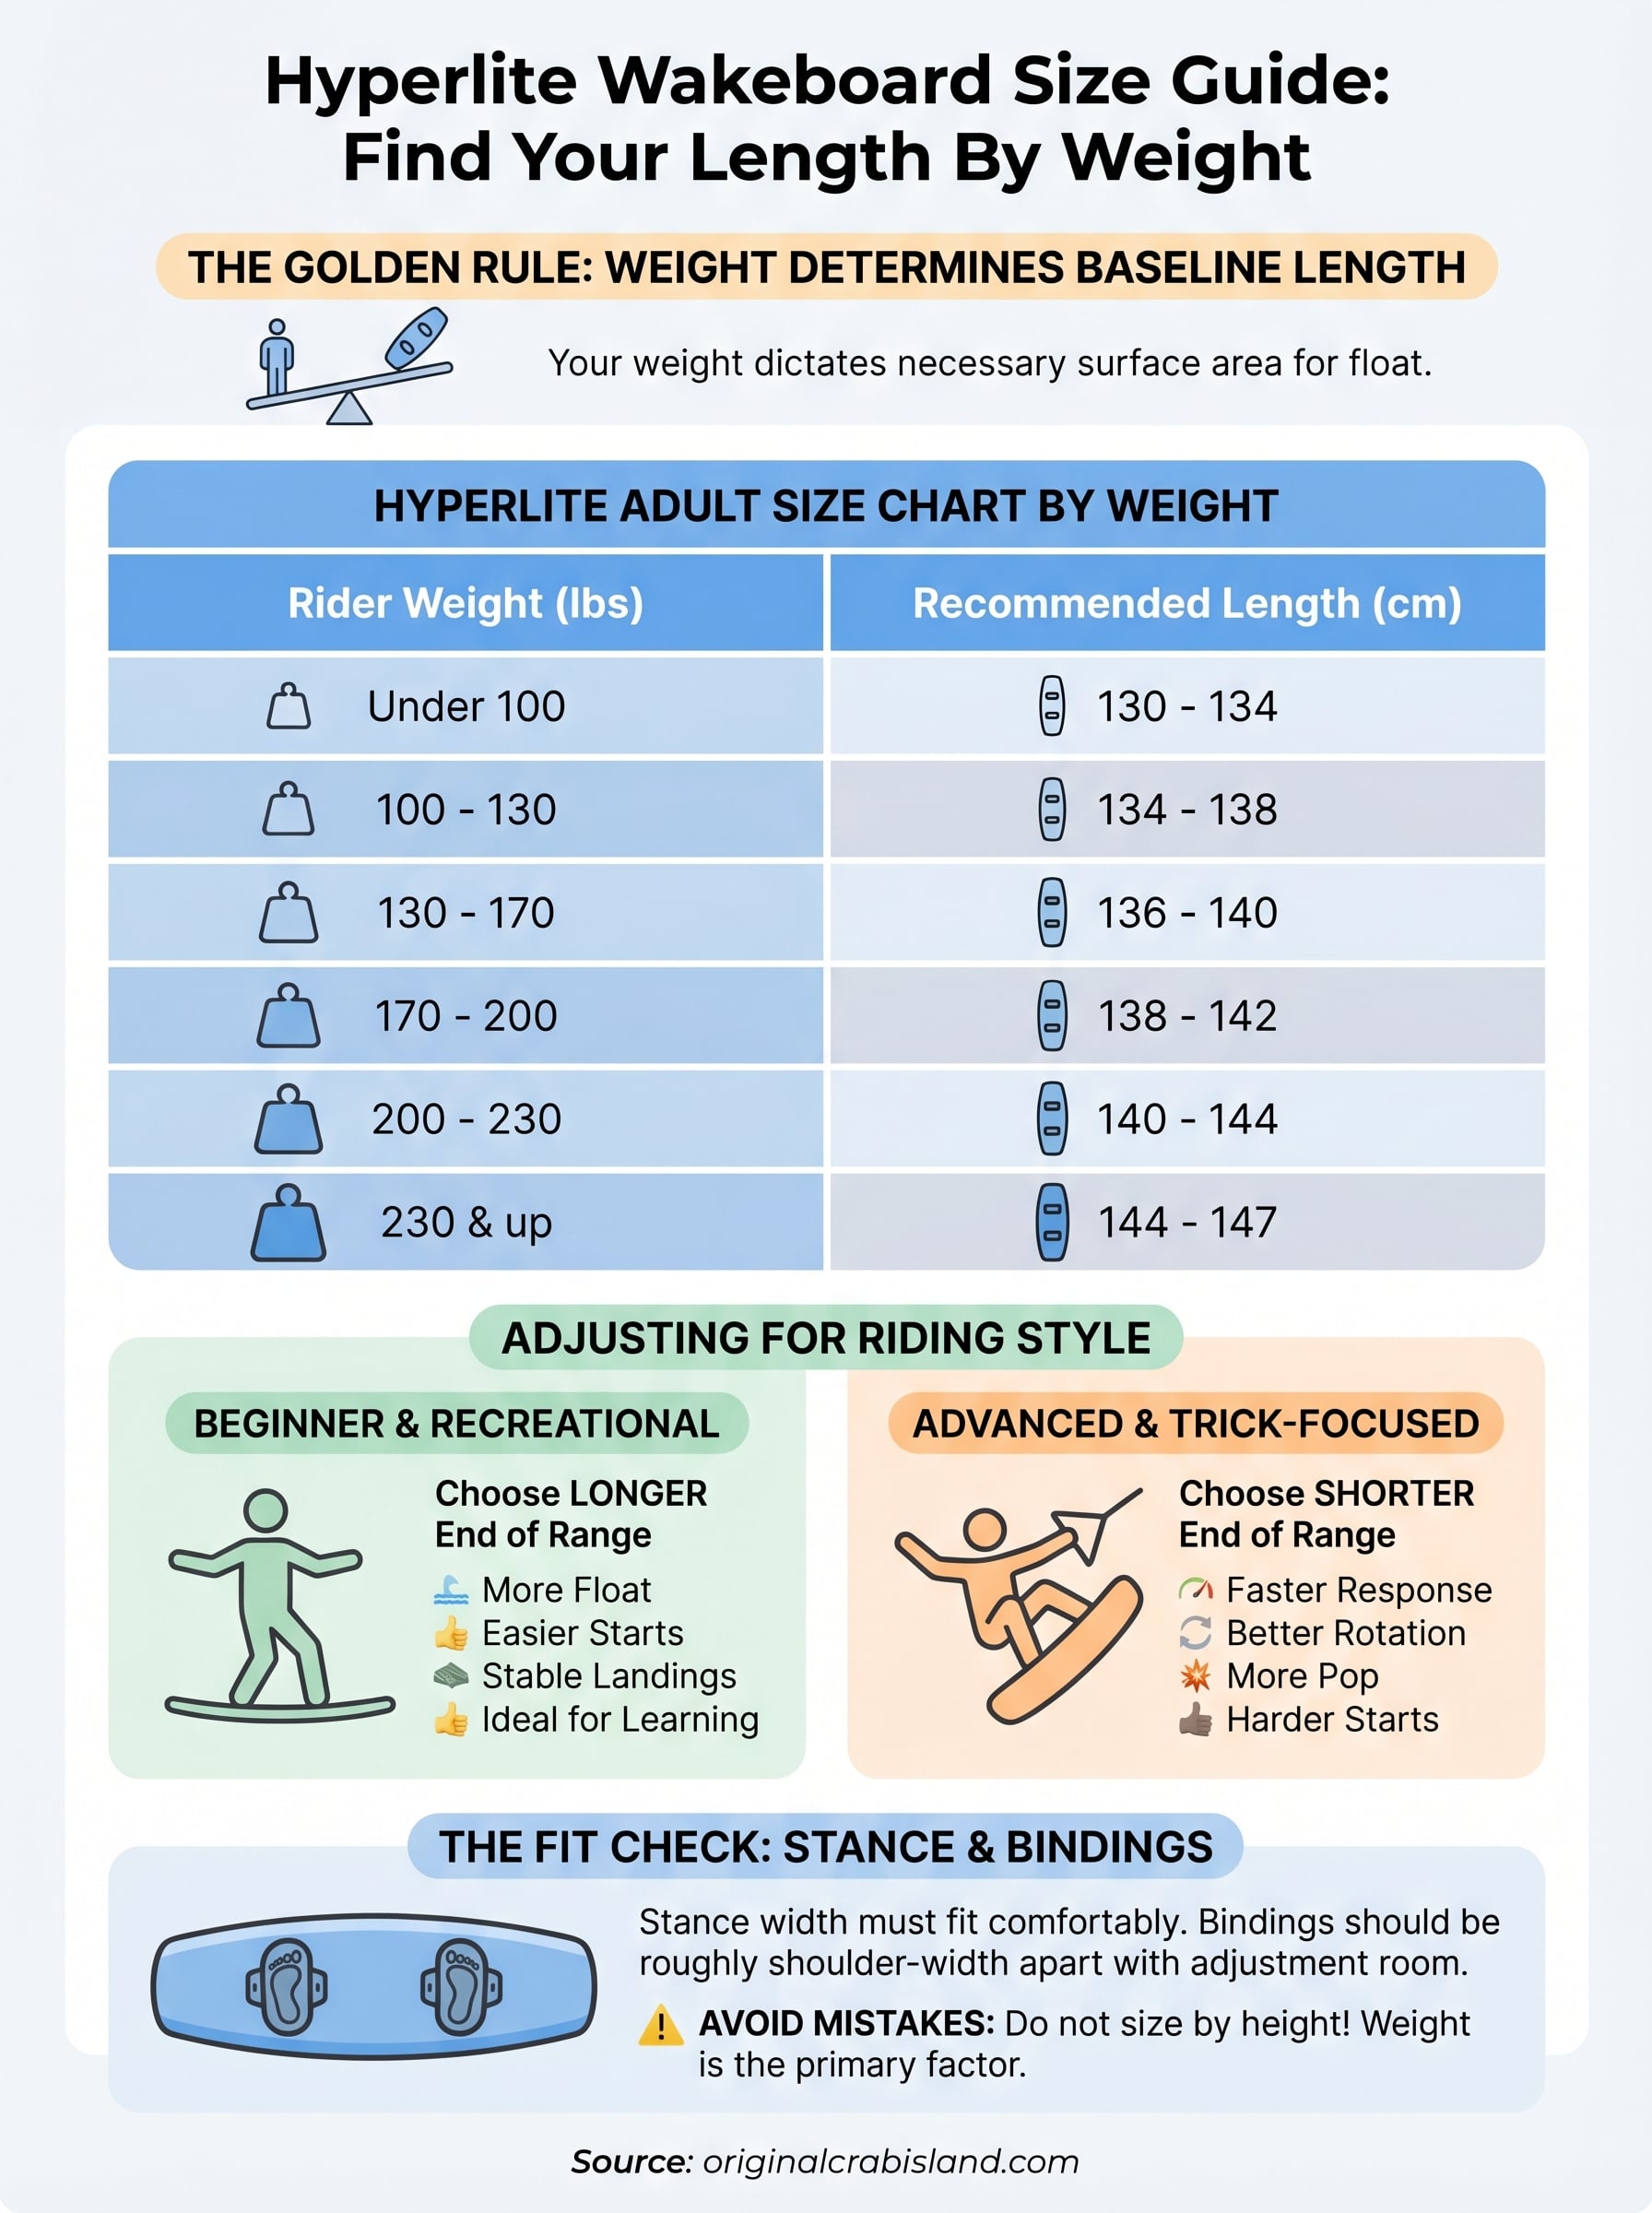
The Hyperlite wakeboard size chart below gives you a direct weight-to-length reference for their current adult lineup. Pull up your weight, find the matching range, and you have a reliable starting length before you factor in anything else.
If you’re right on the border between two weight ranges, lean toward the longer board until you’ve built consistent technique.
Hyperlite adult size chart by weight
The chart covers the full spread of Hyperlite’s adult boards. Lighter riders need less surface area to stay on plane, while heavier riders need more length to generate lift and hold clean landings.
Rider Weight
Recommended Board Length
Under 100 lbs
130-134 cm
100-130 lbs
134-138 cm
130-170 lbs
136-140 cm
170-200 lbs
138-142 cm
200-230 lbs
140-144 cm
230 lbs and up
144-147 cm
These ranges reflect Hyperlite’s general recommendations across popular models like the Franchise, Agent, and Riot. Some models run a touch shorter or longer by design, so always cross-check the specific board’s product page for any model-level adjustments before you commit to a length.
Choose your size by weight and riding style
The hyperlite wakeboard size chart gives you a solid baseline by weight, but your riding style and experience level shift that number in predictable ways. Two riders at the same weight can end up on different lengths once you factor in what they actually do on the water. Once you have your range, use these two categories to narrow it down to the right length.
Beginner and recreational riders
If you’re just starting out or you ride mainly for relaxed fun on calm water, stay at the top of your weight range. The added length gives you more surface area underfoot, which makes deep-water starts easier and landings more stable when you’re still building your technique.
A beginner on a board that’s too short spends more time getting dragged through the water than actually riding.
Pick the longer end of your range if you:
Are in your first or second season on a wakeboard
Prioritize easy starts over quick spins
Ride behind slower or lighter boats
Advanced and trick-focused riders
Advanced riders targeting spins, flips, or wake-to-wake jumps should choose the shorter end of their weight range. A shorter board responds faster to edge changes and rotates more cleanly mid-air, which is exactly what you need when timing tricks off the wake. If you’re landing tricks consistently and want more pop and control, dropping one size is the right call.
Double-check fit with stance and bindings
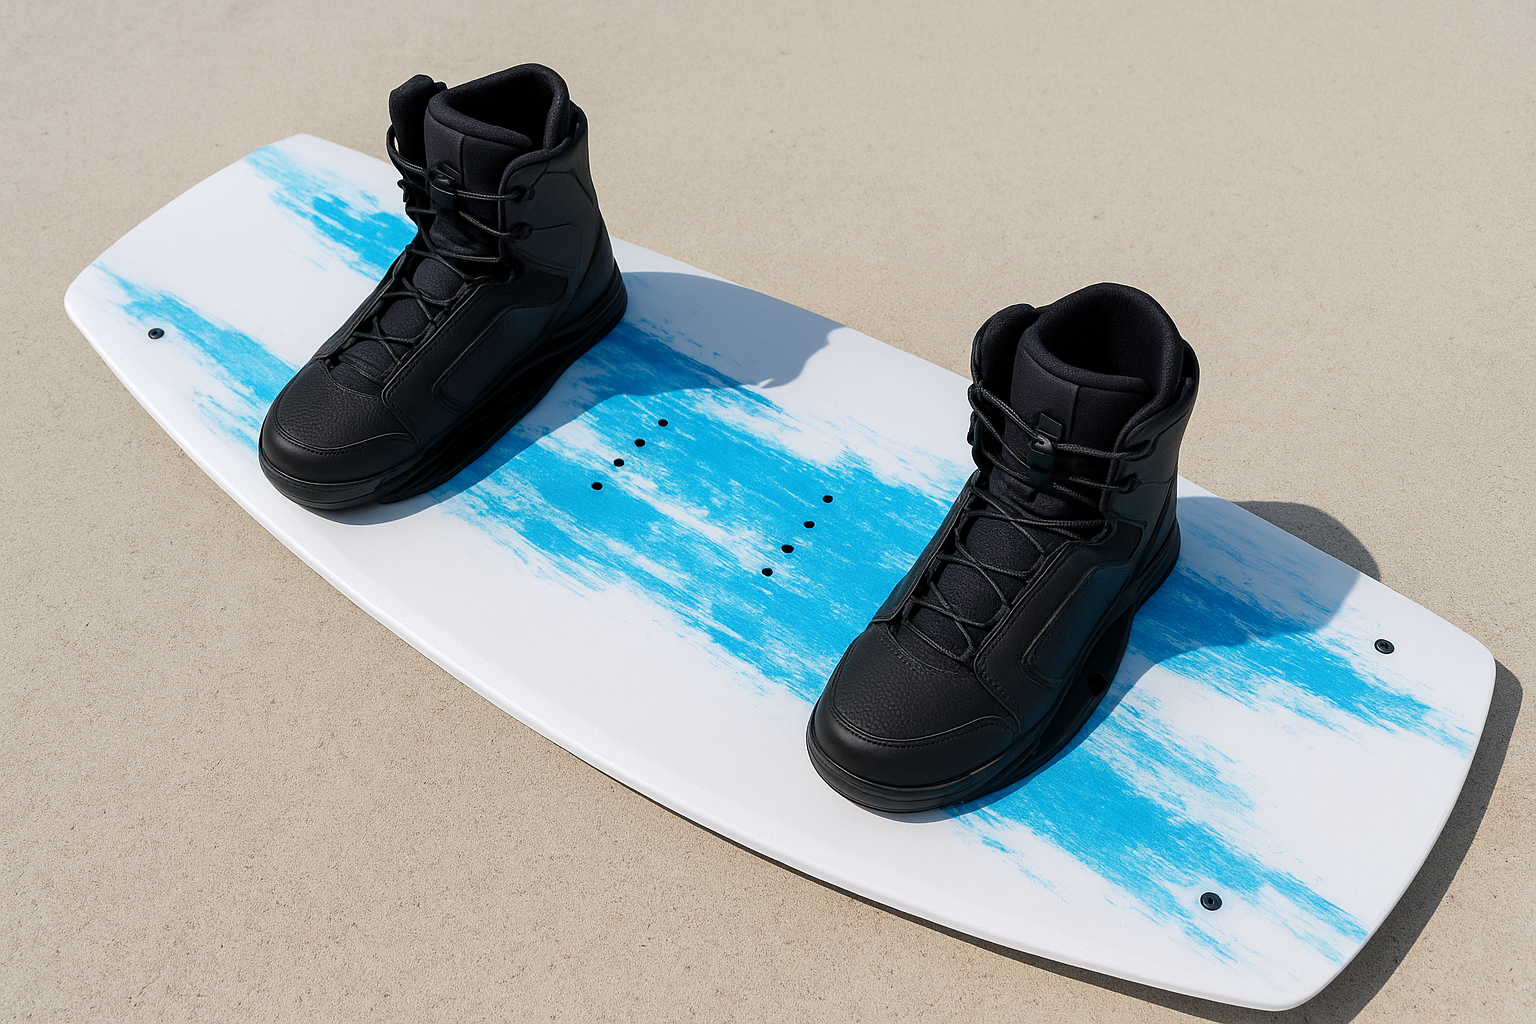
Board length alone doesn’t tell the full story. Your stance width and binding setup interact directly with your board length, and checking these after you pick your size from the hyperlite wakeboard size chart confirms you have the right fit before you hit the water.
Stance width and board length
Your natural shoulder-width stance should fit comfortably between the insert holes on your board with room to adjust inward or outward. If you’re maxed out at the widest inserts and still feel cramped, the board is likely too short for your build. A properly sized board gives you at least two insert positions on each side of your preferred stance so you can fine-tune as needed.
If you can only mount bindings at the outermost inserts, size up before your next session.
Binding position confirms your size
Set your bindings at roughly shoulder-width apart as your starting point, then make small adjustments from there. Bindings positioned too close together on a short board force an unnatural narrow stance that kills your balance. Bindings that sit naturally at shoulder width or slightly wider signal that your board length matches your body, and you’re set up to ride with proper leverage and control on every cut.
Avoid common sizing mistakes
Even with the hyperlite wakeboard size chart in front of you, riders consistently make the same errors before their first session. The most common mistake is sizing by height rather than weight. Height tells you nothing about how much surface area you need to stay on plane. Weight determines how much lift the board generates underfoot. Skip height entirely and go straight to the weight column in the chart.
Borrowing a friend’s board because it "looks about right" is the fastest way to have a frustrating day on the water.
Don’t copy what your instructor rides
Advanced instructors and sponsored riders often choose boards shorter than the chart recommends because they have the technique to compensate for reduced float. If you’re still building your skills, copying their exact setup puts you on a board that’s actively working against you during deep-water starts and landings. Size for where your riding actually is right now, not where you want it to be in a year.
Revisit your size once you’re landing tricks consistently
Recheck the chart any time your weight changes by 15 lbs or more
Test ride before committing to a specific length when possible
Ready to ride
You now have everything you need to pick the right board. Start with your weight on the hyperlite wakeboard size chart, adjust for your riding style, confirm your stance width matches your binding positions, and you’re set. The whole process takes five minutes, and it saves you from fighting your gear every session.
If you’re heading to Destin and want to put your new knowledge to immediate use, the Emerald Coast’s warm, clear water is one of the best places to do it. Conditions out here suit every skill level, from your first deep-water start to linking wake-to-wake jumps with proper technique. Rent gear, get on the water, and let the right board size actually show you what riding feels like when the setup works in your favor. Check out everything waiting for you at Crab Island in Destin, Florida and book your time on the water.
Crab Island draws thousands of visitors to Destin, Florida every year, and most of them show up without knowing the crab island rules that could save them from a fine or a ruined afternoon. There’s no entrance gate, no posted signs on the sandbar, and no one handing you a rule book when you pull up. That’s where confusion starts.
At Original Crab Island, we send boaters and groups out to the sandbar daily. We see what happens when people don’t know about alcohol regulations, anchor zones, or who actually needs a boating license. Some of these rules are Florida state law. Others are local ordinances specific to Destin and the Choctawhatchee Bay. Either way, violating them can mean citations, gear confiscation, or worse.
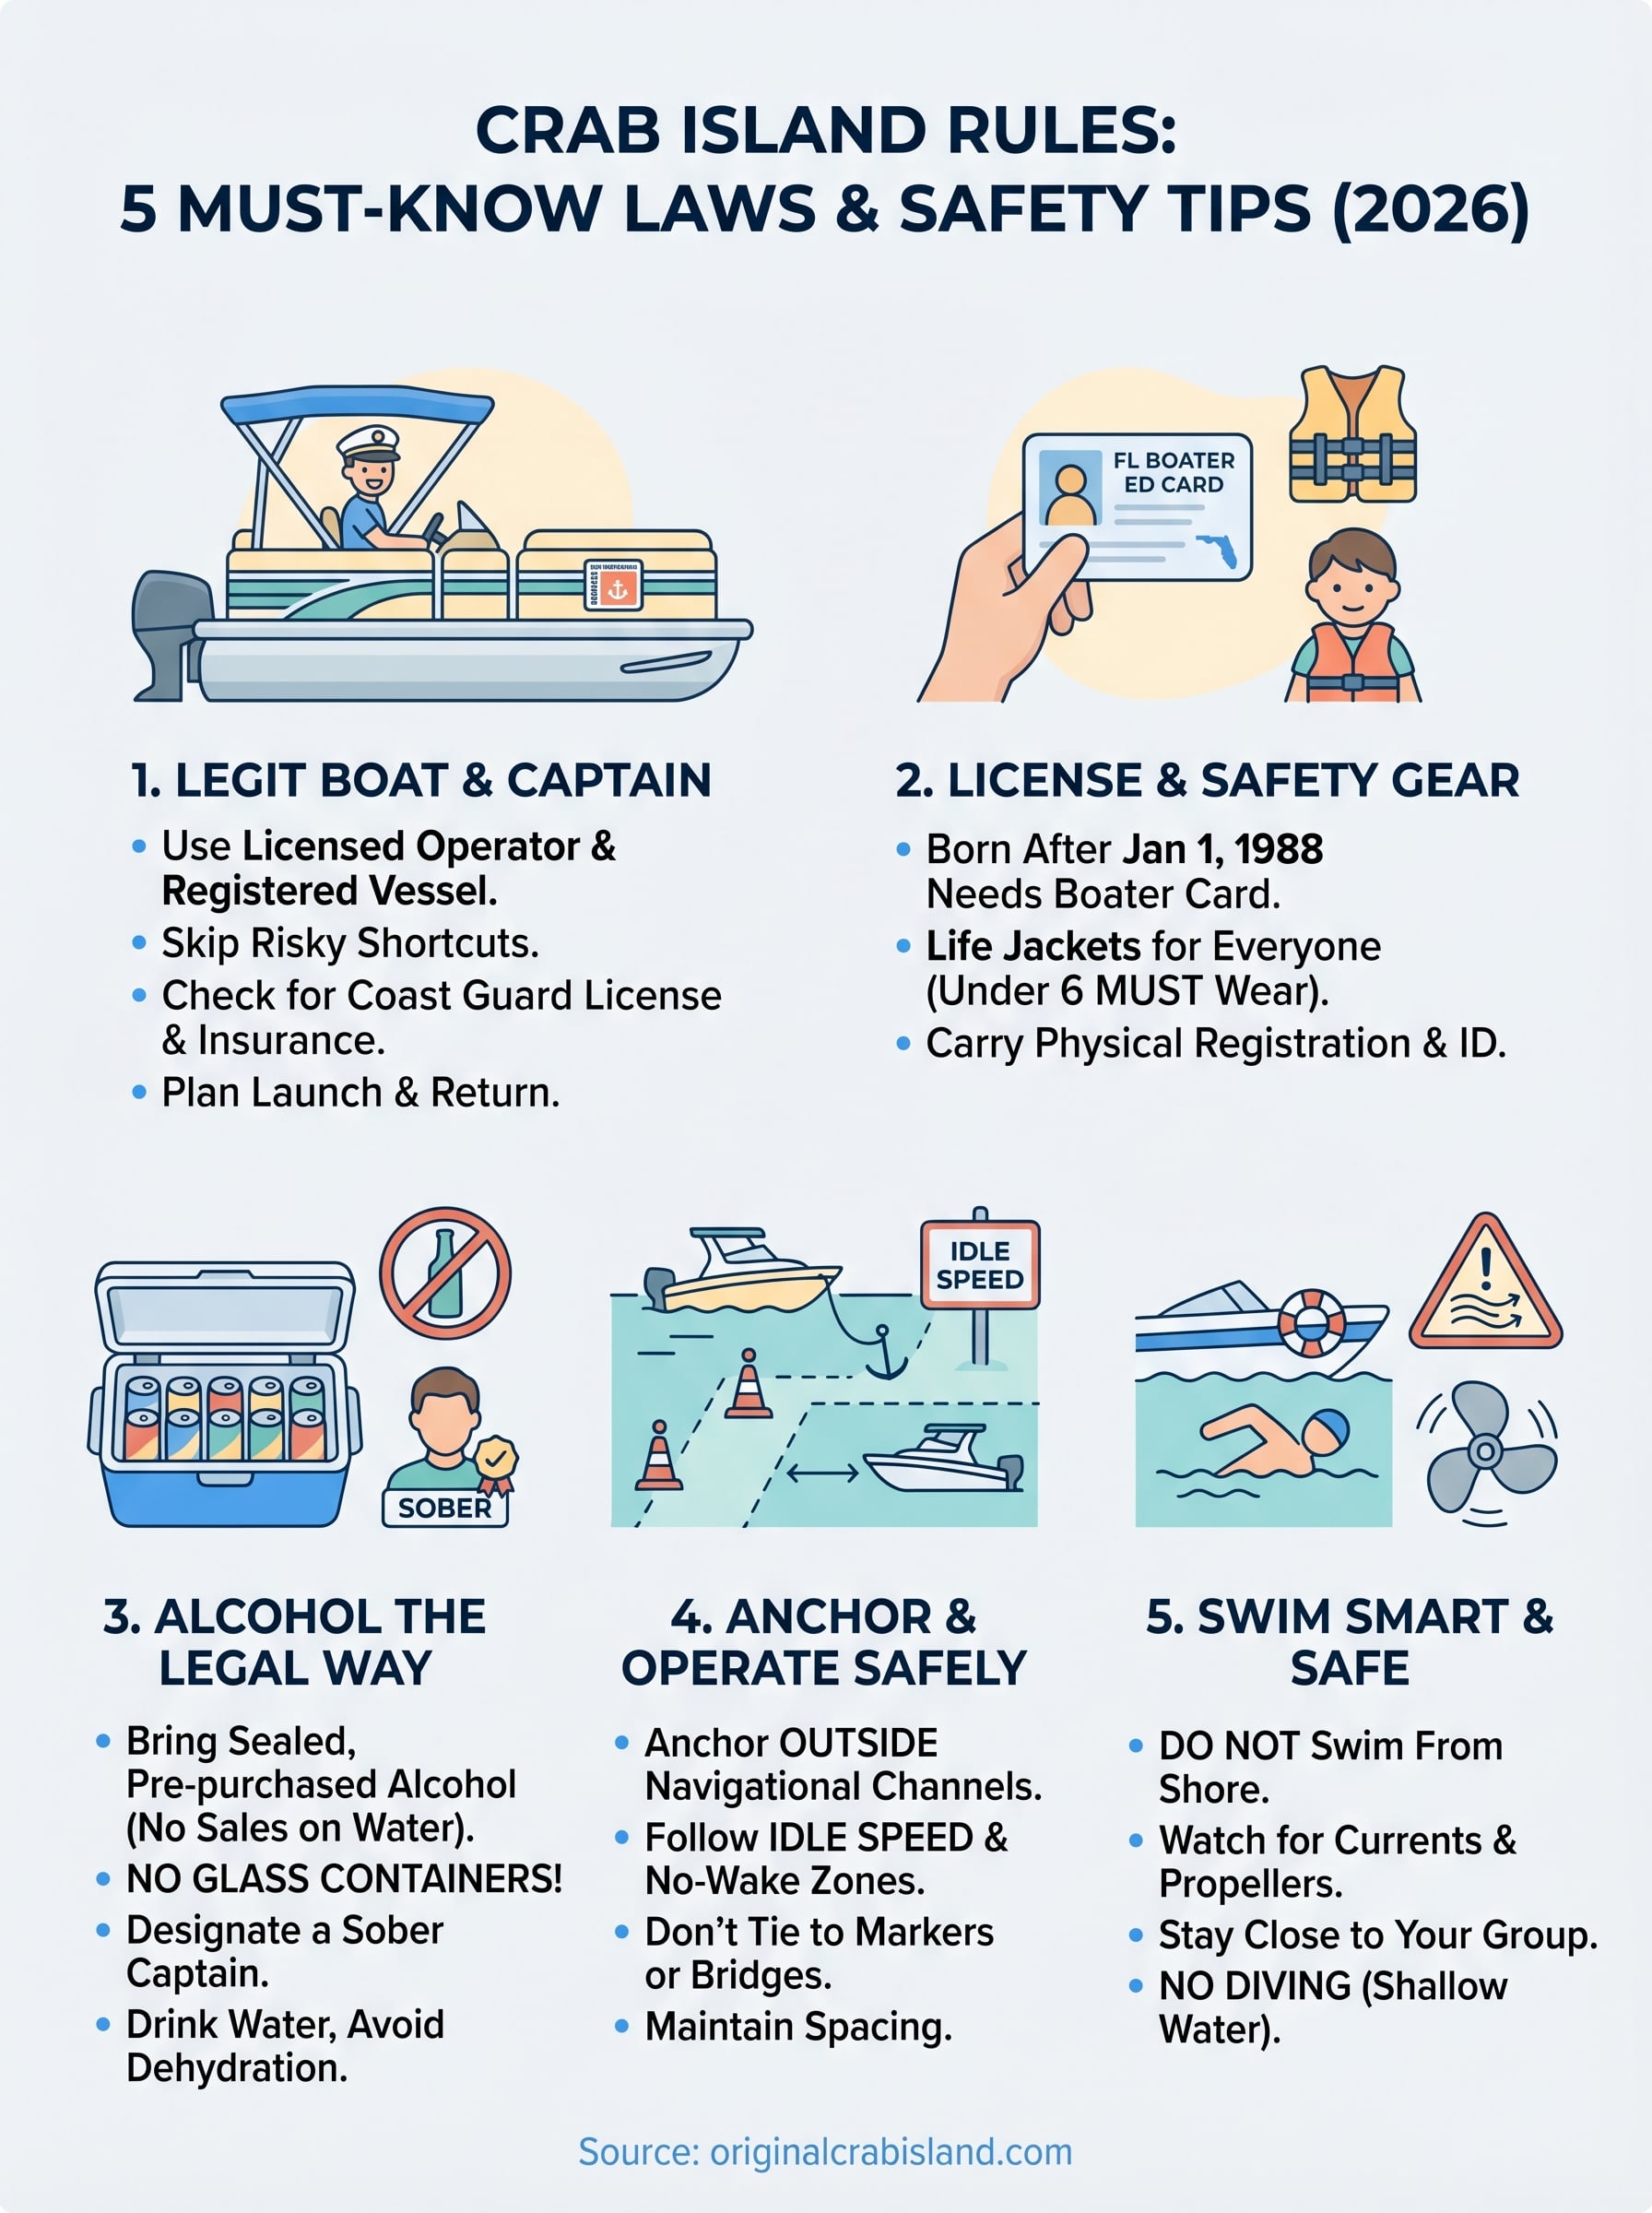
This guide breaks down the five most important rules and safety tips you need before heading to Crab Island in 2026, covering everything from legal drinking age enforcement on the water to required safety equipment on your vessel.
1. Book a legit boat rental or captain
Getting to Crab Island legally starts before you leave the dock. You need a licensed operator or a properly registered vessel to access the sandbar, and skipping this step is one of the fastest ways to get flagged by the U.S. Coast Guard or Okaloosa County marine patrol.
Use legal access only and skip risky shortcuts
Every vessel operating in Destin’s waterways must be properly registered and operated by someone who meets Florida’s requirements. Paddling over from a random shoreline or hitching a ride on an unlicensed vessel puts you outside the legal framework that governs crab island rules in this area.
Okaloosa County has increased on-water enforcement presence at Crab Island during peak summer months, and citations for unregistered or improperly operated vessels are common.
Pick the right option for your group size and vibe
Pontoon boats work well for families and larger groups who want space to relax and anchor near the sandbar. For smaller groups who want more flexibility, a deck boat or jet ski rental lets you cover more of the water.
Know what shuttle boats can and cannot do in 2026
Shuttle boats can transport passengers to the sandbar, but they cannot legally sell or distribute alcohol on board. They must also follow U.S. Coast Guard capacity limits based on the vessel’s certification, and operators are required to display their documentation number visibly.
Ask these questions before you book with any operator
Before you pay a deposit, confirm these specifics with any rental or charter company:
Does the captain hold a valid U.S. Coast Guard operator’s license?
Is the vessel currently registered in Florida?
Does the rental include life jackets for every passenger?
What is the cancellation policy for bad weather?
Plan your launch spot, timing, and return plan
Peak crowds at Crab Island build quickly after 10 a.m. Launch from a permitted public boat ramp in Destin, aim to arrive early for a better anchor position, and confirm your return pickup window before you leave the dock.
2. Follow Florida boating license and safety gear rules
Florida enforces boating education requirements and mandatory safety gear rules on every waterway, including the stretch between Destin and Crab Island. Ignoring these rules puts you at risk of a citation before you even anchor.
Know who needs a Florida boater education card
Anyone born on or after January 1, 1988 must carry a Florida Boater Education Card to legally operate a motorized vessel. Renters typically receive a temporary operator certificate through their rental company, but confirm this before you leave the dock.
Meet life jacket requirements before you leave the dock
Every passenger on board must have a properly sized, Coast Guard-approved life jacket. Rental operators are required to supply these, but confirm the count matches your group size before departure.
Keep kids safe with the under-6 life jacket rule
Children under 6 years oldmust wear a life jacket at all times on a vessel under 26 feet, per Florida state law. This is one of the crab island rules that carries a mandatory fine with no warnings issued.
Florida Fish and Wildlife Conservation Commission officers actively patrol Crab Island and will board your vessel to verify compliance.
Stay ready for law enforcement checks on the water
Keep your registration documents and boater ID accessible at all times. Officers can and do perform random stops without warning.
Avoid the most common paperwork and ID mistakes
Bring physical copies of your boater education card and vessel registration rather than relying on a phone screenshot. Digital versions are not always accepted on the water.
3. Handle alcohol the legal way at Crab Island
Alcohol is legal at Crab Island, but several crab island rules govern how you bring it, consume it, and store it. Vendors on the water cannot sell or serve alcohol, so any drinks you plan to have need to come with you from shore.
Understand what you can bring and what vendors cannot sell
You can bring sealed, pre-purchased alcohol onto your boat or to the sandbar. Floating vendors at Crab Island are not licensed to sell alcohol, and purchasing from unlicensed sellers puts you in violation of Florida law.
Skip glass and pack safer drink containers
Glass containers are prohibited at Crab Island. Pack drinks in plastic or aluminum containers to stay compliant and avoid fines from patrol officers.
Prevent boating under the influence and designate a captain
Florida treats boating under the influence the same as a road DUI. Designate a sober operator before you leave the dock and keep that person off the drinks for the entire trip.
Florida law sets the legal BAC limit for boat operators at 0.08%, and FWC officers conduct active sobriety checks on the water.
Manage heat, dehydration, and mixing alcohol with sun
Heat and alcohol accelerate dehydration faster than most people expect. Drink at least one water for every alcoholic beverage you consume throughout the day.
Keep your cooler setup legal and easy to clean up
Pack a sealed, lidded cooler and carry all bottles and cans back with you when you leave. Leaving trash on the sandbar can result in a littering citation from Okaloosa County patrol.
4. Anchor and operate safely in a crowded sandbar
Crab Island packs dozens of boats into a tight space, and the crab island rules around anchoring and vessel operation exist to protect everyone in that area. Poor anchoring decisions and speeding near swimmers cause most of the preventable accidents on the sandbar each season.
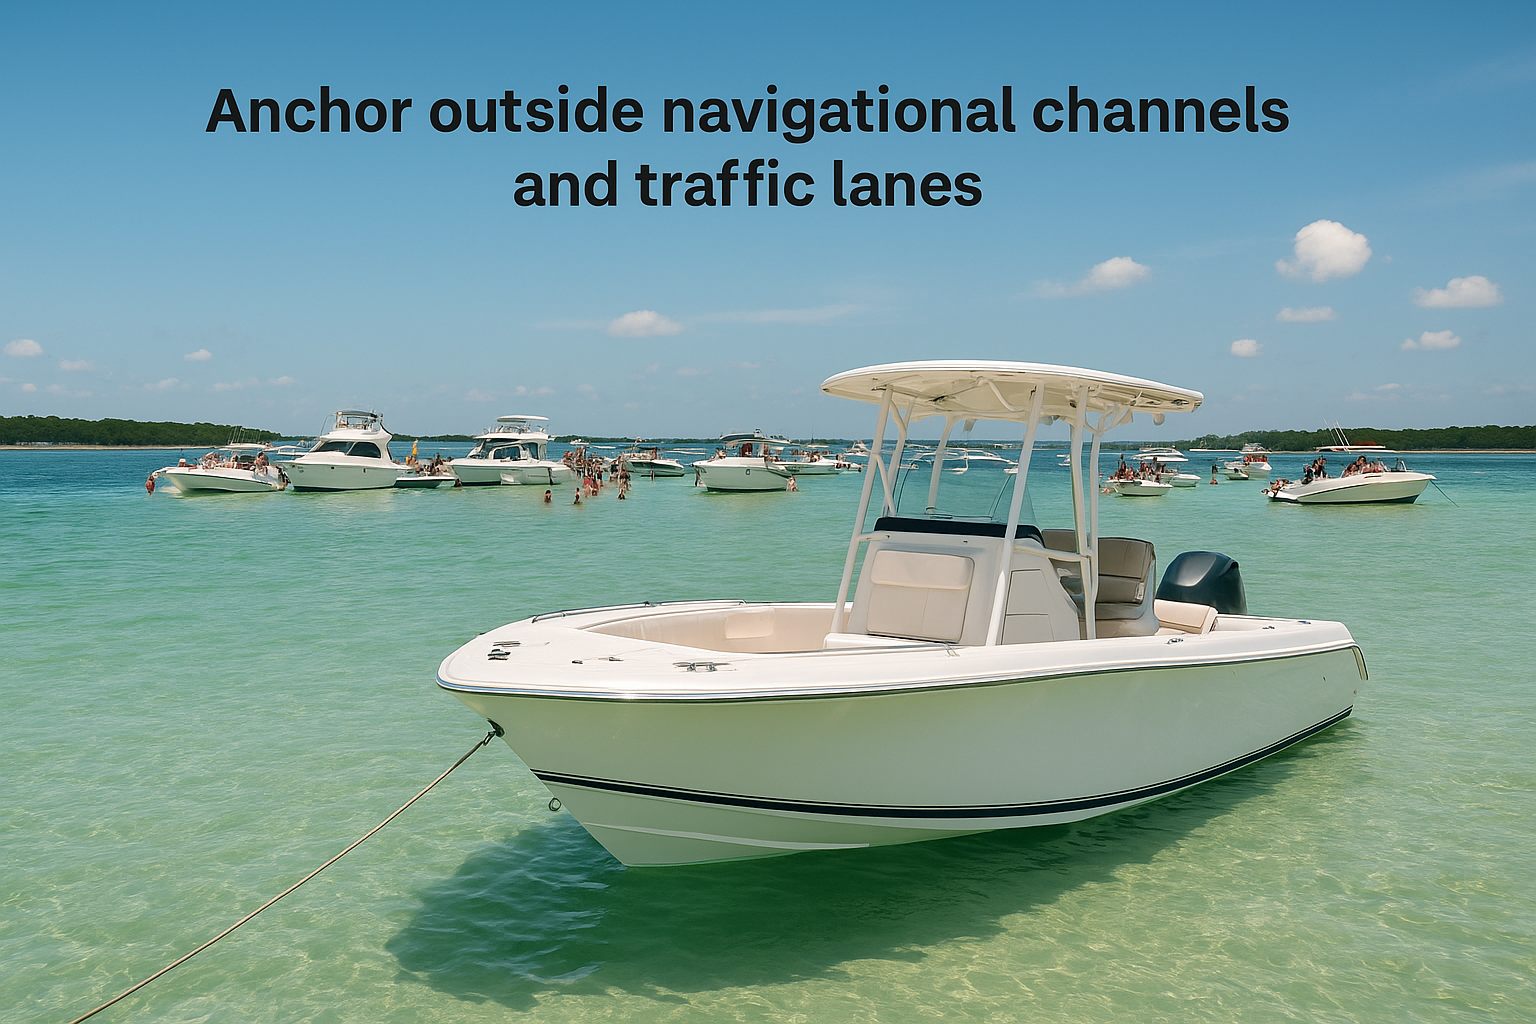
Anchor outside navigational channels and traffic lanes
Drop your anchor well away from marked channels and keep your vessel out of active boat traffic lanes. Anchoring inside a navigational channel is illegal under both Florida state law and federal regulations, and patrol officers will act on it immediately.
Follow idle speed and no-wake zones near boats and swimmers
Idle speed zones surround Crab Island during peak hours. Your wake can knock people off paddleboards, injure swimmers, and damage neighboring vessels, so reduce speed well before you reach the crowd.
FWC officers issue no-wake citations on the spot, and fines increase for repeat violations during the same outing.
Do not tie off to bridge pilings, markers, or buoys
Tying to any navigational aid is a federal violation regardless of how temporary it seems. Secure your vessel using your own anchor gear only.
Know the 2026 overnight anchoring limits for businesses
Commercial operators cannot anchor overnight at Crab Island under current Okaloosa County rules. Private boaters should verify current limits with FWC before planning to stay past sunset.
Use anchor lines, sandbar stakes, and spacing that prevent collisions
Keep at least 10 feet of clearance between your vessel and neighboring boats. Sandbar stakes marked with bright flags help other operators spot your lines before crossing them.
5. Swim smart around currents, tides, and wildlife
Crab Island looks shallow and calm, but the water around the sandbar carries hazards that surprise visitors every season. Following crab island rules for swimming and wildlife protects your group from the most common injuries on the sandbar.
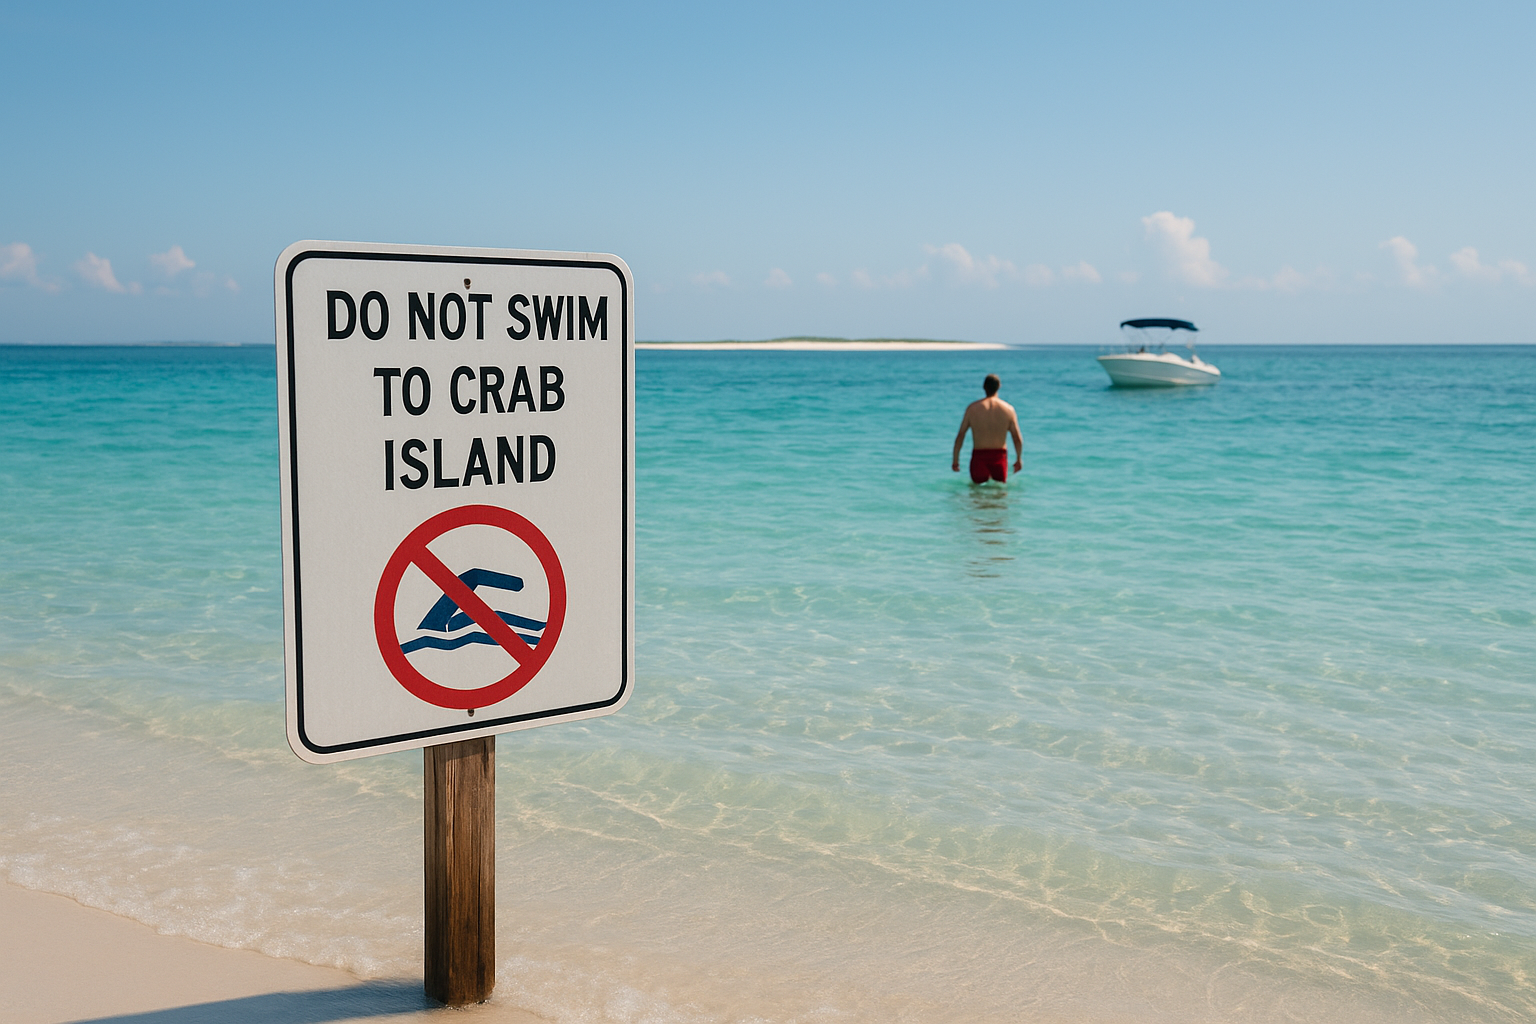
Do not swim to Crab Island and do not wander into deeper water
Never swim to Crab Island from shore. Boat traffic between the sandbar and the Destin bridge creates serious strike hazards for anyone crossing open water.
Treat the current like a real hazard even in shallow areas
Tidal currents shift quickly in the bay, and ankle-deep water near the sandbar edge can pull you off balance. Keep children in arm’s reach at all times.
The National Weather Service publishes daily tide charts for the Destin area you can check before heading out.
Skip diving in shallow water and watch for boats and props
Never dive headfirst into the sandbar water. Depths change with tides, and spinning propellers from passing vessels pose a serious injury risk to anyone in the water.
Time your visit with tide and visibility in mind
Low tide shrinks the sandbar and speeds up currents along the edges. Plan your arrival during mid-to-high tide for more stable, safer swimming conditions.
Respect marine life, protect seagrass, and pack out trash
Avoid standing on seagrass beds visible through the clear water, since Florida law protects these habitats. Carry all trash back to shore when you leave.
Final checklist
These five crab island rules cover everything that matters before you leave the dock in 2026. Book a licensed operator or registered vessel, carry your Florida Boater Education Card if you were born after January 1, 1988, and make sure every passenger has a properly fitted life jacket. Pack drinks in plastic or aluminum containers only, designate a sober captain before departure, and bring all your trash back to shore.
On the water, anchor outside navigational channels, respect idle speed zones around swimmers and boats, and never tie off to markers or buoys. When you get in the water, stay close to your group, skip the headfirst dives, and watch for boat traffic around the sandbar edges.
Nothing kills a good day on the water faster than watching your boat drift away from the spot you just picked out. If you’re new to boating around Destin, Florida, especially heading out to Crab Island, knowing a few solid anchoring tips for beginners can mean the difference between a relaxing afternoon and a stressful one. Getting your anchor right is one of those fundamental skills that experienced boaters take for granted but rarely explain well to newcomers.
At Original Crab Island, we put renters on pontoons, jet skis, and other watercraft every single day. We see firsthand how proper anchoring technique matters, particularly on a shallow sandbar where dozens of boats gather in close quarters. That’s exactly why we put this guide together, to give you practical, no-fluff advice you can use on your very next trip.
Below, you’ll find five straightforward tips covering everything from choosing the right anchor for your setup to dialing in your scope ratio so you actually stay put. Whether you’re renting a pontoon for the first time or you just bought your own boat, these basics will help you anchor with confidence instead of guesswork.
1. Start with a local briefing and a safe spot
Before you even touch your anchor line, you need to know where you’re going and what the bottom looks like when you get there. Skipping this step is the number-one mistake beginners make, and it turns a fun outing into a frantic scramble. Taking 10 minutes to study the area before you leave the dock saves you a lot of trouble later.
What "a good anchorage" looks like for beginners
A good anchorage gives you soft bottom material, like sand or mud, so your anchor can dig in and hold. Hard rock or heavy vegetation makes setting an anchor unreliable. You also want enough depth to swing without grounding out when the tide drops, but not so deep that you need an impractical amount of rode to reach the bottom. Shallow sandbars with gentle slopes, like those around Destin, are genuinely beginner-friendly once you understand the basic layout.
Picking a spot with natural protection from wind and boat wake makes a measurable difference in how well your anchor holds throughout the day.
Crab Island and Destin rules to know before you anchor
Crab Island sits in the middle of a busy, regulated waterway, so you need to know local rules before you drop anything. The Choctawhatchee Bay system has no-wake zones and designated areas where anchoring is permitted or restricted. Check with the U.S. Coast Guard or Florida Fish and Wildlife Conservation Commission for current local regulations before heading out.
How Original Crab Island can help you start safer
When you rent through Original Crab Island, the staff gives you a practical briefing before you leave. They cover where to anchor safely, current conditions, and any local guidelines relevant to that day. You get actionable, location-specific guidance rather than generic advice, which is especially valuable if this is your first time on these waters.
2. Rig the right gear before you approach
Rushing your approach is one of the most common beginner mistakes on the water. Taking five minutes to rig your gear correctly before you get close to your chosen spot keeps things smooth and prevents scrambling at the worst possible moment.
Anchor and rode basics in plain English
Your anchor rode is the combination of chain and rope connecting your anchor to the boat. For sandy, shallow areas like Crab Island, a fluke-style anchor works well because the flukes dig into soft sand quickly. Use a short section of chain between the anchor and your rope to add weight, which keeps the pull angle low and improves holding power.
A good rule of thumb is to have at least 150 feet of rode on board, even in shallow water, so you’re never caught short.
How to set up your bow for a clean drop
Feed your rode up through the bow cleat or chock so it runs cleanly over the side without tangling. Keep the excess coiled loosely on deck so it pays out smoothly when the anchor drops rather than piling up in a mess.
Quick pre-drop safety checks that prevent injuries
Before you approach, confirm no one is standing on loose rode and that the bitter end is secured to the boat. Losing your entire anchor line overboard because it wasn’t tied off is a completely avoidable problem.
3. Nail your scope and swing room every time
Scope is the ratio of rode length to water depth, and getting it right is one of the most overlooked anchoring tips for beginners. Too little scope and your anchor skips across the bottom. Too much and you swing into neighboring boats.
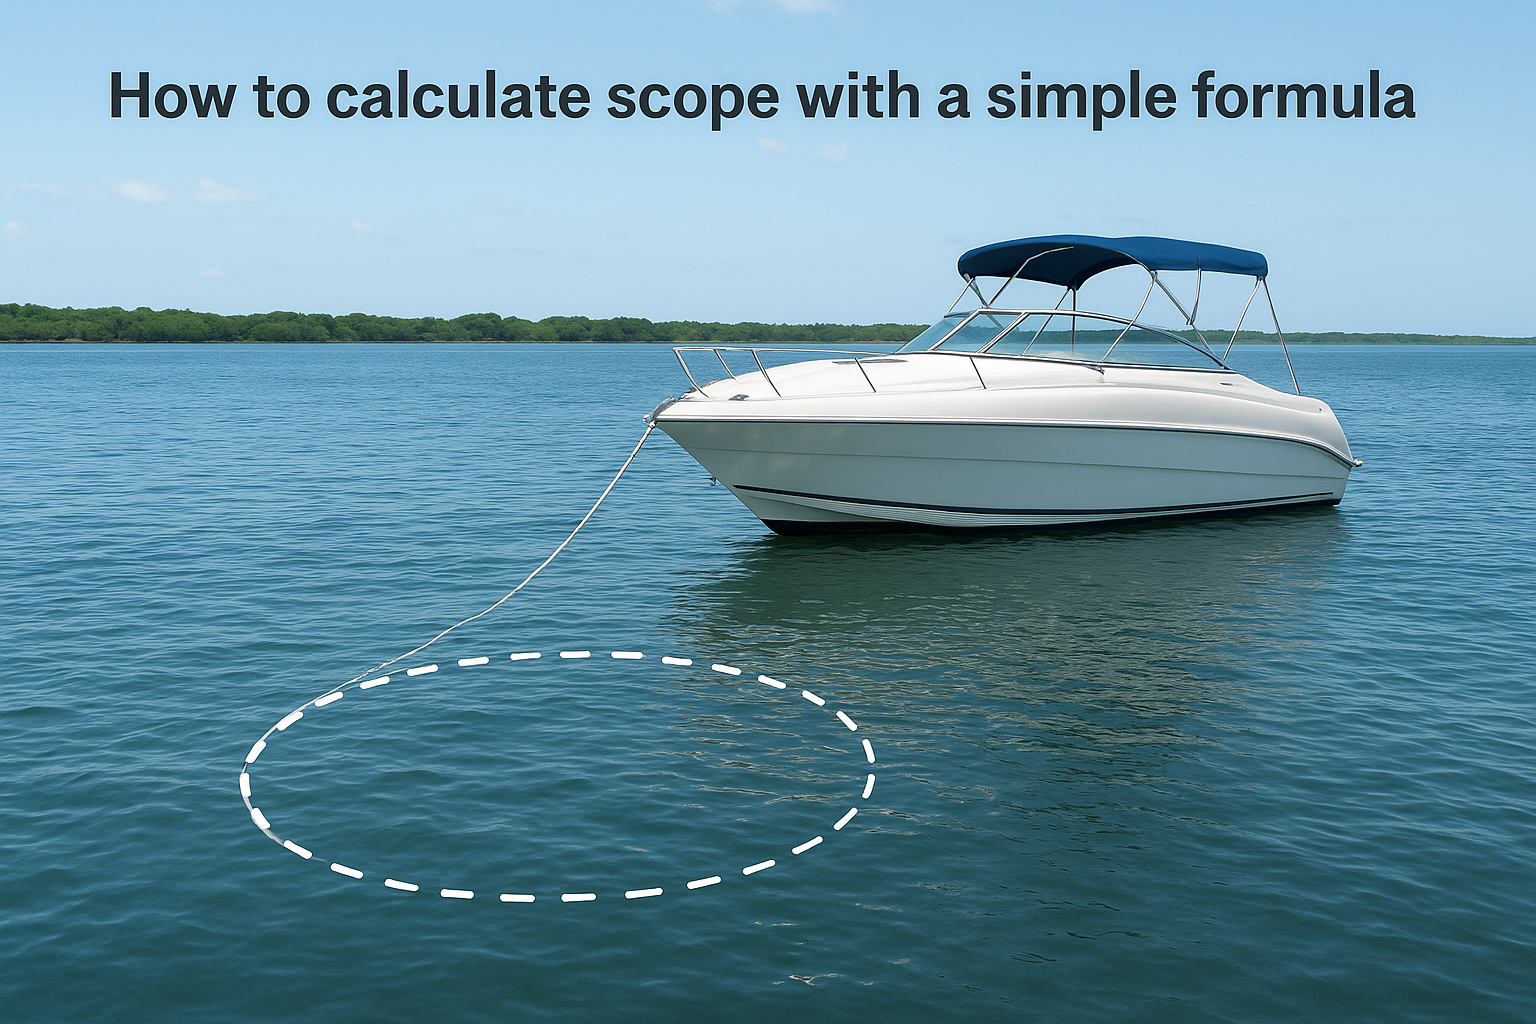
How to calculate scope with a simple formula
The standard recommendation is a scope ratio of 7:1, meaning for every one foot of water depth, you let out seven feet of rode. In eight feet of water, that means paying out 56 feet of line. For calm, protected spots like Crab Island, a 5:1 ratio can work, but 7:1 gives you a reliable safety margin.
A simple way to remember it: depth times seven equals the minimum rode you should let out.
How wind, current, and tide change your numbers
Strong wind or tidal movement puts more horizontal load on your anchor, which means your scope needs to go up, not down. In choppy conditions, bump your ratio to 10:1 to keep the pull angle low and your anchor holding firm.
How to judge swing radius so you don’t hit anyone
Your swing radius equals roughly the amount of rode you’ve let out. Picture a circle that size around your bow cleat and confirm no other boats or obstacles fall inside it before you commit to the spot.
4. Drop and set the anchor the right way
Getting your scope right means nothing if your drop technique is sloppy. Approaching the spot correctly and executing the drop in the right sequence turns all that prep into actual holding power. These steps cover where many anchoring tips for beginners pay off most.
The step-by-step approach into wind or current
Head into the wind or current as you approach, whichever force is stronger. Stop the boat just past your target, shift to neutral, then follow this sequence:
Lower the anchor hand-over-hand until it hits bottom
Let the boat drift back as you pay out rode
Cleat off once you’ve reached your target scope
How to set the anchor without dragging
Once the rode comes tight, apply a brief burst of reverse throttle to dig the flukes into the bottom. Keep the throttle input steady rather than gunning it hard.
Letting the boat’s natural drift do most of the work first gives the anchor time to orient and bite properly.
How to confirm you’re set using simple tests
Pick two fixed landmarks on shore and watch them for 60 seconds. If they stay aligned relative to your position, the anchor is holding.
Place your hand on the taut rode as a second check. Rhythmic tugging or vibration through the line means the anchor is skipping across the bottom and needs to be reset.
5. Stay put, stay courteous, and retrieve cleanly
Dropping the anchor correctly gets you 90% of the way there, but staying alert while you relax keeps that good spot working for you all day. Following through on these final steps rounds out the anchoring tips for beginners that actually matter when the sandbar fills up around you.
How to monitor for dragging without stressing out
Check your landmark bearings every 20 to 30 minutes, especially after wind shifts or passing boat wakes disturb the water. If your reference points no longer line up, pull up and reset promptly rather than waiting and hoping for the best.
Catching a drag early means a quick reset; ignoring it means drifting into someone else’s afternoon.
Basic anchoring etiquette in a crowded sandbar
Give neighboring boats adequate room when you arrive, and never anchor so close that your swing circles overlap. If someone anchored before you, their swing zone takes priority and you adjust your position to fit around them, not the other way around.
How to pull the anchor safely and avoid tangles
Motor slowly forward to reduce tension on the rode before you start pulling. Then follow these steps:
Haul hand-over-hand, rinsing sand and mud off as it comes up
Stow the anchor flat and secure so it can’t shift while you’re underway
This protects anyone standing near the bow and keeps your deck clear for the ride back.
Quick wrap-up before you crack a cooler
These five anchoring tips for beginners cover everything you need to go from uncertain to confident the next time you head out on the water. Pick a protected spot with soft bottom, rig your gear before you approach, calculate your scope correctly, execute a clean drop into wind or current, and stay alert once you’re settled. Each step builds on the last, so skipping one tends to create problems that the others can’t fix.
The good news is that practice makes all of this fast. After a handful of trips, the sequence becomes second nature. If you want to spend your next Destin day on the water without the guesswork, the staff at Original Crab Island can set you up with the right rental and a straightforward local briefing before you leave the dock. Book your outing, follow these steps, and enjoy the afternoon.
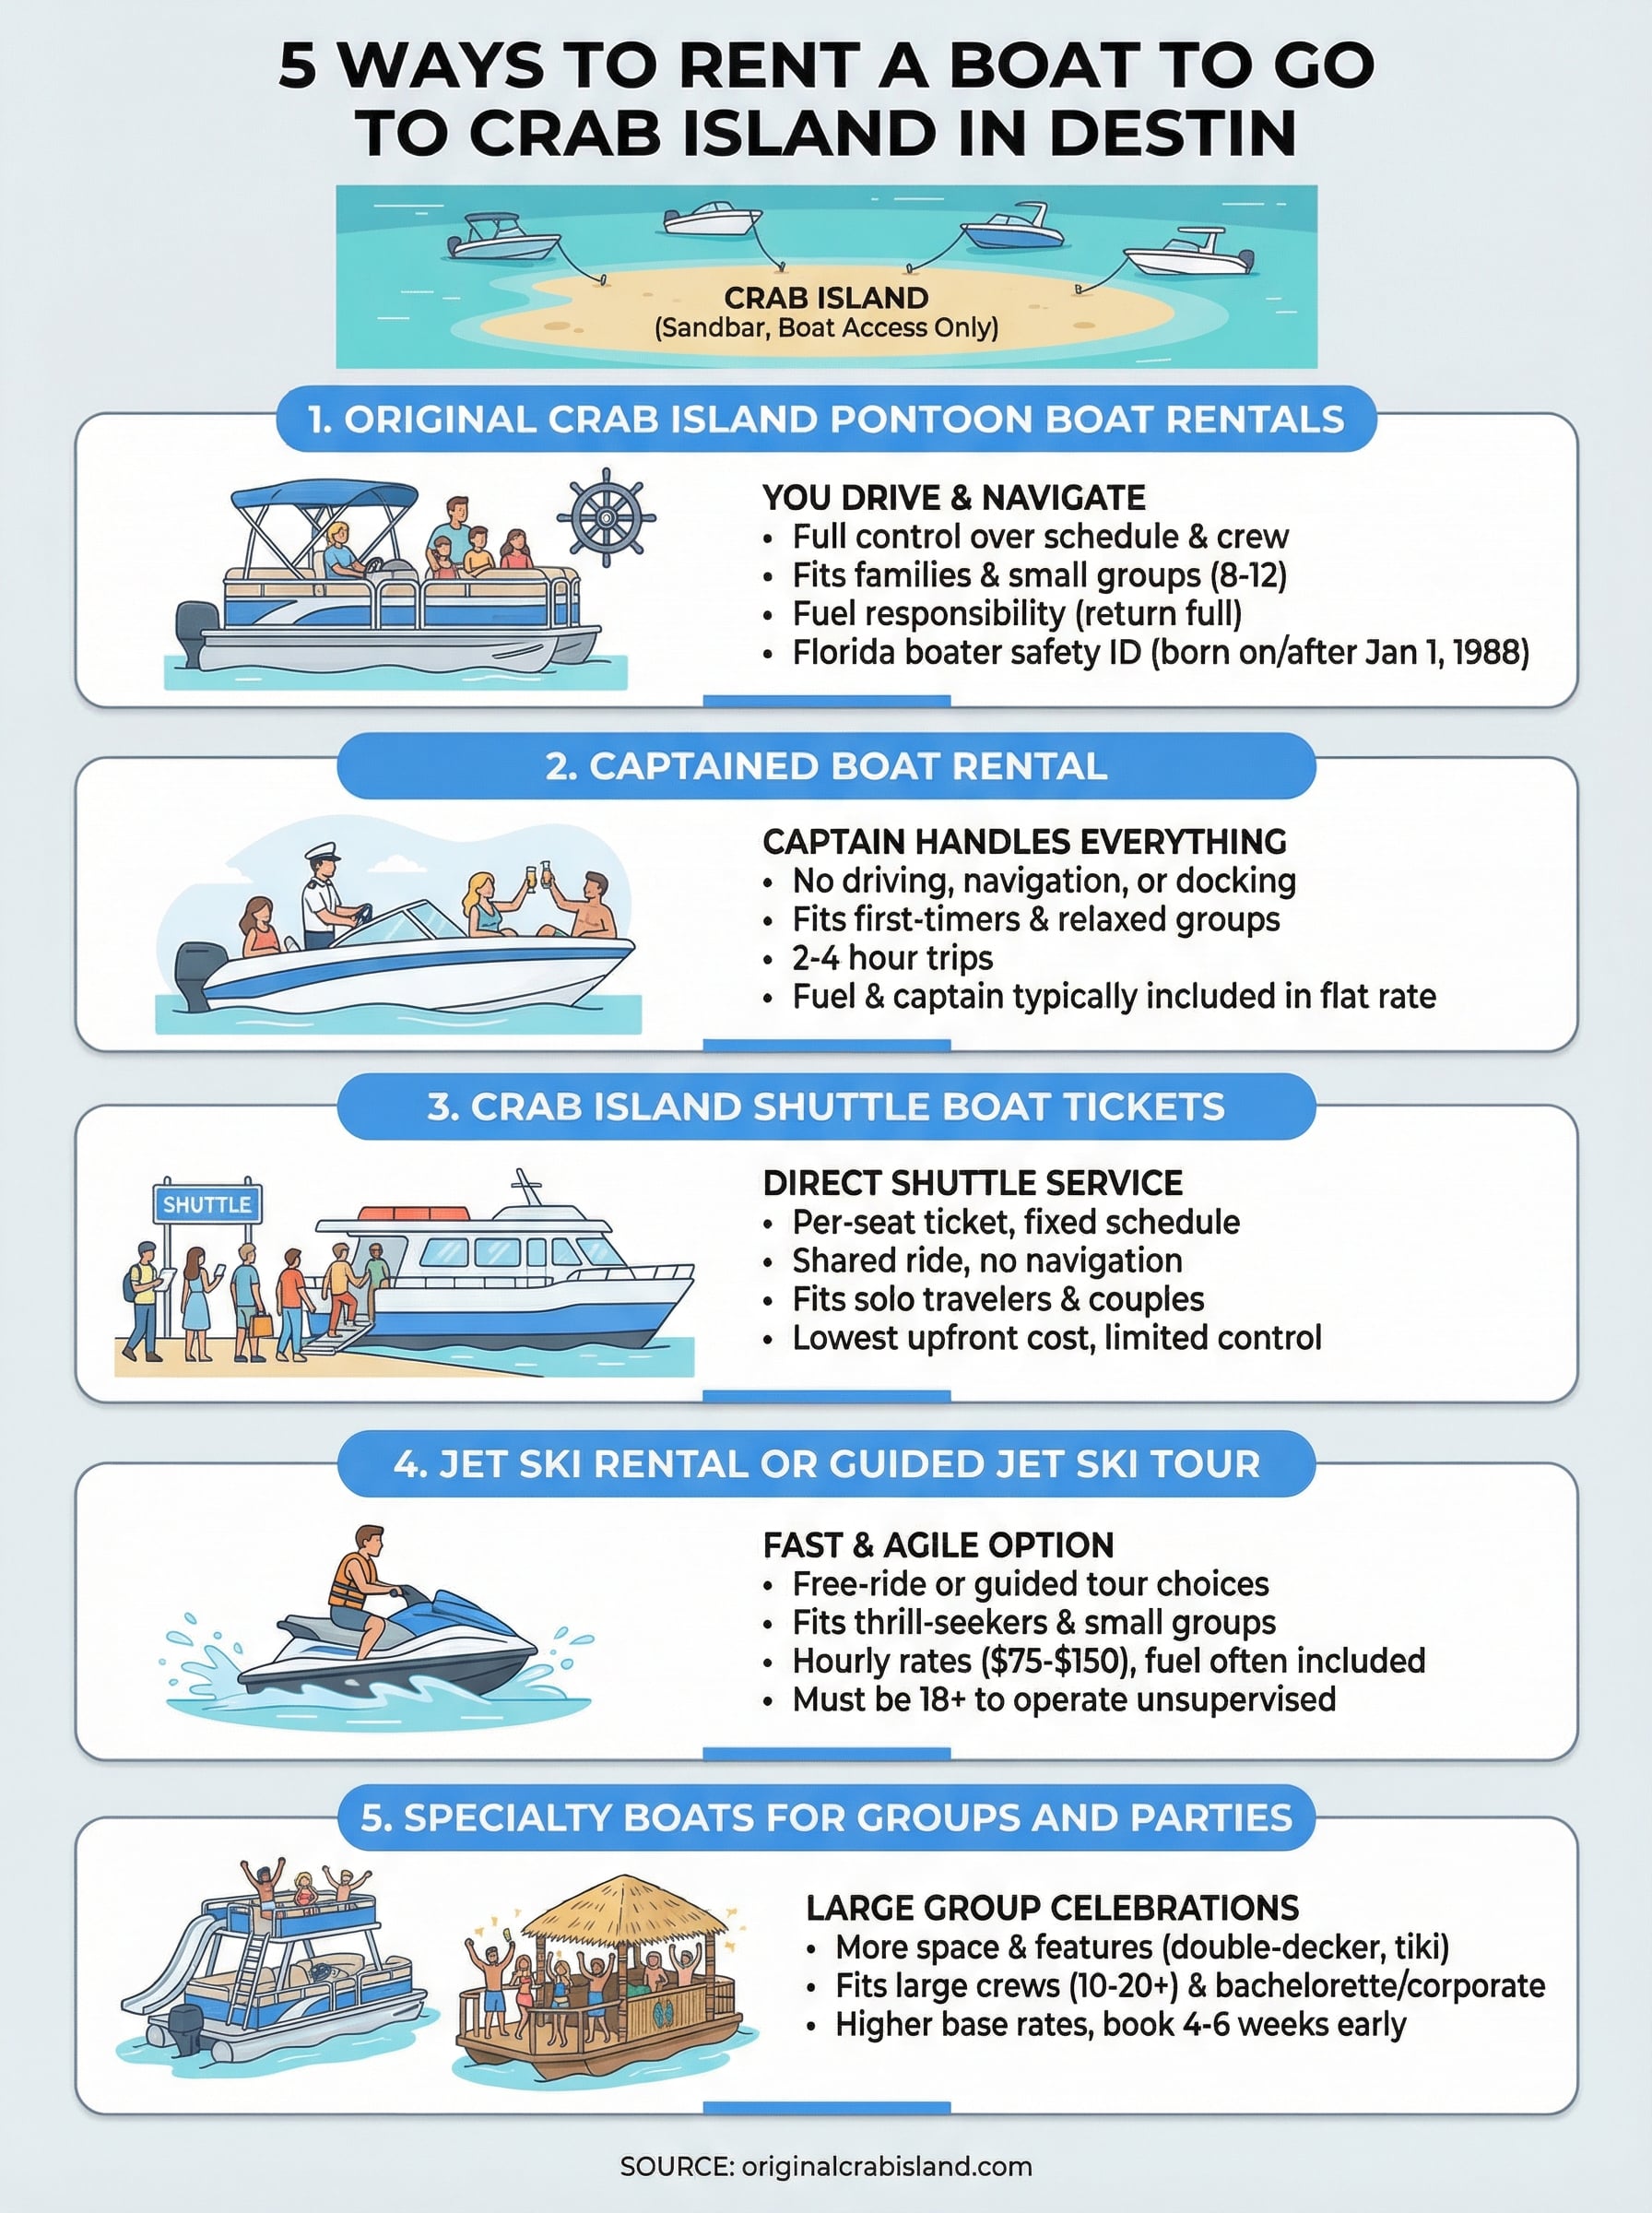
Crab Island isn’t actually an island, it’s a shallow sandbar in the Choctawhatchee Bay near Destin, Florida, and the only way to get there is by boat. Every spring and summer, thousands of people anchor up in waist-deep turquoise water to swim, float, and hang out. If you want to rent a boat to go to Crab Island, you’ve got more options than you probably realize, from bare-bones pontoon rentals to fully captained party boats.
At Original Crab Island, we help visitors get out on the water every single day. We offer pontoon rentals, jet skis, fishing charters, parasailing, and guided cruises, all launching from Destin. So we know the routes, the rental landscape, and what actually matters when you’re picking a boat for a Crab Island trip.
Below, we break down five solid ways to get to Crab Island by boat this year, including what each option costs, who it’s best for, and what to watch out for. Whether you’re planning a chill family afternoon or a full-blown bachelorette blowout, one of these options will fit.
1. Original Crab Island Pontoon Boat Rentals
Renting a pontoon from Original Crab Island is the most popular way to rent a boat to go to Crab Island on your own terms. You set the schedule, pick your crew, and stay as long as you want.
What You Get on a Typical Pontoon Rental
A standard pontoon rental gives you a stable, flat-deck boat with seating, a sun canopy, and a swim ladder. You get enough space to bring coolers, towels, and gear without feeling cramped. Most boats come pre-rigged and fueled at the start of your rental.
How the Rental Process Works from Check-In to Return
You arrive at the dock, sign your rental agreement and damage waiver, go through a brief orientation, and then you’re off. At return, staff inspect the boat and verify fuel levels. The whole check-in process usually takes about 20 minutes.
Who This Option Fits Best
This option works best for families, couples, and small friend groups who want full control over their day. If you’re comfortable reading water markers and following basic instructions, a self-guided pontoon is a natural fit.
Capacity, Comfort, and Add-Ons to Look For
Most pontoons seat 8 to 12 people, so confirm the exact capacity before booking. Ask about coolers, Bluetooth speakers, and life jackets when you reserve, since availability varies by vessel.
Pricing, Deposits, Fuel, and Damage Waivers Explained
Expect to pay a security deposit at check-in, which is held and released after inspection. Fuel is typically your responsibility, so return the tank at the same level you received it or pay a refueling fee.
Boater Safety Certificate Rules for Florida Renters
Florida law requires anyone born on or after January 1, 1988 to carry a valid boater safety ID card. You can complete the approved course online through the Florida Fish and Wildlife Conservation Commission at myfwc.com.
If you were born after 1988 and show up without your card, you will not be allowed to operate the boat.
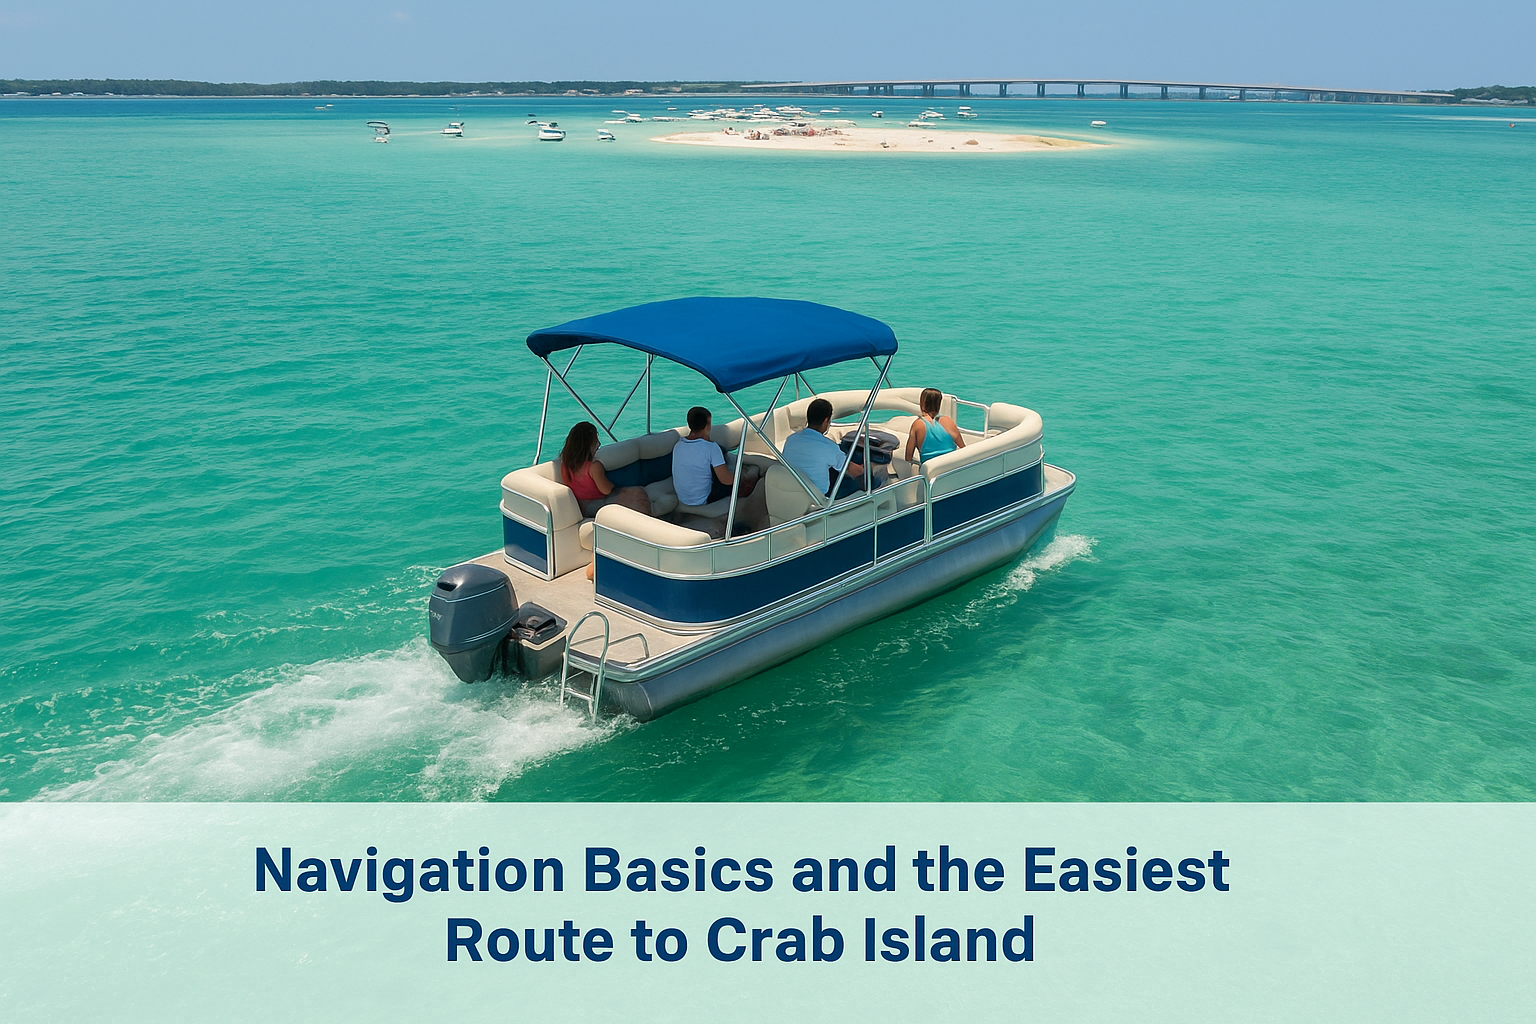
Navigation Basics and the Easiest Route to Crab Island
The sandbar sits just north of the Destin Bridge in the Choctawhatchee Bay. Staff walk you through the route during orientation, and the channel markers make it a straightforward 10-minute cruise from most Destin marinas.
2. Captained Boat Rental to Crab Island
A captained rental lets you rent a boat to go to Crab Island without touching the wheel once. Someone else handles every navigation decision so your group can relax from the moment you step onboard.
How a Captained Trip Works and What the Captain Handles
Your captain manages all navigation, anchoring, and docking at the sandbar. You board, point toward Crab Island, and let them handle the rest of the logistics while you enjoy the ride.
Who This Option Fits Best
This works well for first-time visitors and groups who want a smooth, low-stress outing. It also suits anyone who finds boat operation intimidating or who simply prefers to focus on the experience rather than the mechanics.
Typical Trip Lengths and What You Can Do at Crab Island
Most captained trips run two to four hours. At the sandbar, your group can swim, float with inflatables, and grab snacks from the floating food vendors that anchor nearby.
Floating vendors sell food, drinks, and snacks directly at the sandbar, so you do not need to haul a heavy cooler onboard.
Pricing Structure and What Is Usually Included
Expect flat-rate group pricing rather than a per-seat charge. Fuel and the captain’s time are typically bundled into one quoted rate, which makes budgeting straightforward.
Alcohol, Music, and On-Water Conduct Expectations
You can usually bring alcohol and a portable speaker, but your captain sets the specific rules for behavior onboard. Ask those questions directly before you finalize the booking.
What to Ask Before You Book a Captain
Confirm capacity limits, trip length, and the cancellation policy before you pay anything. Also ask whether life jackets and safety gear are provided or if you need to bring your own.
3. Crab Island Shuttle Boat Tickets
Shuttle boats give you a direct way to rent a boat to go to Crab Island without handling any navigation yourself. You buy a per-seat ticket, board at a set time, and a crew handles the rest.
How Shuttle Boats Work and What the Experience Feels Like
A shuttle runs on a fixed schedule between a Destin dock and the sandbar. You ride with other passengers, anchor at the sandbar, and hop in the water when you arrive.
Who This Option Fits Best
Shuttles work best for solo travelers and couples without a full group to split a rental with. This also suits anyone who wants no logistics beyond buying a ticket.
Typical Per-Seat Pricing and What Affects the Cost
Per-seat rates typically run $20 to $40 depending on the operator and trip length. Peak season and weekend departures tend to cost more than weekday runs.
Book your seat early in summer, since popular departure times sell out before the day of.
What You Can Bring Onboard and What Gets Restricted
Most shuttles allow small bags and personal items but restrict large coolers. Confirm the specific carry-on rules with your operator before you show up at the dock.
Timing, Meet-Up Location, and What Happens at the Sandbar
Shuttles generally leave from Destin Harbor on a rotating schedule throughout the day. At the sandbar, you swim, float, and buy snacks from floating food vendors anchored nearby.
Pros and Cons Versus Renting Your Own Boat
Shuttles cost less upfront and require zero boating experience, but you lose control of your schedule. A private rental lets you stay as long as you want and leave on your own timeline.
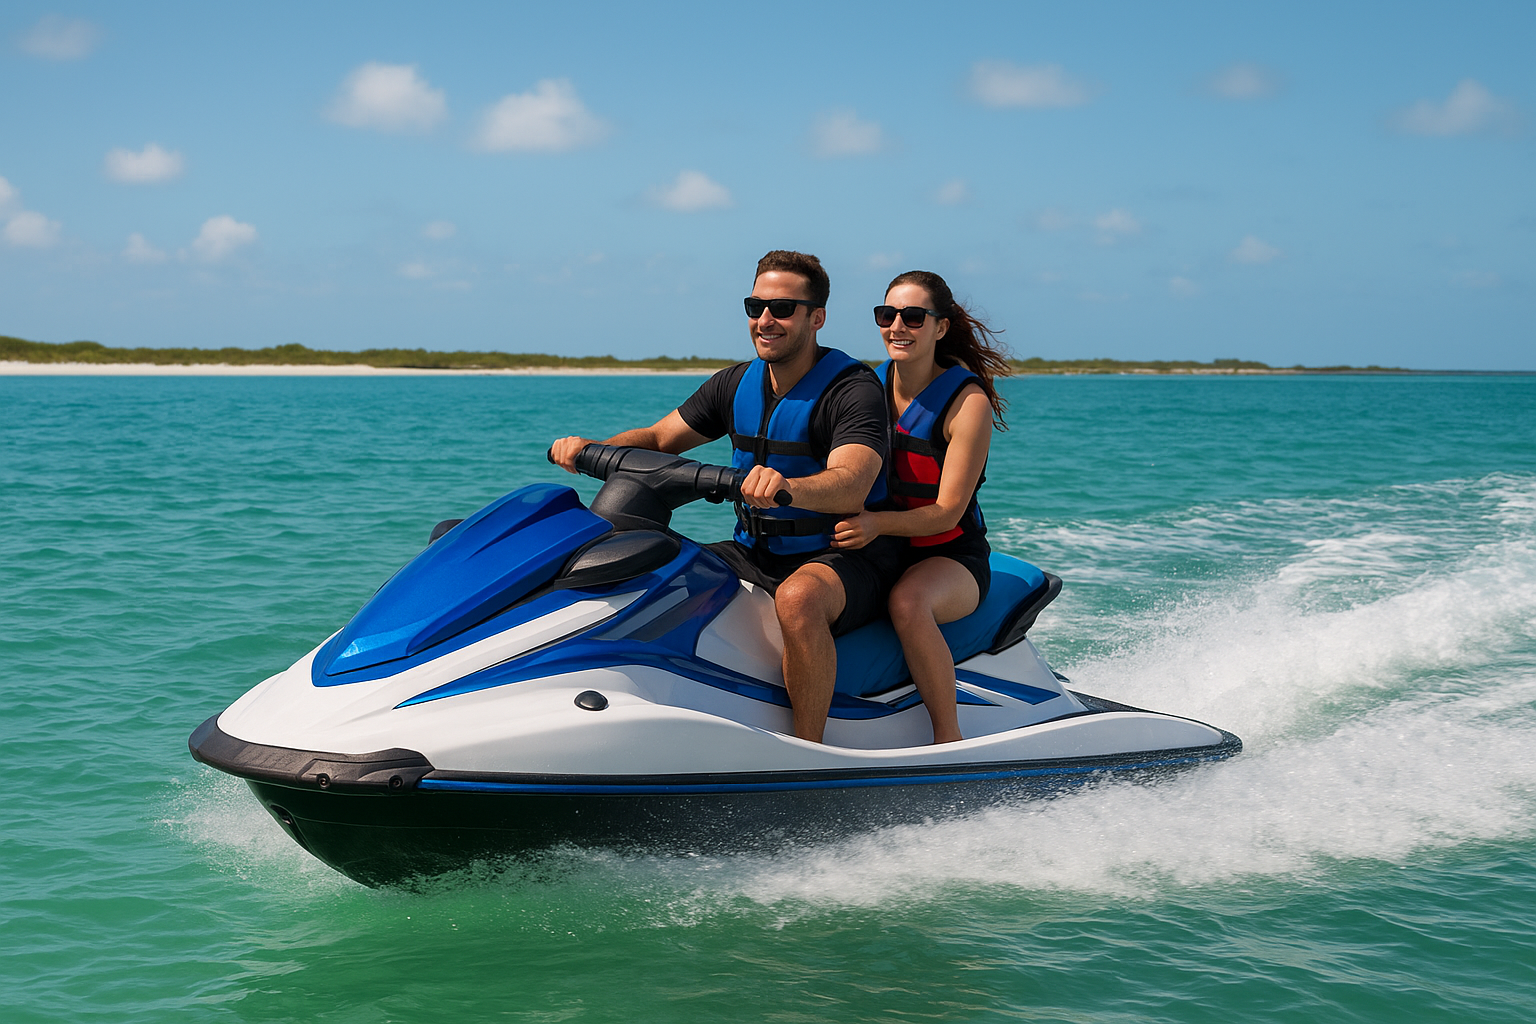
4. Jet Ski Rental or Guided Jet Ski Tour
A jet ski is a fast, direct option if you want to rent a boat to go to Crab Island with something smaller and more agile than a pontoon. You cover the same water route but with more speed and a very different feel on the water.
Choosing Between a Free-Ride Rental and a Guided Tour
A free-ride rental hands you a key and lets you explore on your own schedule. A guided tour pairs you with an instructor who leads the group along a set route, including a stop at the sandbar.
Who This Option Fits Best
Jet skis work best for thrill-seekers and smaller groups who want speed over seating capacity. Guided tours fit first-time riders who want instruction and structure built into the experience.
Typical Pricing and What Is Included
Rentals typically run $75 to $150 per hour per ski, while guided tours bundle the guide’s time and a set route into one flat rate. Fuel is usually included in both formats.
Always confirm whether the quoted price covers fuel before you hand over a deposit.
Age Rules, Licensing, and Rider Requirements
Riders must be at least 18 years old to operate a jet ski in Florida without supervision. Valid government-issued ID is required at check-in, so bring yours to the dock.
Safety Tips for the Pass, Wakes, and Changing Conditions
Keep a safe following distance from other boats near the pass and slow down in congested areas. Bay conditions can shift quickly, so check posted flag warnings before you head out.
What to Bring and How to Keep Valuables Dry
Wear water shoes and a properly fitted life jacket throughout your ride. A waterproof dry bag or phone case protects your cash, cards, and phone from splash and submersion.
5. Specialty Boats for Groups and Parties
If you’re planning a celebration or a large group outing, specialty boats give you more space and more features than a standard pontoon. These are the go-to choice when you want to rent a boat to go to Crab Island with a crew of 10 or more.
Popular Options Like Double-Decker Pontoons and Tiki Boats
Double-decker pontoons add an upper deck for jumping and sunbathing, while tiki boats bring themed seating and shade structures that make the whole trip feel like an event before you even anchor.
Who This Option Fits Best
Specialty boats work best for bachelorette parties, bachelor parties, and corporate groups that want exclusive use of the vessel. Your group gets the whole boat for the full rental window with no strangers onboard.
Capacity Limits, Comfort Features, and Must-Have Gear
Most specialty boats hold 12 to 20 passengers depending on the model. When comparing options, look for:
Built-in coolers and storage
Bluetooth sound systems
Shade canopies and seating for every passenger
Typical Pricing and What Drives the Total Cost
Base rates run higher than standard pontoons, with the final number shaped by boat size, rental length, and add-ons. Captain fees, fuel, and cleaning deposits can all push the total up.
Get a fully itemized quote in writing before you hand over any deposit.
Rules to Know for Party Vibes Without Getting Fined
Open container laws and noise rules apply on the water just like they do on land. Your operator reviews the conduct rules at check-in, so pay attention during that briefing.
Booking Tips for Peak Season and Large Groups
Reserve four to six weeks out during summer since specialty boats sell out fast. Confirm your exact headcount and any special requests in writing when you lock in your date.
Quick Recap and Next Steps
You now have five clear ways to rent a boat to go to Crab Island, each built for a different kind of trip. Pontoon rentals give you full control over your schedule and your crew, while captained trips and shuttle boats handle all navigation so your group can relax from the first minute. Jet skis work for thrill-seekers who want speed and agility on the water, and specialty boats cover large groups, bachelorette parties, and corporate events with the extra space and comfort they need.
Your best pick comes down to your group size, your budget, and how much responsibility you want on the water. If you’re ready to lock in a date before summer fills up, Original Crab Island offers pontoon rentals, jet skis, parasailing, and guided cruises all launching from Destin. Book directly and get your crew on the water without the guesswork.
Picking the best wakeboard bindings for beginners can feel overwhelming when you’re staring at dozens of options with unfamiliar specs and jargon. But here’s the thing, bindings are arguably the most important piece of wakeboard gear you’ll buy. They’re your direct connection to the board, and the wrong pair can make learning harder (or downright painful).
At Original Crab Island, we spend every day getting people out on the water in Destin, Florida, from pontoon cruises to jet ski adventures. We see firsthand how the right equipment transforms a beginner’s experience, especially when it comes to towed water sports like wakeboarding. That hands-on perspective is exactly what shaped this guide.
Below, we break down five beginner-friendly wakeboard bindings worth your money in 2026, plus a buying guide covering fit, flex, closure systems, and everything else you need to know before checkout.
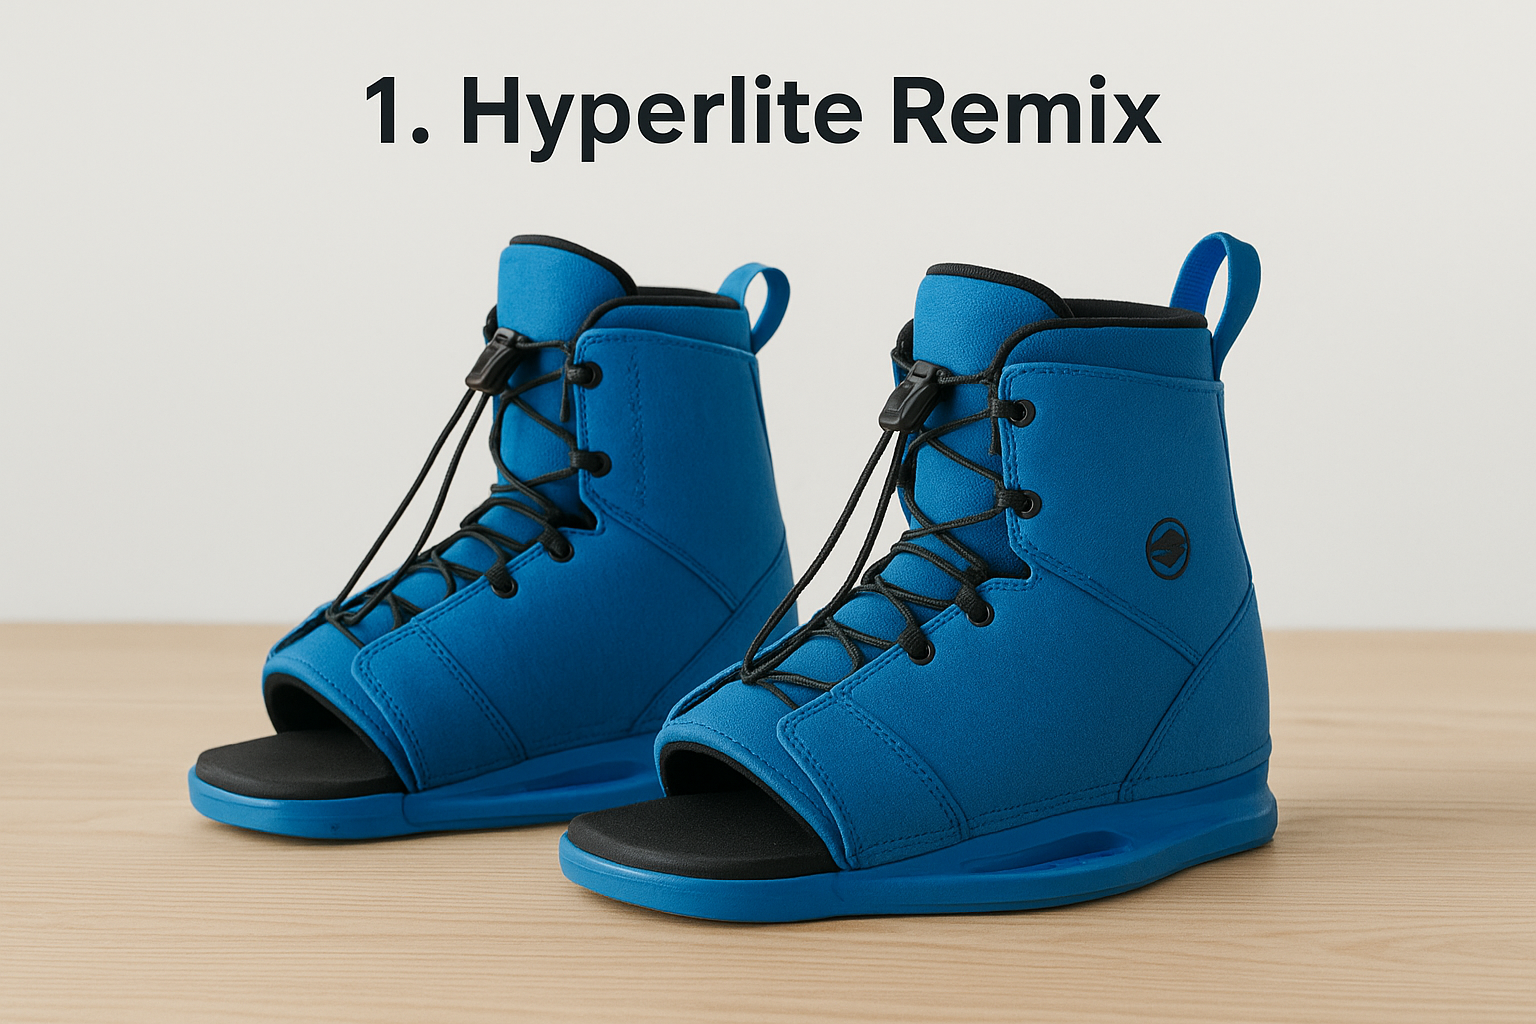
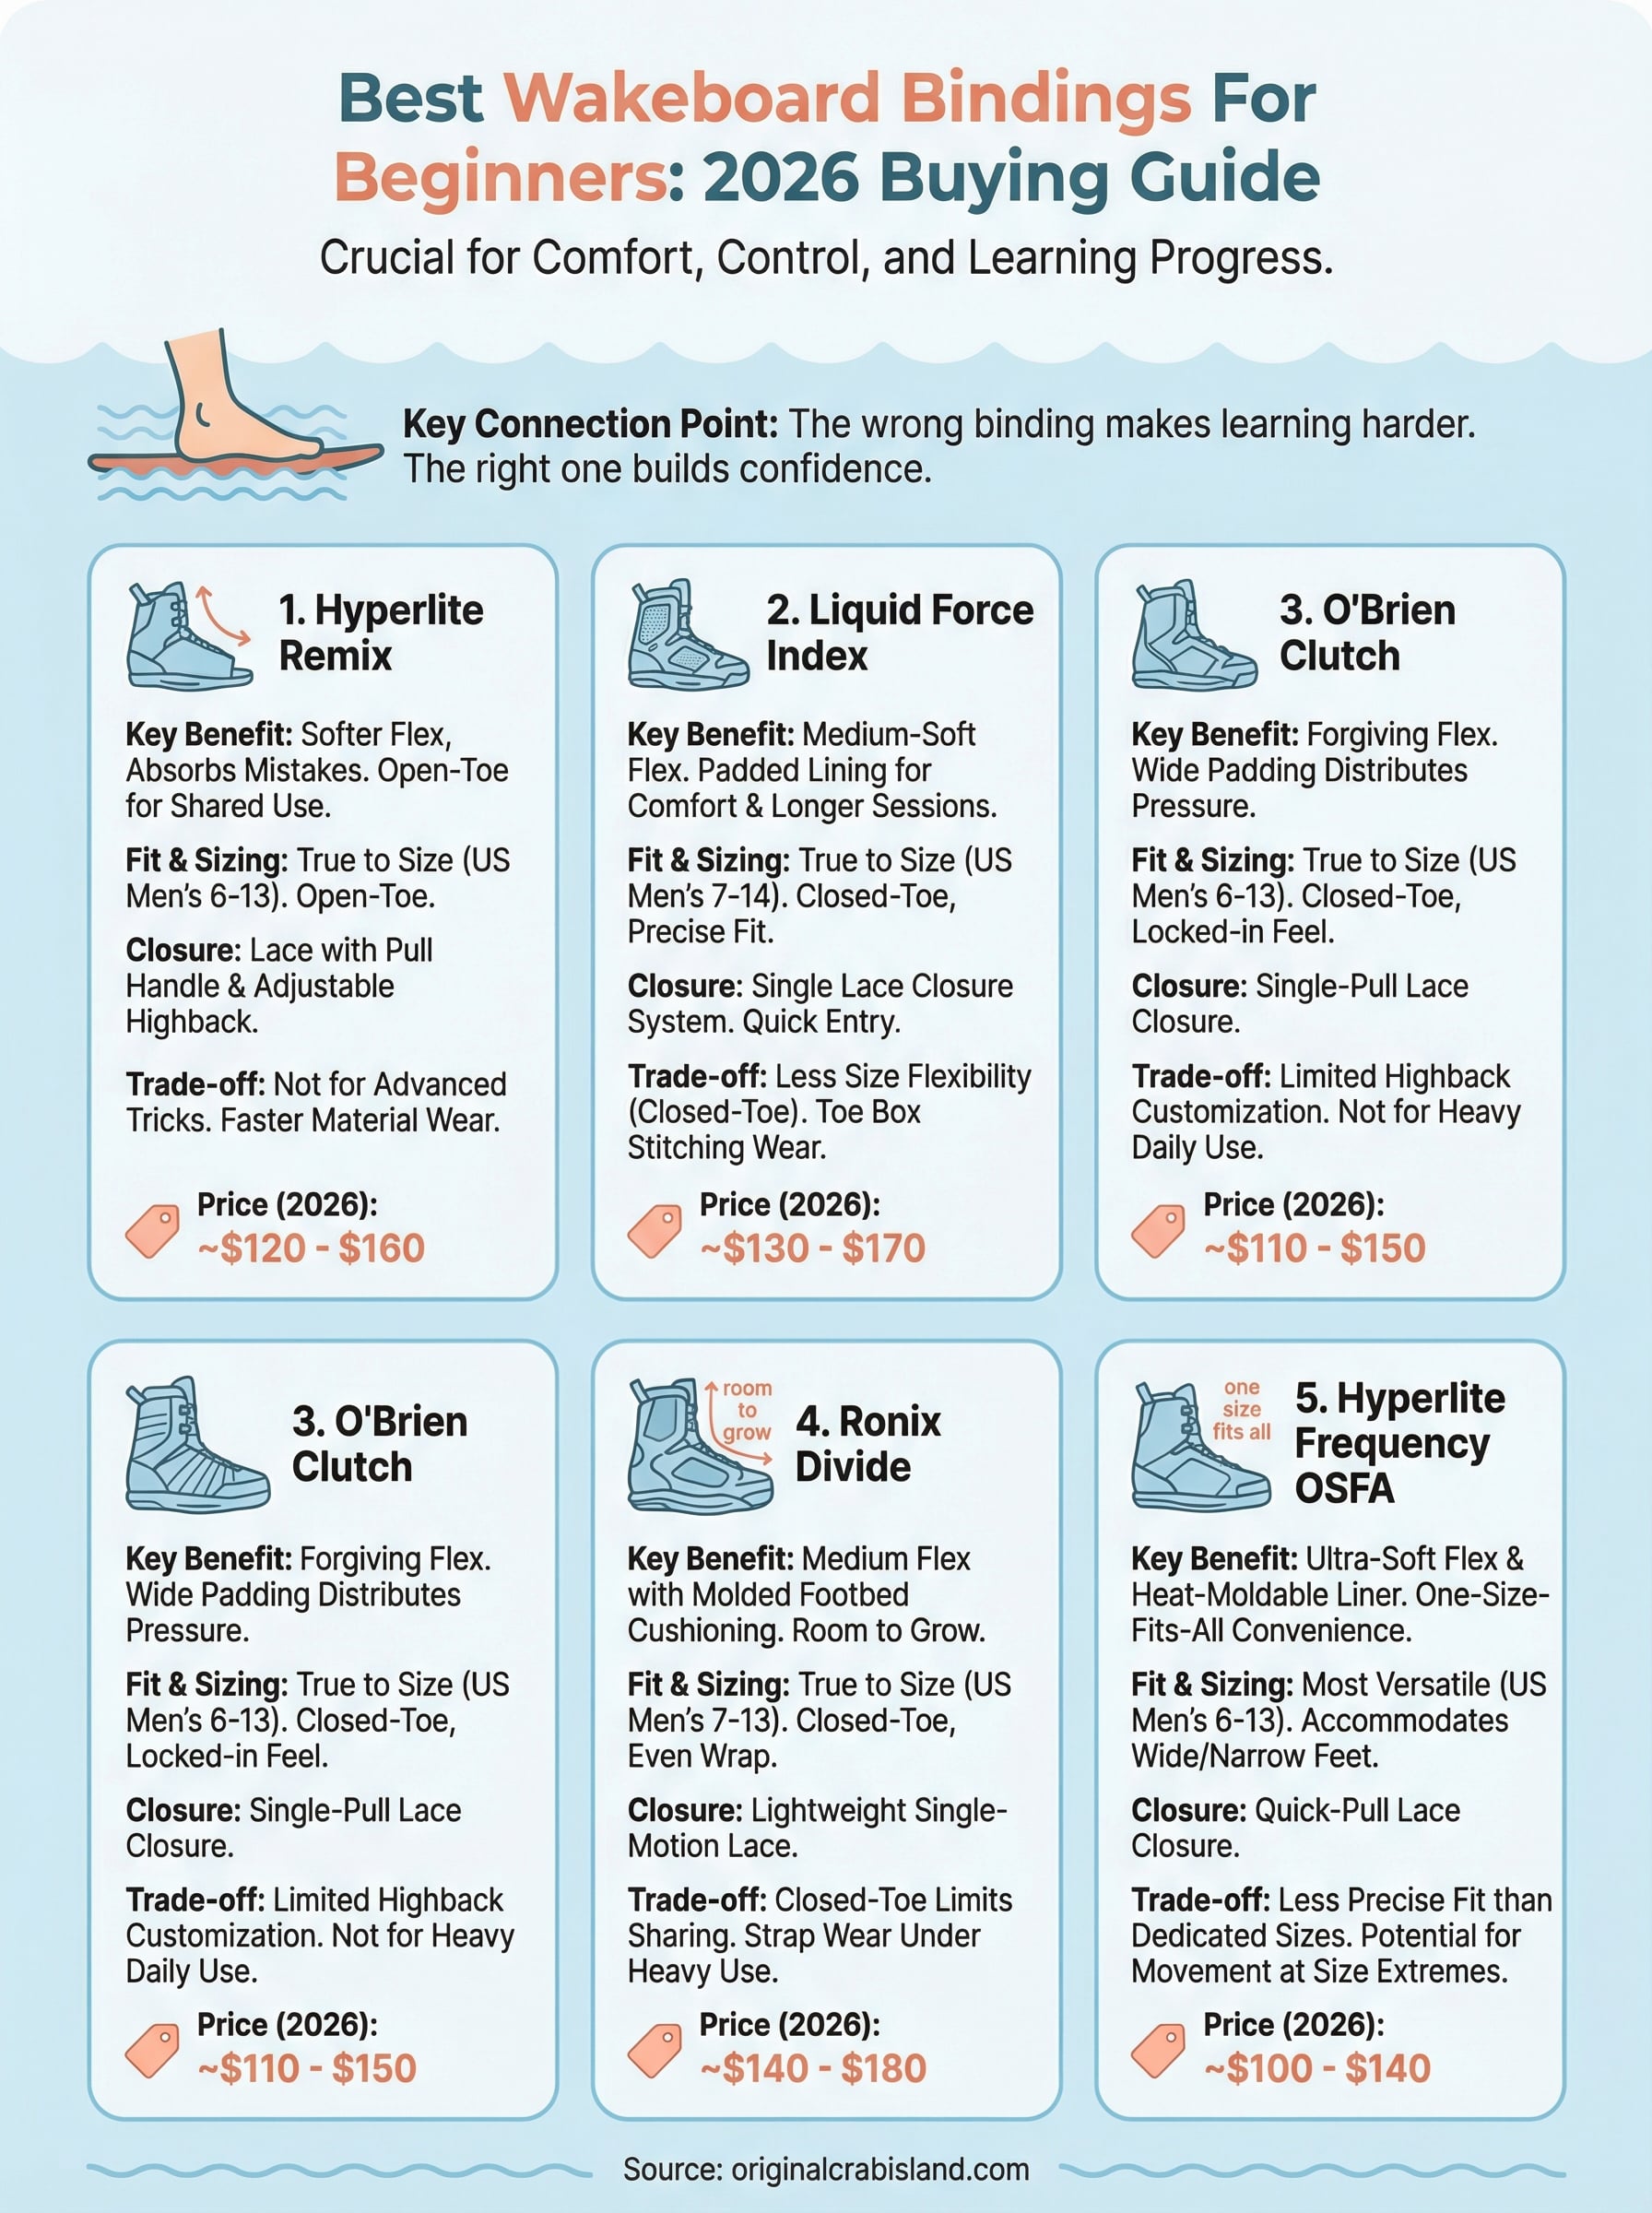
1. Hyperlite Remix
The Hyperlite Remix consistently ranks among the best wakeboard bindings for beginners, and for good reason. It strikes a practical balance between comfort, support, and affordability that most entry-level riders need while they’re still figuring out stance and style on the water.
Why beginners like it
Hyperlite built the Remix with a softer flex rating, which is exactly what new riders benefit from. A stiffer binding punishes small mistakes; a softer one absorbs them. The open-toe design also means you can share the binding across different foot sizes, making it ideal for group outings or family trips where multiple people want a turn on the board.
A softer flex binding reduces fatigue and lets you focus on technique rather than fighting your gear.
Fit and sizing notes
Sizing runs true to your standard shoe size, so order with confidence. The Remix covers US men’s sizes 6 through 13 depending on the size option you select, and the open-toe construction gives extra room for wider feet without sacrificing lateral support.
Ease of entry and adjustment
Getting in and out of the Remix takes seconds. Lace-style closure with a pull handle lets you tighten the binding evenly across your foot without repeatedly bending over at the water’s edge. The adjustable highback also lets you dial in your forward lean as your skills develop.
Trade-offs to know before you buy
One limitation worth knowing is that the Remix is not built for advanced tricks or heavy landings. If you plan to progress quickly into kickers and rails, you may outgrow it within a season or two. Softer materials also wear faster under heavy use compared to mid-range or performance-tier bindings.
Typical price range in 2026
Expect to pay $120 to $160 for a new pair. Sales and bundle deals occasionally pull that price closer to $100, especially mid-season.
2. Liquid Force Index
The Liquid Force Index earns its spot among the best wakeboard bindings for beginners with a well-rounded design that prioritizes comfort without sacrificing enough structure to actually support your riding.
Why beginners like it
The Index features a medium-soft flex that rewards riders still developing balance and edge control. Padded interior lining cushions your foot on longer sessions, which matters when you’re falling and re-entering the water repeatedly.
Adequate padding reduces foot fatigue, letting you stay on the water longer and build skills faster.
Fit and sizing notes
Sizing runs true to shoe size, and the Index is available in men’s sizes 7 through 14. The closed-toe design provides a snug, precise fit that many beginners find more confidence-building than open-toe options.
Ease of entry and adjustment
Liquid Force uses a single lace closure system on the Index, so you adjust fit in one motion. Getting in and out is quick and consistent every session.
Trade-offs to know before you buy
The closed-toe design means fit is less flexible across different foot sizes, so the Index works better for a dedicated rider than a shared setup. Stitching around the toe box can also show wear after a heavy season of frequent use.
Typical price range in 2026
New pairs typically sell for $130 to $170. Watching for end-of-summer clearance sales can bring that price down noticeably.
3. O’Brien Clutch
The O’Brien Clutch delivers solid performance at a price point that makes it one of the more accessible options among the best wakeboard bindings for beginners. O’Brien’s long history in towed water sports shows in how well this binding handles the basics without overcomplicating things.
Why beginners like it
The Clutch uses a forgiving flex profile that absorbs water impact on falls and keeps your feet comfortable across longer sessions. Wide interior padding distributes pressure evenly, so you avoid hotspots even when your form is still developing.
Consistent comfort during early sessions helps you focus on learning rather than managing foot pain.
Fit and sizing notes
The Clutch runs true to shoe size and fits men’s sizes 6 through 13. Its closed-toe construction gives you a secure, locked-in feel that builds confidence when you’re learning to edge the board.
Ease of entry and adjustment
O’Brien uses a lace closure system that tightens with a single pull. You can adjust fit quickly from the water without fumbling, which keeps your sessions moving.
Trade-offs to know before you buy
The Clutch offers limited customization on the highback angle, which can feel restrictive as your riding style develops. Overall durability is solid for casual use but not ideal for riders who get on the water five or more days per week.
Typical price range in 2026
New pairs run $110 to $150, making the Clutch one of the more budget-friendly picks on this list.
4. Ronix Divide
The Ronix Divide brings a level of quality engineering to an entry-level price point that few bindings on this list can match. It stands out among the best wakeboard bindings for beginners because Ronix designed it specifically for riders who want room to grow without buying a second pair after their first season.
Why beginners like it
The Divide uses a medium flex construction that supports your ankle without locking you into one riding style. Molded footbed cushioning absorbs impact from water landings, which adds up quickly when you’re still learning to ride clean.
A medium flex binding gives you enough forgiveness to survive beginner mistakes while offering enough structure to develop proper edging technique.
Fit and sizing notes
Sizing runs true to shoe size, with closed-toe coverage from men’s US size 7 through 13. The interior liner wraps your foot evenly, reducing pressure points on longer sessions.
Ease of entry and adjustment
Ronix uses a lightweight lace closure system that pulls tight in a single motion. Adjusting fit between riders or after a fall takes under 30 seconds.
Trade-offs to know before you buy
The Divide’s closed-toe design limits size sharing, so it works best for one dedicated rider. Strap durability holds up well for casual use but shows wear faster under daily heavy sessions.
Typical price range in 2026
New pairs sell for $140 to $180 depending on the retailer and time of year.
5. Hyperlite Frequency OSFA
The Hyperlite Frequency OSFA stands out among the best wakeboard bindings for beginners because of one practical advantage: its one-size-fits-all construction. If you share gear with family or rotate riders during group sessions, this binding removes the sizing problem entirely.
Why beginners like it
Hyperlite built the Frequency OSFA around an ultra-soft flex profile and a heat-moldable liner that shapes to your foot after a few sessions. That personalized fit reduces pressure points without requiring you to spend extra on a custom binding.
A heat-moldable liner delivers a custom feel at an entry-level price.
Fit and sizing notes
The OSFA design covers men’s US sizes 6 through 13, making it the most versatile sizing option on this list. Riders with wider or narrower feet both tend to find a workable fit.
Ease of entry and adjustment
Hyperlite includes a quick-pull lace closure that tightens evenly in a single motion. You can re-enter the binding quickly even with wet hands between runs.
Trade-offs to know before you buy
The one-size build sacrifices some precision fit compared to a dedicated-size binding. Riders at the outer ends of the size range may notice slightly more movement than they’d prefer.
Typical price range in 2026
New pairs run $100 to $140, placing the Frequency OSFA at the most affordable end of this list.
Your next step on the water
You now have a clear picture of the best wakeboard bindings for beginners across five solid options at different price points. Whether you go with the affordable Hyperlite Frequency OSFA for shared group sessions or the Ronix Divide for dedicated personal use, any of these bindings will serve you well through your first season on the board.
Gear is only part of the equation. Getting on the water regularly, in conditions you actually enjoy, matters just as much as what you strap onto your feet. If you want to experience wakeboarding and other water activities on one of the most iconic stretches of water on the Gulf Coast, Destin is the place to do it. Check out everything Original Crab Island offers, from rentals to guided experiences, and start planning your time on the Emerald Coast today.
If you’re planning a trip to Destin’s waterfront, HarborWalk Marina Destin sits right at the center of the action. It’s the jumping-off point for fishing charters, boat rentals, dolphin cruises, and just about every on-the-water activity the Emerald Coast has to offer. Whether you’re fueling up a boat, grabbing bait for a morning trip, or just figuring out where to park and what to do, this marina is likely part of your itinerary.
We run Original Crab Island out of the Destin area, so we know this marina and the surrounding waterfront well. Our pontoon rentals, jet ski tours, parasailing flights, and fishing charters all operate in the same waters, and many of our guests start their day right here at the harbor. That firsthand experience is exactly what we’re pulling from in this guide. No recycled tourist brochure info, just practical details from people who are on these docks regularly.
This article covers everything you need to know before visiting: slip reservations, fuel availability, rental options, parking logistics, nearby restaurants, and tips that’ll save you time and money in 2026. If you want a clear picture of what HarborWalk Marina offers and how to make the most of it, you’re in the right place. Let’s get into the specifics that actually matter for your trip.
What HarborWalk Marina is and where it sits in Destin
HarborWalk Marina is Destin’s primary full-service marina, located at 10 Harbor Boulevard along the Destin Harbor. It sits on the north side of the harbor, facing open water, and acts as the central hub for commercial and recreational boating in the area. When people talk about the Destin waterfront, they almost always mean this stretch of docks, restaurants, and charter boats. Understanding where it sits and how it’s laid out helps you plan your time there far more efficiently.
The physical location and layout
The marina sits at the eastern end of the Destin Harbor, directly accessible from Highway 98. You’ll find it tucked between the Destin Bridge to the east and the main harbor channel to the west. The address, 10 Harbor Boulevard, is easy to punch into any GPS, and the waterfront development that surrounds it lines the south side of the harbor.
Physically, HarborWalk is larger than most first-time visitors expect. You’re looking at hundreds of wet slips, a long boardwalk lined with restaurants and retail shops, multiple charter boat staging areas, and a fuel dock that serves both private and commercial vessels. The whole complex spans several hundred feet of waterfront, and walking the main boardwalk end to end at a comfortable pace takes a solid 20 minutes.
The boardwalk itself is public, so even if you’re not renting or chartering anything, you can walk it freely and watch boats move in and out of the harbor throughout the day.
How the harbor geography shapes your experience
Destin Harbor is a natural inlet that connects to Choctawhatchee Bay on the north and runs out to the Gulf of Mexico through East Pass to the south. This geography explains why harborwalk marina destin holds such a practical position. Boats leaving from these docks follow a short, protected route through calm harbor water before reaching open Gulf conditions, making it a logical launch point for everything from half-day fishing trips to full-day offshore runs.
Water inside the harbor stays calm compared to the open Gulf, which matters when you’re boarding a large charter boat or loading gear for a full-day trip. Wind and wave exposure is minimal here, so departures stay smooth even on days when conditions outside East Pass are rough. That’s one reason most fishing charters, dolphin tours, and sightseeing cruises stage out of this marina rather than from a Gulf-side ramp.
What surrounds the marina on land
On either side of the docks, you’ll find a dense cluster of restaurants, bars, retail shops, and entertainment venues that make up the broader HarborWalk Village. Dining options range from casual waterfront spots to sit-down seafood restaurants, and most face the water so you get harbor views with your meal.
Beyond the village itself, you’re a short drive or walk from downtown Destin, Henderson Beach State Park, and the shopping corridor along Highway 98. If you rent a bike, the trail along Scenic 98 connects the marina area to several nearby beaches and neighborhoods without putting you on a busy road. That proximity to other destinations is a real practical advantage: you can book a morning charter, grab lunch on the boardwalk, and drive five minutes to the beach for the afternoon without losing much time between activities.
Crab Island, the famous shallow sandbar just northwest of the Destin Bridge, is also less than a ten-minute boat ride from HarborWalk. That short distance is exactly why so many visitors use this marina as their base for a full day on the water. Everything you’d want to do on the Emerald Coast sits within easy reach of these docks.
Why HarborWalk Marina matters for a Destin trip
Most visitors arrive in Destin knowing they want to get on the water, but they don’t always know where to start. HarborWalk Marina solves that problem by putting nearly everything you need in one accessible location. Fishing charters, dolphin tours, boat rentals, fuel, food, and gear all sit within a short walk of each other, so you spend less time hunting for services and more time actually enjoying your vacation.
One place for everything on the water
When you’re coordinating a trip for a family or a group, the logistics of managing multiple stops across a spread-out beach town get complicated fast. HarborWalk Marina concentrates the most useful services in a single stretch of waterfront. You can book a morning fishing charter, pick up live bait from the ship store, fuel the boat, and grab coffee from a harbor-side cafe without moving your car once.
That kind of consolidation matters especially if you’re working with a limited vacation window and don’t want to waste an hour just getting set up.
This is also where most of the major commercial charter operators in Destin stage their boats. That’s not by accident. The marina’s access to East Pass and the Gulf of Mexico makes it the most efficient departure point for offshore and nearshore trips alike. When you book through any reputable local operator, the pickup point will almost always bring you back to harborwalk marina destin.
The time savings add up quickly
Vacation days in Destin are short when you factor in travel, meals, and downtime. Every minute you spend navigating to a different dock or tracking down a boat that launched from a random ramp is a minute you’re not on the water. Using the marina as your anchor point cuts that wasted time down considerably.
The concentration of services also creates a practical backup if something falls through. If a charter cancels due to weather, you’re standing in the middle of a waterfront with multiple alternative operators, rental options, and activity providers within sight. You’re not stuck at a remote ramp with no good options. That flexibility has real value when Destin’s weather shifts quickly, which it does regularly during summer afternoons.
For visitors who aren’t boaters themselves, the marina’s restaurant row and boardwalk also give non-participants something worth doing while the rest of the group is on the water. Nobody has to sit in the car waiting for a group to return from a charter.
What you can do at HarborWalk Marina
HarborWalk Marina Destin packs a wide range of activities into a compact waterfront footprint. Whether you came to Destin specifically for fishing or you’re just looking to fill a free afternoon with something worth doing, the marina and the village attached to it give you genuine options. You don’t need a boat reservation to have a good time here, though having one certainly helps.
Fishing, boating, and on-the-water activities
Fishing charters are the most popular draw at the marina, with dozens of operators running half-day, full-day, and overnight offshore trips out of these docks. You can book trips targeting nearshore species like amberjack and cobia or go further offshore for tuna, mahi-mahi, and wahoo depending on the season. The proximity to East Pass means boats clear the harbor and reach productive water faster than from most other Gulf Coast launch points.
Beyond fishing, you’ll find dolphin cruises, sightseeing tours, and watersports vendors all operating out of the same stretch of docks. If you want to handle a boat yourself rather than go with a guided trip, rental operators nearby can set you up with a pontoon, jet ski, or deck boat for a few hours. Parasailing is also available right off the waterfront, and the views over the harbor and out toward the Gulf are worth it if you’ve never gone up before.
Crab Island sits less than ten minutes by boat from the marina, which makes this the most practical starting point for anyone planning a sandbar day.
Dining, shopping, and waterfront time
HarborWalk Village lines the boardwalk with enough restaurants and bars to handle any meal of the day. Seafood dominates the menus, but you’ll also find casual spots serving sandwiches, burgers, and drinks if the group has picky eaters. Several places have outdoor seating that faces the harbor, so you can watch charter boats return with their catch while you eat.
Retail shops along the boardwalk sell fishing gear, sunscreen, beach clothes, and souvenirs, which is genuinely useful if you forgot something at your rental or need to pick up supplies before heading out. Even if you don’t buy anything, walking the boardwalk and watching boats move in and out of the harbor throughout the day makes for a relaxed way to spend time between activities. Non-boaters in your group can stay comfortable here without feeling like they’re missing out on the day.
Rentals, charters, and tours you can book nearby
The area surrounding harborwalk marina destin gives you access to more rental and charter options than most people realize before they arrive. Operators line the waterfront, and the concentration of choices means you can compare what’s available, ask questions, and book on the same day without much hassle. Knowing what categories of services exist before you show up helps you move faster and spend more time on the water.
Boat and watercraft rentals
Pontoon boats are the most popular rental choice for families and groups, and several operators near the marina offer them by the half-day or full day. A pontoon gives you the flexibility to cruise out to Crab Island, anchor in the shallows, and spend the afternoon without committing to a guided trip. If you want higher speeds and a more active experience, jet ski rentals are available close to the docks as well, with hourly rates that work well even for shorter visits.
Deck boats and smaller powerboats round out the rental inventory if your group wants something between a pontoon and a jet ski. Most rental operators require a valid boater’s safety certification or a brief orientation before they hand you the keys, so factor that into your morning timeline if you’re booking early.
Renting a boat from a provider you can physically visit the day before, rather than booking blindly online, lets you inspect the equipment and ask direct questions about current water and weather conditions.
Fishing charters and guided trips
Half-day fishing charters departing from near the marina typically target nearshore reefs and artificial structures holding amberjack, grouper, and snapper. Full-day and offshore trips push further into the Gulf after larger species like mahi-mahi and wahoo, with departure times usually falling between 6 and 7 in the morning to maximize fishing hours. Most charter boats include gear, bait, and fish cleaning in the quoted price, so confirm what’s covered before you pay to avoid surprises.
Dolphin cruises, parasailing, and group packages
Dolphin cruises run multiple times daily and work well for families with younger kids or anyone who wants a relaxed two-hour trip without the commitment of a fishing charter. Parasailing operators also stage their boats right off the waterfront, offering tandem and solo flights over the harbor and Gulf with views that stretch across the Emerald Coast. If you’re organizing a bachelor or bachelorette party, a corporate outing, or a sunset cruise, several operators in this area offer packaged group experiences that bundle transportation, drinks, and onboard guides into a single booking.
Fuel, bait, and the ship store: what to expect
Before you leave the dock, you want to know whether the marina can handle your fuel, bait, and last-minute supply needs without sending you across town. HarborWalk Marina Destin handles all three in one place, which saves you real time on mornings when a charter or rental has you working against a clock. Knowing what the fuel dock and ship store carry before you show up means you arrive prepared rather than scrambling.
Fueling up at the dock
The marina’s fuel dock serves both gasoline and diesel, which covers the full range of recreational vessels you’re likely to bring or rent in Destin. Boats pull directly up to the fuel dock, and attendants are typically on hand during peak hours to assist with the pump and answer basic questions about the harbor. Fuel prices at the dock run slightly higher than what you’d pay at a land-based station, which is standard at any full-service marina, so top off your tank before you arrive if you’re trailering a boat in from out of town.
If you’re renting rather than captaining your own boat, the rental operator handles fueling, so you don’t need to visit the fuel dock at all.
Bait and tackle availability
The ship store stocks live and fresh-cut bait for anglers running nearshore and offshore trips out of the harbor. You’ll find shrimp, pinfish, and cigar minnows available depending on the season, along with frozen options if live bait is sold out during busy summer weekends. Arriving early in the morning gives you the best shot at securing the live bait you want before charter crews and other early risers clean out the supply.
What the ship store carries
Beyond bait, the ship store functions as a practical supply point for boaters who forgot something or need a quick restock before heading out. Ice, drinks, sunscreen, basic fishing tackle, and rigging supplies are all typically on the shelves. You won’t find the selection of a full marine outfitter here, but for common items that people forget or run out of, the store handles it without requiring you to leave the waterfront.
Prices inside the store reflect the convenience premium you pay at any marina-side shop, so stock your cooler at a grocery store the night before if you’re feeding a large group for a full day on the water. For small essentials and last-minute needs, though, having the store right there at the dock is worth more than the markup.
Slips, reservations, and boater essentials
If you’re arriving at harborwalk marina destin on your own vessel, securing a slip ahead of time is the single most important step you can take before leaving home. The marina fills up fast during summer weekends and holiday periods, and showing up without a reservation means you may spend part of your morning working the radio looking for an open spot instead of getting on the water. Planning your slip reservation at least a week in advance gives you the best chance of landing a berth in a convenient location close to the fuel dock and boarding areas.
Reserving a slip
The marina accepts transient slip reservations for visiting vessels, which covers the bulk of recreational boaters coming in for a day or a weekend. You can contact the marina’s dockmaster directly by phone or through their online contact form to check availability and confirm your dates. Slip sizes vary, so when you call, have your vessel’s length, beam, and draft ready so the dockmaster can match you to an appropriate berth without delay.
Rates for transient slips depend on vessel size and the length of your stay. Most marinas in this area charge by the foot per night, and peak season pricing runs higher than what you’d pay in spring or fall. If you’re staying for multiple nights, confirm whether water and electricity hookups are included in the slip fee or billed separately, since that difference adds up on longer stays.
Booking your slip and your charter or rental on the same call is worth doing, because the dockmaster can often point you toward the right staging area for your specific activity.
What boaters need to know before arriving
Vessel check-in procedures at HarborWalk follow standard marina protocol. You’ll typically stop at the dockmaster’s office when you arrive to confirm your reservation, receive your slip assignment, and get any current notices about harbor traffic or channel conditions. East Pass conditions change with weather and tide, so asking the dockmaster for a current conditions update before you head out gives you practical information that no app fully replaces.
Carrying current nautical charts for the Destin Harbor and the surrounding Gulf approaches is still a smart move even with GPS on board. Required safety equipment under U.S. Coast Guard regulations includes life jackets for all passengers, a working horn, fire extinguisher, and navigation lights for any vessel operating after dark. Having everything on board before you dock keeps your departure smooth and avoids any compliance issues.
Parking, getting there, and moving around HarborWalk
Harborwalk marina destin sits right off Harbor Boulevard, which runs parallel to Highway 98 through the heart of Destin. The address is straightforward to navigate, and most GPS apps route you there without issues. What catches visitors off guard is not the drive itself but what happens once they arrive: parking fills up fast on summer mornings, and the layout of the waterfront takes a few minutes to figure out on your first visit.
Getting to the marina by car
You’ll access the marina from Harbor Boulevard, turning off Highway 98 at the signs for HarborWalk Village. The road runs directly into the waterfront complex, and from there you follow the lot signage toward available spaces. Arriving before 9 a.m. on busy summer days is the most reliable way to avoid circling for a spot, especially if you have a morning charter or rental departure. Weekend holiday periods fill the lots even earlier, so plan accordingly.
If your rental unit or hotel sits within a mile of the waterfront, walking or biking to the marina eliminates the parking problem entirely.
Parking options and what they cost
The marina area has both surface lots and a parking garage within short walking distance of the docks. Paid parking is the norm here during peak season, with rates typically running by the hour or with a flat daily cap depending on the lot. The parking garage near the waterfront gives you covered, shaded space and stays closer to full capacity on hot summer afternoons when beach and harbor traffic overlap. Checking the current posted rates when you pull in prevents any surprises at checkout.
Several restaurants and shops along the boardwalk also validate parking for customers, so if your group plans to eat at one of the waterfront spots, ask about validation before you pay at the meter. That small detail can save you a few dollars on a day when you’re spending on charters and rentals already.
Moving around once you’re there
Walking the boardwalk is the primary way to get between the docks, restaurants, and shops once you’re at the marina. The path is flat, paved, and covers the full stretch of the waterfront without requiring you to get back in your car. If you want to cover more ground between activities, bike rentals are available near the marina and connect to the trail network along Scenic 98, giving you an easy way to reach nearby beaches or grab supplies without adding another car trip to your afternoon.
Quick recap and next steps
HarborWalk Marina Destin gives you fuel, bait, slip reservations, charter access, dining, and rental options all within a single walkable waterfront. You can arrive, gear up, get on the water, eat lunch, and head to the beach without burning your whole day on logistics. The key moves before you show up are reserving your slip early if you’re bringing a boat, arriving before 9 a.m. to beat the parking rush, and stocking your cooler the night before so you’re not paying marina prices for snacks.
From these docks, Crab Island sits less than ten minutes away by boat, and that sandbar is worth building your whole trip around. If you want a guided experience on the water rather than handling a boat yourself, our team at Original Crab Island runs pontoon rentals, jet ski tours, parasailing, and fishing charters right here in these same waters. Book your Destin water activity today and we’ll handle the rest.
Whether you’re piloting a rental pontoon around Crab Island or navigating offshore waters in the Gulf of Mexico, having reliable chart-plotting tools matters. OpenCPN navigation software is a free, open-source program that turns a laptop, tablet, or even a Raspberry Pi into a fully functional marine chartplotter, no expensive proprietary hardware required.
Here at Original Crab Island, we put people on the water every day across Destin, Florida, from pontoon cruises to deep-sea fishing charters. We know firsthand that understanding navigation tools makes time on the water safer and more enjoyable. OpenCPN is one of those tools that recreational boaters and seasoned captains alike keep coming back to, and for good reason.
This article breaks down what OpenCPN actually does, what features set it apart, and how to download, install, and configure it on your device. If you’ve been curious about the software but weren’t sure where to start, you’re in the right place. We’ll walk through the basics so you can get up and running before your next trip on the water.
What OpenCPN does and who it’s for
OpenCPN stands for Open Chart Plotter Navigator. At its core, it reads digital nautical charts and displays your GPS position on those charts in real time, giving you a live picture of where you are on the water. You can plan routes before you leave the dock, track your movement while underway, and pull in live data from connected instruments like AIS receivers and depth sounders.
The core function: chart plotting
OpenCPN navigation software processes chart files in several formats and renders them on your screen as an interactive map. You can zoom in on channels, sandbars, and anchorages, measure distances, and draw waypoints for your planned route. The software runs on Windows, macOS, Linux, and Android, which means you can use a device you already own rather than buying a dedicated chartplotter unit.
A dedicated marine chartplotter can cost several hundred to several thousand dollars; OpenCPN delivers comparable chart-plotting functionality for free.
Who benefits most from OpenCPN
Recreational boaters make up the largest group of OpenCPN users. If you rent a vessel for a day trip, own a sailboat, or run a small fishing boat on coastal waters, OpenCPN gives you professional-grade situational awareness at no cost. The software scales well, so solo kayakers using a phone mount and offshore passage-makers on blue-water sailboats both find it useful.
Commercial operators and charter captains also use OpenCPN as a secondary or backup navigation system, layering it alongside certified commercial equipment for added redundancy. Beginners appreciate the straightforward interface, while experienced mariners value the plugin system that extends the software’s capabilities far beyond basic chart plotting.
Why boaters use OpenCPN
Boaters keep coming back to OpenCPN navigation software because it solves real problems without adding complexity or cost. The software gives you accurate, real-time positioning on detailed nautical charts, which is exactly what you need whether you’re threading through a shallow inlet or heading miles offshore.
Cost and accessibility
Traditional chartplotters lock you into proprietary hardware and expensive map subscriptions. OpenCPN breaks that model entirely. You download the software for free, install free official chart packages from sources like NOAA, and run it on a device you already own. That combination makes serious navigation tools available to every boater, not just those with deep pockets.
For coastal U.S. waters, NOAA provides free, official electronic nautical charts (ENCs) that work directly inside OpenCPN.
Flexibility across conditions
Your needs on the water change, and OpenCPN adapts with them. You can run it on a Windows laptop at the nav station, an Android tablet mounted in the cockpit, or a dedicated single-board computer below deck. The same chart files and route plans transfer between devices, so your preparation at home carries over seamlessly to whatever setup you use underway.
Key features and chart support
OpenCPN navigation software packs a strong feature set into a lightweight application that runs without an internet connection once you have your charts downloaded. You get real-time GPS tracking, route planning, waypoint management, and instrument integration all in one interface, and the plugin system lets you add capabilities as your needs grow.
Built-in tools that matter underway
The software displays your speed over ground, course, and heading in configurable data panels you can position anywhere on screen. AIS support lets you see nearby vessel traffic plotted directly on your chart, which is especially useful in busy coastal areas. You can also set anchor alarms and proximity alerts that notify you if the boat drifts beyond a defined radius.
AIS integration inside OpenCPN turns your screen into a live traffic display, showing other vessels’ positions, names, and speeds in real time.
Chart formats and free sources
OpenCPN reads S-57 and S-63 vector charts along with raster BSB/KAP files, giving you broad compatibility with chart sources worldwide. For U.S. waters, NOAA publishes free electronic nautical charts you can install directly into the software. Vector charts update more frequently than printed paper charts and render cleanly at any zoom level, so your situational awareness stays accurate.
How to set up OpenCPN step by step
Setting up OpenCPN navigation software takes less than 15 minutes on most devices. The process follows a three-step flow: download the application, install it, then load your charts. Each step is straightforward, and you won’t need any technical background to complete it.
Download and install the application
Head to opencpn.org and grab the installer that matches your operating system. Windows and macOS users get a standard installer package, while Linux users can install through a package manager. Run the installer, accept the defaults, and OpenCPN opens ready to configure. The software supports the following platforms:
Windows 7 and newer
macOS 10.13 and newer
Linux (Debian, Ubuntu, and others)
Android (via Google Play)
Load your charts
Without charts, OpenCPN navigation software shows you a blank screen. Open the Chart Downloader plugin inside the software by clicking Tools, then Plugins. Select NOAA as your source, choose the region covering your planned boating area, and download. NOAA charts are free and install directly into the software within minutes.
NOAA updates its electronic nautical charts regularly, so re-downloading your region before each season keeps your data accurate.
Once the charts load, coastal outlines, depth contours, and navigation aids fill in across your screen.
Basics: routes, GPS, AIS, and safety tips
Once you have OpenCPN navigation software loaded with charts and a GPS source connected, three functions will drive most of your time in the application: route planning, live positioning, and AIS vessel tracking. Each one builds on the others to give you a full picture of what’s happening around your boat.
Planning routes and reading GPS
Creating a route is as simple as right-clicking your chart and dropping waypoints along your intended path. OpenCPN calculates the total distance and estimated travel time between each point, so you can verify your plan makes sense before you leave the dock. Your GPS feed updates your position continuously once you’re underway, keeping the chart centered on your location. Key tools you’ll use constantly include:
Add, move, or delete waypoints on the fly
Name and save routes for repeat trips
View bearing and distance for each leg
Using AIS and staying safe
AIS displays other vessels’ positions, headings, and speeds directly on your chart, which helps you anticipate crossing traffic before it becomes a problem. You can set collision alarms that trigger when a vessel’s closest point of approach falls within a threshold you define. Always cross-reference your screen with a visual scan, since not every boat transmits AIS, including most small recreational craft.
Treat OpenCPN as a decision-support tool, not a replacement for watching the water around you.
Your next steps on the water
OpenCPN navigation software gives you a capable, free chartplotter that works on hardware you already own. You now know what it does, how to install it, and how to use its core tools for routes, GPS, and AIS tracking. The practical next step is to download the application, pull in your NOAA charts for your target region, and spend 20 minutes clicking around the interface before you ever leave the dock. Familiarity on land translates directly to confidence underway.
Once you feel comfortable with the software, put it to work on real water. If you’re heading to Destin, Florida, load the charts for the Choctawhatchee Bay and the waters around the sandbar before your trip. Pairing solid navigation knowledge with the right vessel makes every outing better. When you’re ready to get out there, book a boat rental or charter on Crab Island and put your new skills to use on the Emerald Coast.