Standing up on a wakeboard feels impossible, until it doesn’t. One second you’re dragging through the water like a sack of potatoes, and the next you’re gliding across the surface wondering why you ever thought this was hard. Learning how to wakeboard for the first time comes down to a few key fundamentals that most beginners either skip or overthink. Get those right, and you’ll be riding confidently much sooner than you’d expect.
The warm, calm waters around Destin, Florida make a fantastic classroom for first-timers. Here at Original Crab Island, we put visitors on boats every day along the Emerald Coast, and we’ve watched plenty of beginners go from nervous to hooked in a single session. That firsthand experience is exactly why we put this guide together, to give you a real advantage before you ever touch the water. No vague tips, no fluff, just practical steps that actually work.
This guide covers everything from choosing the right gear and setting up your stance to getting out of the water, riding with control, and avoiding the mistakes that stall most beginners. Whether you’re planning a trip to Crab Island or hitting the water closer to home, these fundamentals apply everywhere. By the end, you’ll have a clear picture of what to do, what not to do, and how to make your first ride one you’ll actually remember, for the right reasons.
What to know before you start
Wakeboarding has a real learning curve, but it’s not as steep as it looks from the shore. Before you figure out how to wakeboard for the first time, you need to set realistic expectations about what the first session actually involves. Most beginners spend more time in the water than on top of it during that first outing, and that’s completely normal. Understanding what’s coming saves you from frustration and keeps you focused on the right things instead of fighting against your own surprise.
What your body needs to bring
You don’t need to be an athlete to learn wakeboarding, but basic physical fitness makes a real difference in how quickly you progress. The two things that matter most at the start are core strength and swimming ability. Your core does most of the stabilizing work when the rope pulls you up and when you’re riding over choppy water. Weak core muscles mean you’ll fold at the hips instead of holding your position, which sends you face-first into the water almost every time.
Swimming ability is non-negotiable. Every beginner falls off the board repeatedly, so you must be comfortable in open water before you ever clip into a wakeboard. If you’re not a strong swimmer, wear a life jacket and stay in water shallow enough to stand in while you practice getting up. Most rental operators will require a life jacket for beginners regardless, and that requirement exists for good reason.
Comfort in the water removes fear from the equation, and fear is the single biggest obstacle for first-time wakeboarders.
What the experience actually feels like
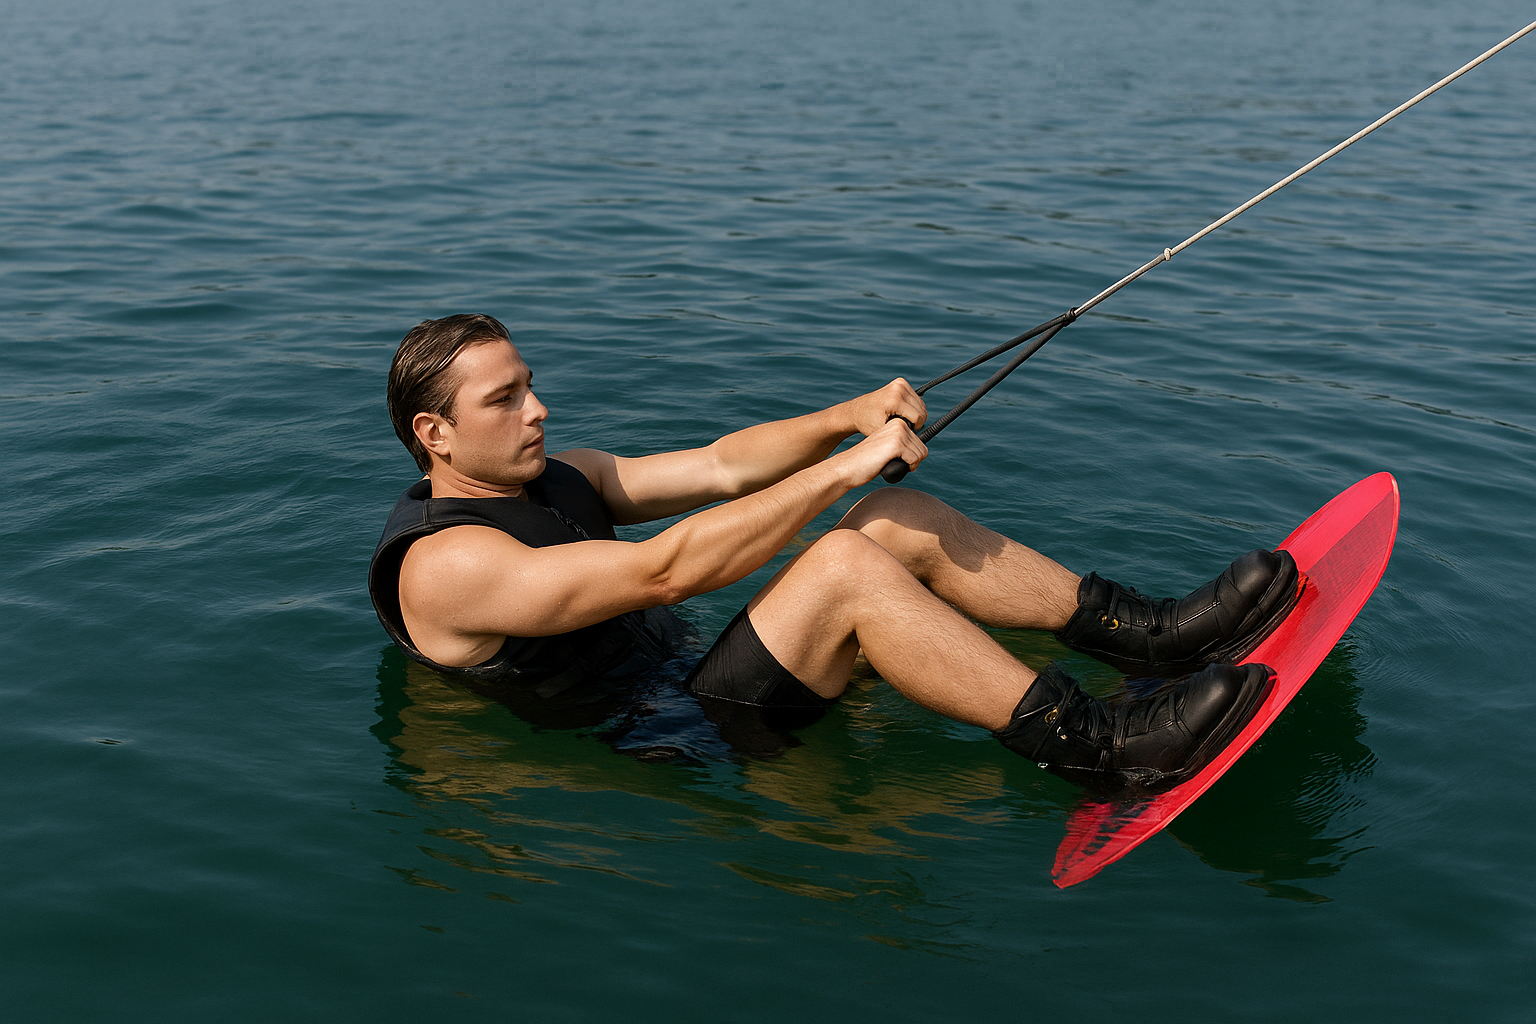
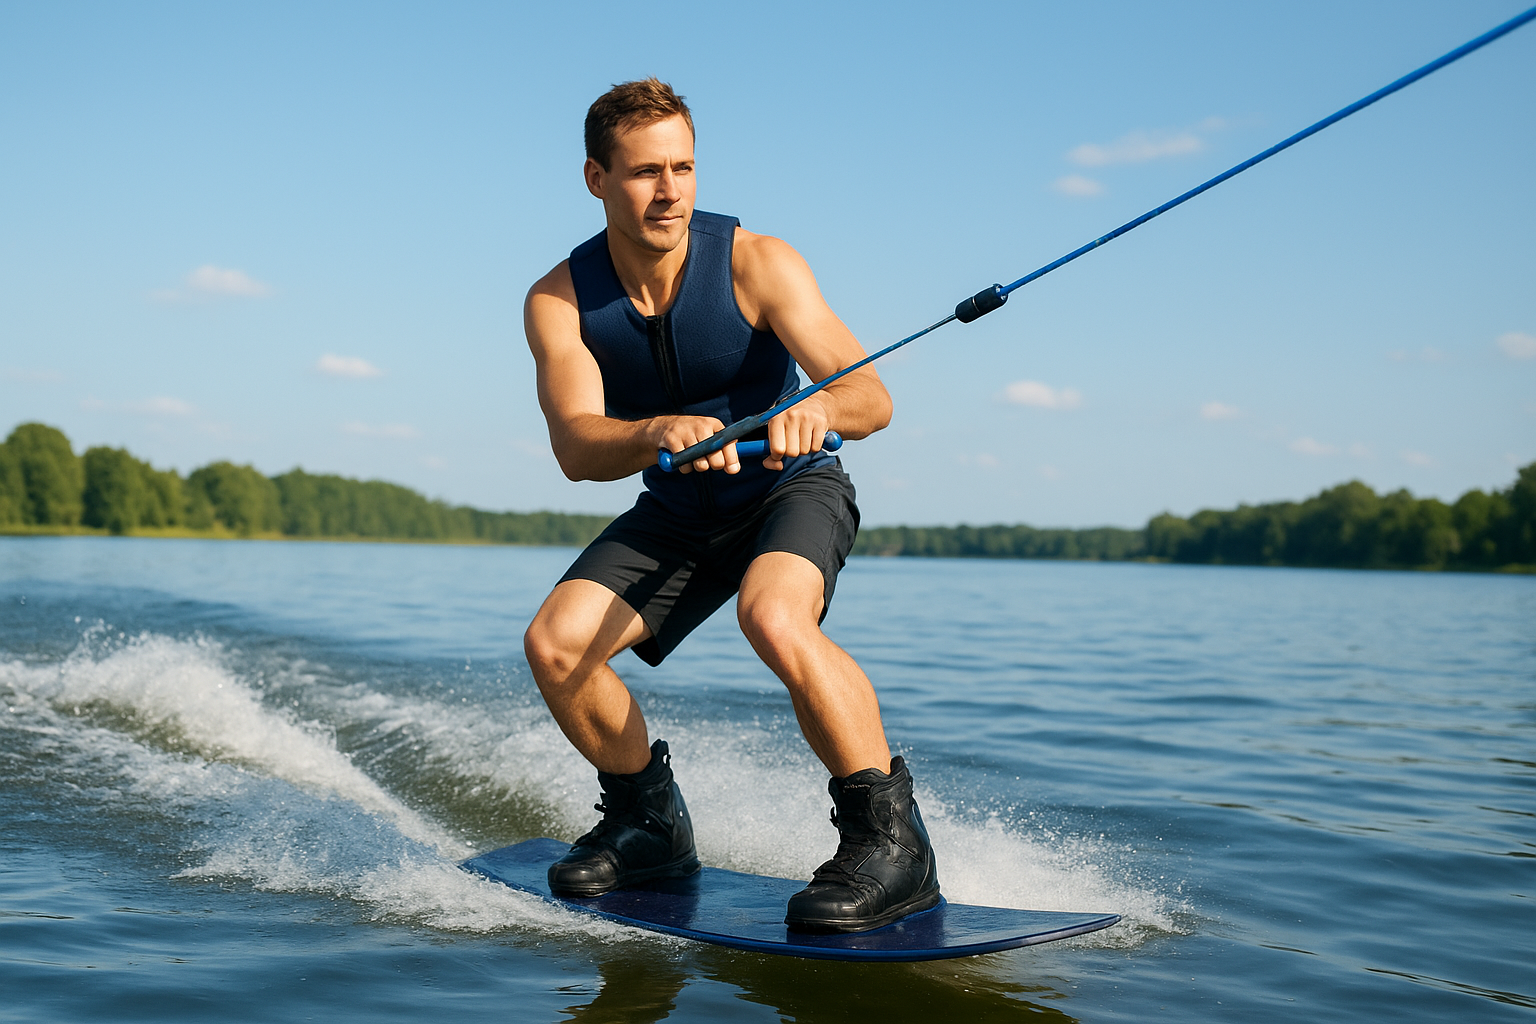
The first pull from the boat is stronger than most beginners expect. When the rope goes taut and the boat accelerates, the force comes fast. Your instinct will be to pull the handle toward your chest or stand up immediately, but both moves will throw you off balance. The correct response is to let the boat do the pulling and stay in a compact, crouched position until the water lifts you naturally to the surface.
Water conditions also affect your first session more than you might think. Flat, calm water is far easier to learn on than choppy or wavy conditions. Early mornings on most lakes or protected bays tend to offer the smoothest surface. If you’re riding in coastal waters like those around Destin, boat wakes and light chop are part of the experience, so picking a calmer stretch of water makes a noticeable difference in how quickly you get up and stay up.
Signals and communication on the boat
Once you’re in the water and away from the boat, verbal communication becomes nearly impossible. You’ll rely entirely on hand signals to tell the driver what you need, and learning these before you get in the water is essential. Here are the standard wakeboarding signals every beginner should know:
| Signal | Meaning |
|---|---|
| Thumbs up | Speed up |
| Thumbs down | Slow down |
| Finger drawn across throat | Stop the boat |
| Hand pat on head | Return to dock |
| OK sign | Speed is good, ready to go |
Every person on the boat should know these signals too, not just the driver. If you fall and need help, the spotter (not the driver) is responsible for watching you and relaying your status back to the driver. Make sure your boat has a dedicated spotter before you start, because a driver who’s watching the rider and watching the water ahead at the same time creates a real safety risk for everyone involved.
Step 1. Pick the right gear and fit it
Getting your gear right before you ever hit the water makes learning how to wakeboard for the first time significantly easier. Riding a board that’s too small, wearing bindings that are too loose, or skipping a proper life jacket will work against you from the first pull. The right setup lets you focus entirely on technique instead of fighting equipment that wasn’t matched to your body.
Choose the right board size
Board size is based primarily on your body weight, not your height. A board that’s too short sits too low in the water and makes getting up much harder than it needs to be. A longer board gives you more surface area and better stability, which is exactly what a beginner needs during those first attempts.
Use this general sizing guide as your starting point:
| Rider Weight | Recommended Board Length |
|---|---|
| Under 100 lbs | 130 cm or less |
| 100-150 lbs | 130-134 cm |
| 150-180 lbs | 134-138 cm |
| 180-220 lbs | 138-142 cm |
| 220+ lbs | 142 cm or longer |
If you’re between sizes, always go with the longer board as a beginner since extra surface area makes getting up and staying balanced far more forgiving.
Fit your bindings correctly
Bindings are the boots that attach your feet to the board, and how they fit changes everything about your control and comfort on the water. Loose bindings let your feet shift during the pull, which throws off your balance before you even get upright. Snug bindings that hold your foot firmly without cutting off circulation give you the most control when the boat pulls you forward.
Check your fit on dry land before you get in the water. Your heel should sit flat against the back of the boot with no gap, and your toes should have just enough room that they aren’t jammed forward. Wiggle your ankle side to side, and if you feel significant movement inside the boot, tighten the lacing or strap system one more notch before you launch.
Wear a proper life jacket
Every beginner should wear a Coast Guard-approved life jacket for every session, no exceptions. Choose one rated as a Type III personal flotation device, which gives you freedom of arm movement while keeping you afloat after a fall. A correctly fitted life jacket sits snug against your torso and does not ride up over your chin when you raise both arms straight above your head.
Step 2. Set your stance and board position
Before the boat moves an inch, how you position your body and feet on the board determines whether you get up cleanly or get yanked forward on every attempt. Most beginners skip this step and assume stance just happens naturally once they’re in the water. It doesn’t. Setting your stance on dry land first saves you from trial and error when you’re already cold, tired, and trying to process a dozen other things at once.
Determine your dominant foot
Your dominant foot is the one that goes toward the back of the board. Most right-handed people ride "regular," meaning left foot forward, while most left-handed people ride "goofy," meaning right foot forward. If you’re not sure which stance fits you, here’s a quick test: have someone give you a light push from behind without warning. Whichever foot you step forward with to catch yourself is your front foot on the wakeboard.
Getting your foot placement wrong from the start makes everything harder, so spend two minutes figuring this out before you clip in.
Set your body position in the water
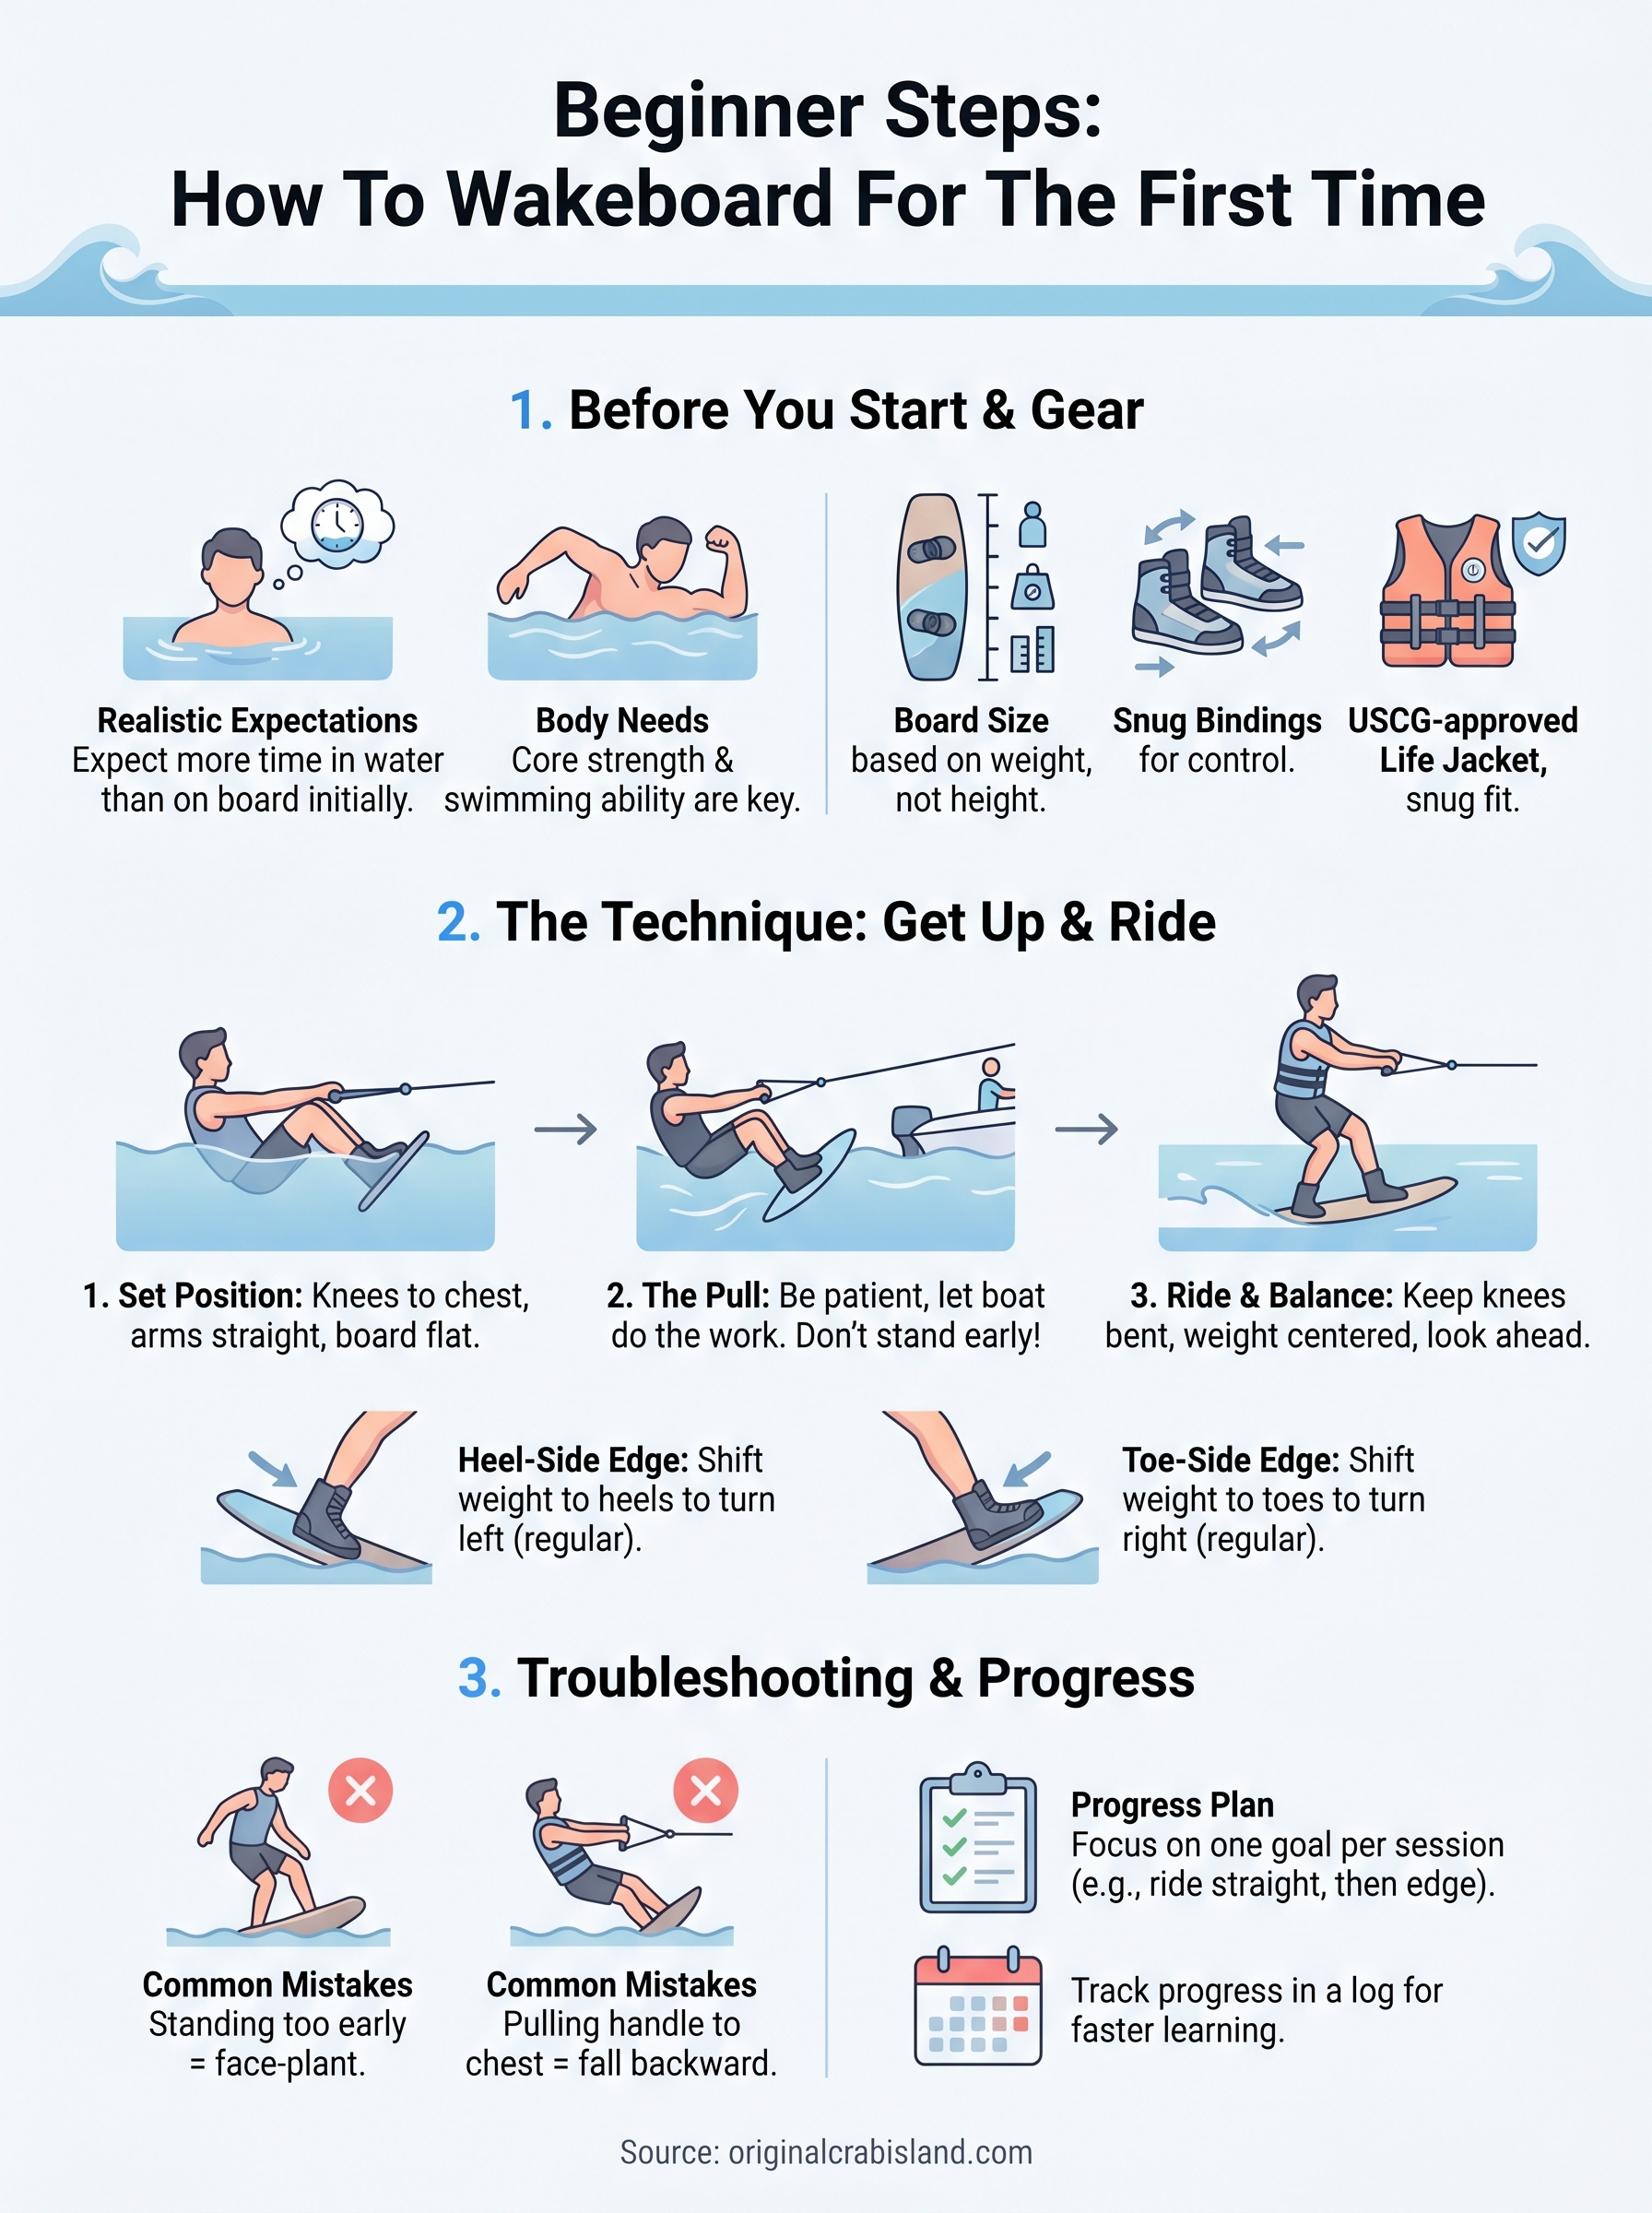
Once you’re in the water and ready to start learning how to wakeboard for the first time, your body position before the pull matters just as much as your stance on the board. Float on your back and let the board rest flat on the surface in front of you. Your knees should be pulled up toward your chest, with both knees bent at roughly 90 degrees, and your arms extended straight in front of you holding the handle at about knee height.
Keep these positioning checkpoints in mind:
- Knees: Bent and close to your chest, not splayed out to the sides
- Arms: Straight and relaxed, not bent at the elbows
- Back: Rounded slightly, not arched backward
- Board: Perpendicular to the rope with tips just above the water
- Chin: Tucked slightly toward your chest, eyes looking forward
Your weight should sit evenly across both feet at this stage, not shifted to either heel or toe. A lot of first-timers press their heels down into the board before the boat pulls them, which tilts the nose of the board underwater and causes them to face-plant within the first two seconds. Keep the board flat and let the rope tension do the work of bringing you up.
Step 3. Get up on your first pull
The pull is where most beginners learning how to wakeboard for the first time either nail it or immediately fall into the same repeating mistake. Getting up is not about strength or explosiveness. It’s about patience and letting the boat do the work while you hold a single position and wait for the physics to work in your favor. The more you fight the pull, the harder the water fights back.
What to do the moment the boat accelerates
Give the driver your OK signal and call out or signal when you’re ready. The moment the rope begins to tighten, press your feet evenly into the board and keep your knees pulled toward your chest. Do not try to stand yet. Your only job during the acceleration phase is to hold your compact position and resist the urge to do anything dramatic. The boat’s pull will gradually bring the board to the surface, and your body will begin to rise with it.
Once your hips clear the water, shift your weight very slightly to your back foot to keep the board’s nose lifted, then let your legs straighten slowly as you rise.
As you reach the surface and feel the board level out beneath you, guide the handle toward your front hip and rotate your body so your hips open up toward the boat at roughly a 45-degree angle. Do not pull the handle to your chest or yank it backward. Keep your arms straight and low until you’re fully upright, then bend them slightly at the elbows to hold the handle close to your lead hip.
Where most beginners go wrong on the first pull
The two most common problems on a first pull come down to timing and posture. Standing up too early is by far the biggest issue. When you feel the first hint of resistance from the rope, your instincts will push you to stand up immediately. If you do that before the board reaches the surface, the nose of the board digs in and you go straight down into the water.
The second problem is letting your arms bend and pulling the handle to your chest. This shifts your weight forward, drops your hips, and breaks your center of gravity in the wrong direction. Keep your arms extended until the board levels out, then draw the handle to your hip, not your chest. These two fixes alone eliminate the most frustrating falls beginners take during that first session.
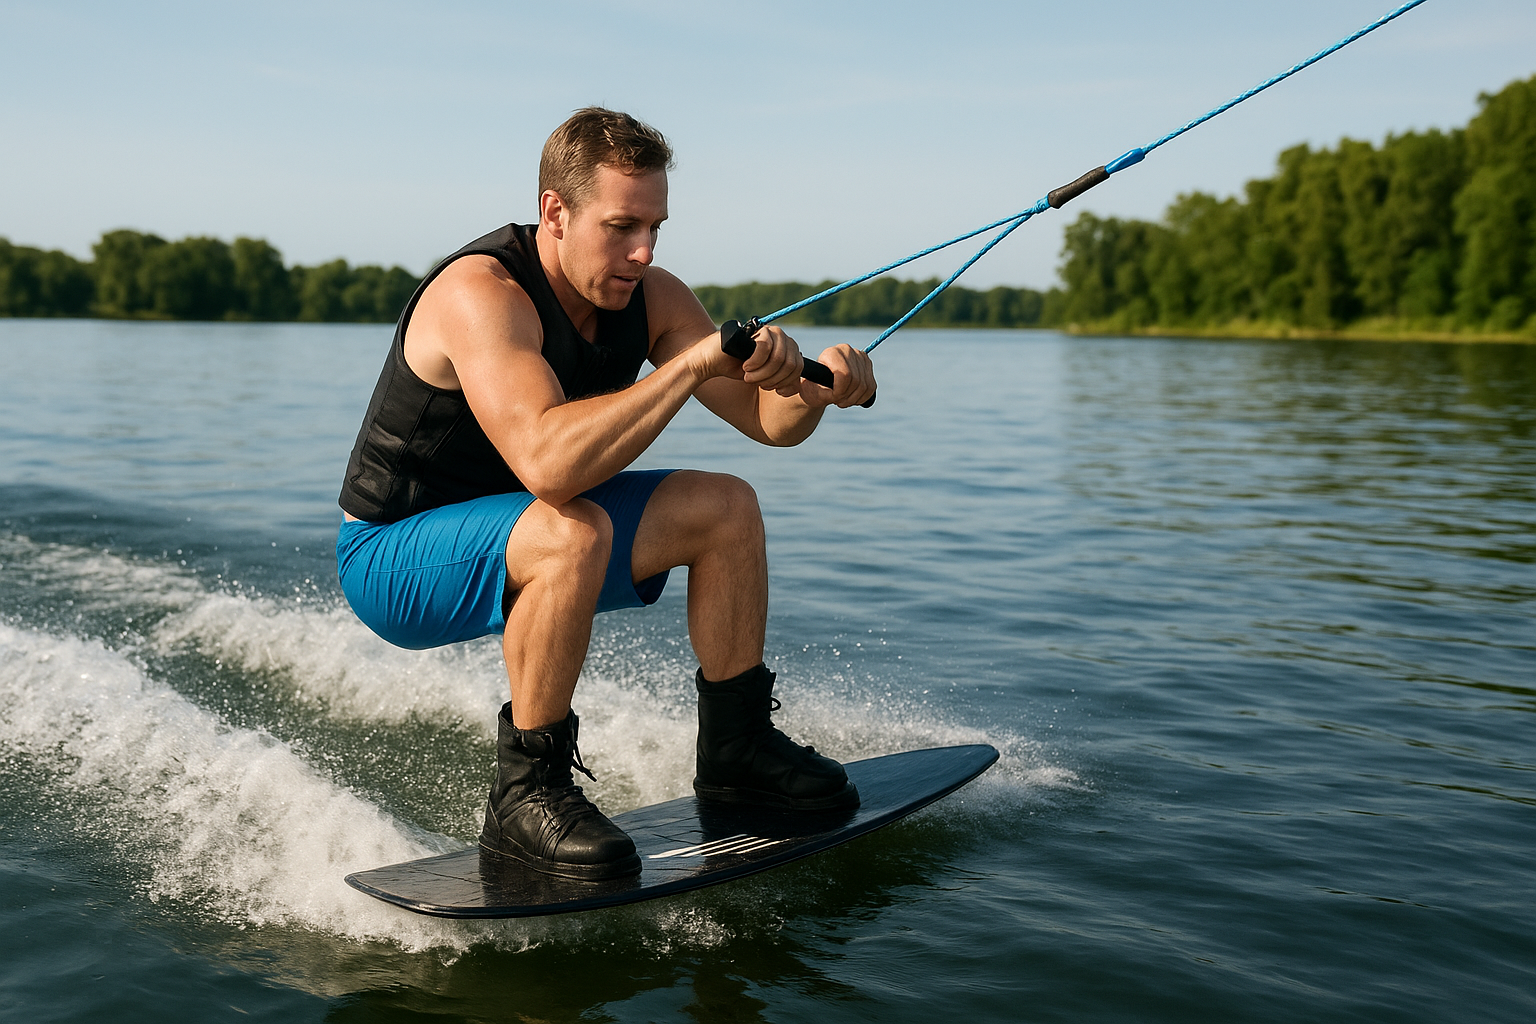
Step 4. Find your balance and ride straight
Once you’re upright and the board is moving across the surface, the challenge shifts from getting up to staying up. Many beginners learning how to wakeboard for the first time focus so hard on the initial pull that they don’t prepare for what comes right after. The moment you’re standing, your body will want to stiffen up out of excitement or relief, and that rigidity is exactly what causes you to fall in the first few seconds after you get up.
Keep your knees bent and your weight centered
The single most important thing you can do once you’re standing is resist the urge to straighten your legs. Straight legs turn your body into a rigid pole that has no ability to absorb the movement of the water or the pull of the rope. Keep your knees soft and bent at roughly 30 to 45 degrees at all times, which puts your center of gravity low and lets your legs act as natural shock absorbers against any small bumps or chop beneath the board.
Your weight should stay distributed evenly between both feet while you’re riding in a straight line behind the boat. Shifting too much weight to your back foot lifts the nose too high and slows you down unexpectedly. Shifting too far forward buries the nose and sends you over the front of the board almost instantly. Use this checklist to self-correct your posture while riding:
- Knees: Bent at 30-45 degrees, not locked out
- Hips: Square and low, not twisted or tilted
- Handle: Held close to your front hip, arms slightly bent
- Shoulders: Relaxed and level, not hunched or raised
- Eyes: Looking forward toward the boat, not down at the board
Looking down at your feet while riding drops your shoulders forward and shifts your weight toward the nose, which is one of the fastest ways to crash after a clean start.
Where to look and how to hold the rope
Your eyes do more work than you might expect when it comes to balance on a wakeboard. Fix your gaze on the back of the boat or the horizon ahead of you, not on your feet or the water below. Your body naturally follows your eyes, so keeping your focus forward keeps your posture upright and your weight centered over the board.
Hold the rope handle close to your leading hip with both hands and keep your arms slightly bent rather than fully extended. A fully extended grip pulls your shoulders toward the boat and rotates your body out of position. Staying close to your hip keeps the tension in your legs and core, where it belongs, and lets you ride a clean, straight line without fighting the rope on every small correction.
Step 5. Turn with heel-side and toe-side edging
Once you can ride in a straight line without falling, the next skill you need when figuring out how to wakeboard for the first time is edging. Edging is how you steer the board left or right by shifting your body weight toward your heels or your toes. Both edges work the same fundamental way: you apply pressure to one side of the board, and the board responds by carving in that direction. Start with small, gradual shifts and let the turn build naturally before you push for sharper angles.
Heel-side edge: turn toward your heels
A heel-side turn happens when you shift your weight backward toward your heels, which tilts the board’s edge into the water and pulls you in the direction your heels are facing. To initiate the turn, push your heels down into the board while keeping your knees bent and your hips low. At the same time, bring the handle slightly toward your back hip to keep the rope tension working with you instead of pulling you off balance. Your upper body should stay relatively upright, not leaning dramatically backward.
The more evenly you distribute the heel pressure across both feet, the smoother and more controlled your heel-side turn will feel.
Use this sequence to practice a controlled heel-side edge:
- Confirm you’re riding stable and balanced before you initiate anything
- Push both heels down gradually, starting with about 25 percent of your body weight
- Keep your knees bent and your hips low throughout the movement
- Hold the handle close to your back hip and let the board arc across the water
- Ease the heel pressure off slowly to straighten out when you want to stop turning
Toe-side edge: turn toward your toes
A toe-side turn is the mirror image of the heel-side, but most beginners find it slightly harder to control because shifting weight onto your toes requires your ankles and calves to work more actively. To start the turn, press the balls of your feet down into the board while leaning your knees gently toward the water in front of you. Your hips will naturally follow your knees in that direction, which is exactly what you want. Keep your back straight and avoid the common mistake of bending at the waist, because that collapses your posture and kills the edge before the turn develops.
Practice both edges at slow, controlled speeds before you try linking them together. Short, deliberate turns across the wake build the muscle memory you need to ride with real confidence.
Step 6. Cross the wake and stop safely
Crossing the wake and stopping cleanly are the two skills that complete your foundation when learning how to wakeboard for the first time. Most beginners treat wake crossing as an advanced move, but it’s actually something you should attempt in your very first session once you can ride a straight line without falling. The wake is just the two ridges of water that trail behind the boat, and crossing them with the right technique feels like a small jump rather than a dramatic obstacle.
Cross the wake with controlled edging
Start your approach from the far edge of the wake by applying a smooth, gradual heel-side or toe-side edge to build momentum toward the center. The key word there is gradual. If you dig your edge in too aggressively, you’ll accelerate faster than you expect and hit the wake off-balance. Let your speed build steadily, keep your knees bent and your body low, and aim to hit the wake’s peak with your legs coiled and ready to absorb the impact.
The moment your board contacts the crest of the wake, absorb the small pop with your knees rather than fighting it, and you’ll land flat and stable on the other side.
Follow this sequence each time you cross the wake during your session:
- Start your edge from a stable, balanced position well outside the wake
- Commit to the direction and keep your handle close to your lead hip
- Absorb the wake’s rise by bending your knees slightly more as you reach the crest
- Land with your weight centered and your knees still bent, not stiff-legged
- Hold your edge briefly on the other side, then flatten the board to ride straight again
Stop safely after your ride
When you’re ready to stop, never just let go of the rope and assume that’s enough. Releasing the handle while traveling at speed lets the boat continue pulling away while you sink or skim across the surface unpredictably. Instead, signal the driver with the throat-cut signal first, wait for the boat to slow down before you release, then let the handle go and settle into the water in a controlled seated position with your board in front of you.
Once you’re in the water, keep your board facing toward the surface so it acts as a visual marker for the boat driver and spotter. Stay still and wait for the boat to circle back rather than swimming toward it, which keeps you clear of the propeller and makes the pickup process straightforward for everyone on board.
Fix the most common first-time problems
Every beginner learning how to wakeboard for the first time runs into the same handful of problems, and almost all of them trace back to one or two specific body habits that feel natural but work against you on the water. Identifying exactly what’s going wrong before your next attempt lets you correct the problem in seconds rather than repeating the same fall for an entire session.
You keep face-planting on the pull
This is the most common crash beginners experience, and the cause is almost always standing up too early. When you push your legs straight before the board fully levels out on the surface, the nose of the board bites into the water and throws you forward with the full force of the boat’s acceleration behind you.
Stay compact and patient during the pull, and only begin to rise once you feel the board floating flat beneath both feet.
Fix this by counting to two in your head after the rope goes tight before you think about straightening your legs at all. Keep your knees pressed toward your chest until the water feels smooth and level under the board, then rise slowly.
You fall to your heel side immediately after getting up
Falling immediately to your heels after a clean start usually means your weight shifted too far back on your feet during the rise. When your back foot carries more load than your front foot, the board’s nose pops up and tips you backward before you’ve had a chance to stabilize.
Correct this by focusing on equal pressure across both feet the moment you reach the surface. Think about pressing the ball of your front foot into the board during the first two seconds of riding. That small shift forward levels the board and gives you a stable platform to work from.
You can’t hold the position once you’re up
If you’re getting up cleanly but falling within a few seconds, the problem is usually a stiff body rather than a technique error. Locking your knees out turns your legs into rigid poles that can’t respond to any movement in the water beneath you.
Keep a soft, athletic bend in your knees at all times and hold the handle close to your front hip rather than letting your arms drift outward. Those two habits alone eliminate most of the instability that beginners mistake for a balance problem.
Beginner progress plan for your next set
One session on the water teaches you a lot, but real progress happens across multiple sets when you build on each attempt deliberately. Rather than just getting back in the water and hoping things click faster next time, use a structured approach that gives you one or two specific focal points per session instead of trying to fix everything at once. That focus is what separates riders who improve quickly from riders who plateau after their first few outings.
What to focus on in your first three sessions
Your first three sessions on the water should each have a clear primary goal that builds directly on what you learned before. Stacking skills in the right order makes each session more productive and keeps the frustration level low.
Use this progression framework as your guide:
| Session | Primary Goal | Secondary Goal |
|---|---|---|
| 1 | Get up and ride straight for 10+ seconds | Practice the ready position before every pull |
| 2 | Ride stable for a full pass, both directions | Initiate one controlled heel-side edge |
| 3 | Cross the wake cleanly in both directions | Practice stopping with a signal before release |
Locking in one solid skill per session beats chasing five things at once and walking away from the water feeling like nothing worked.
Stick to slower boat speeds of 16 to 18 mph during sessions one and two. Beginners often assume faster speed helps them stay on the surface, but lower speeds give you more time to react and correct your body position before small mistakes compound into falls. Ask your driver to hold a consistent speed throughout each run so you can isolate what your body is doing rather than blaming speed changes.
Track your progress with a simple session log
Keeping a short written record after each session accelerates your learning far more than relying on memory alone. You don’t need anything elaborate. A note on your phone or a small notebook works perfectly. Log what went well, what kept going wrong, and one thing you want to correct before your next set.
Here’s a simple template you can use after every outing when figuring out how to wakeboard for the first time:
Session Date:
Conditions (calm / choppy / windy):
Boat Speed:
What worked:
What kept going wrong:
One fix to try next session:
Reviewing two or three of these notes before you get back on the water primes your brain for what to focus on the moment the rope goes tight.
Wakeboarding at Crab Island and Destin waters
Destin offers one of the best environments in the country to learn how to wakeboard for the first time, and it’s not just the scenery that makes it work. The Choctawhatchee Bay and the protected waters around Crab Island give beginners calm, flat conditions that are far more forgiving than open Gulf waters or exposed coastlines. If you’ve been looking for a place where everything lines up in your favor on your first session, this stretch of the Emerald Coast delivers exactly that.
Why Destin works well for first-timers
The water around Crab Island stays relatively shallow and protected from heavy wind chop for most of the day, which removes one of the biggest obstacles beginners face when they’re still figuring out the pull and their body position. Flat water lets you focus entirely on technique rather than fighting unpredictable surface conditions. Early morning sessions before boat traffic builds up tend to offer the smoothest surface, which makes your first few pulls significantly more manageable.
If you can time your session for the first two hours after sunrise, you’ll find conditions that rival any lake in the country for a beginner run.
What to plan before you get on the water
Booking your rental ahead of time saves you from showing up and waiting on a busy summer day when every operator in Destin has a full schedule by mid-morning. At Original Crab Island, you can reserve your pontoon or watercraft rental online before your trip, which means you spend your morning on the water instead of standing in line on the dock. Bring sunscreen rated SPF 50 or higher, a rash guard, and water shoes that fit snugly enough to stay on during falls, because the Gulf sun and the sandy bottom both get underestimated by first-time visitors.
Making the most of your time on Destin water
Give yourself at least two to three hours on the water for your first wakeboarding session rather than booking a short window and rushing through your attempts. The first 30 minutes typically go toward gear setup, signals, and getting comfortable with the feel of the board in the water. Your best runs usually come in the second hour once your muscles have adapted to the rope tension and your brain has processed the first round of corrections. Building that time buffer into your booking means you leave the water with real progress instead of just a few rushed attempts.
Ready for your first ride
You now have everything you need to understand how to wakeboard for the first time before you ever touch the water. The gear setup, the ready position, the pull sequence, edging, wake crossing, and stopping safely all follow a logical order, and each skill builds directly on the one before it. Stick to that order and you’ll progress faster than most first-timers who show up without a plan.
Destin gives you one of the best places in the country to put these skills to work. Flat protected water, warm Gulf temperatures, and reliable rental equipment mean your first session is set up to succeed rather than just survive. If you’re ready to get on the water and make your first ride count, book your watercraft rental at Original Crab Island and lock in your time before the schedule fills up. The water is waiting.