How Much Does It Cost to Rent a Pontoon Boat in Destin?
A pontoon boat rental in Destin costs $375 for a 4-hour half day and $575 for an 8-hour full day at Original Crab Island, both seating up to 13 passengers with fuel and parking included.
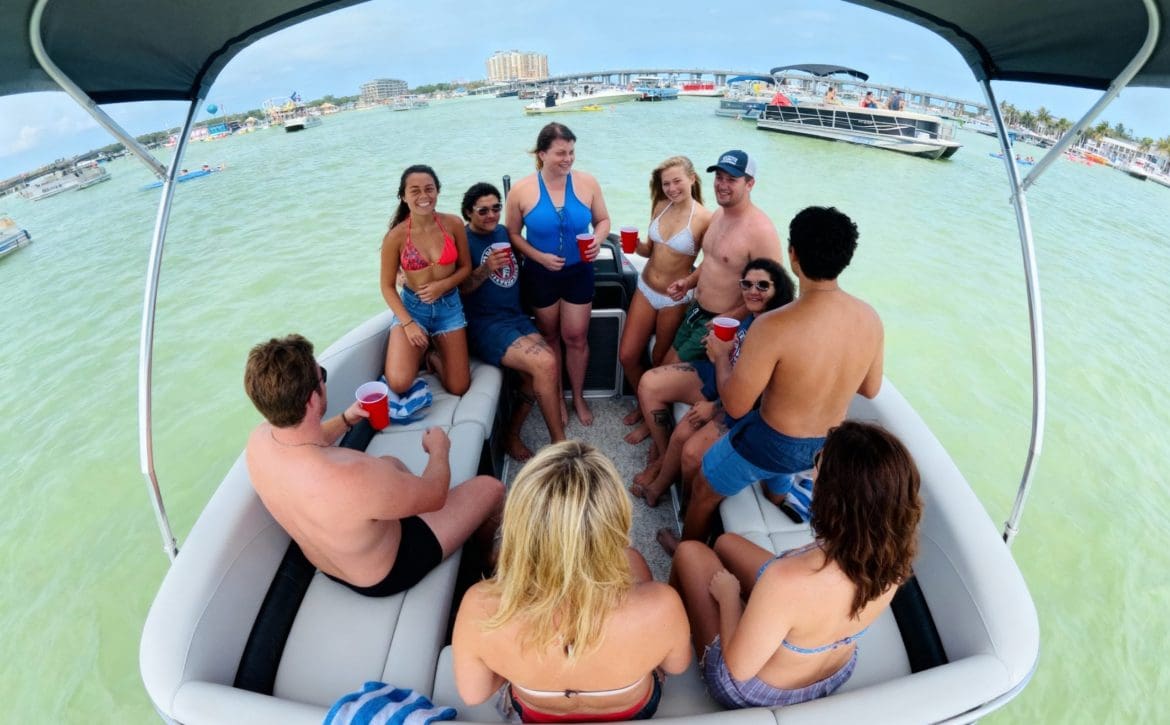
A pontoon boat rental in Destin costs $375 for a 4-hour half day and $575 for an 8-hour full day at Original Crab Island, both seating up to 13 passengers with fuel and parking included.

Whether you’re booking your first fishing charter out of Destin, Florida, or gearing up for a day on the Gulf, understanding what is fishing tackle makes a real difference. Fishing tackle is a catch-all term for the equipment anglers use to catch fish, rods, reels, hooks, lines, lures, sinkers, and everything in between. It’s the stuff that connects you to what’s swimming below the surface.
At Original Crab Island, we put guests on the water every day for guided deep-sea fishing trips in the Gulf of Mexico, so we see firsthand how the right tackle turns a slow afternoon into a cooler full of fish. Knowing what each piece does, and why it matters, helps you make smarter choices whether you’re shopping at a bait shop, packing for a trip, or stepping aboard one of our charters.
This article breaks down every major category of fishing tackle, from rods and reels to terminal tackle and electronics. By the end, you’ll have a clear understanding of the gear that makes fishing work and know exactly what to look for the next time you hit the water.
Understanding what is fishing tackle goes beyond memorizing gear names. The equipment you choose directly affects how many fish you hook, how comfortable your time on the water feels, and whether your setup can handle the species you’re targeting. A mismatched rod and reel combination, the wrong line weight, or a hook that’s too large will cost you bites before you even make a second cast.
When your tackle matches the target species and fishing conditions, everything works together cleanly. A light spinning rod paired with a 6-pound monofilament line is perfect for smaller inshore fish like flounder or speckled trout. Put that same setup against a large amberjack in the Gulf of Mexico and the line snaps before you see the fish.
Matching your gear to the fish you’re after is the single most important decision you make before the first cast.
Experienced anglers and charter captains always start by thinking about the fish first, then building their tackle setup around it. This approach keeps you from wasting money on the wrong gear and keeps action moving throughout the day. On a deep-sea trip out of Destin, that alignment between gear and target is exactly why guided charters produce better results than most self-rigged trips.
Worn or low-quality tackle creates real safety risks that most beginners overlook. A frayed line can snap back at high speed. A corroded hook can bend under pressure and send a rigged bait flying toward someone’s face. Cheap swivels fail under tension and can cause sudden lurches that throw people off balance on a moving boat.
Checking your hooks, lines, and knots before every trip takes under five minutes and cuts those risks sharply. On a guided charter, your captain handles gear inspection before anyone boards. When you fish independently, that responsibility is yours. Treating your tackle as safety equipment, not just fishing equipment, keeps everyone on the water comfortable and protects the trip from avoidable problems.

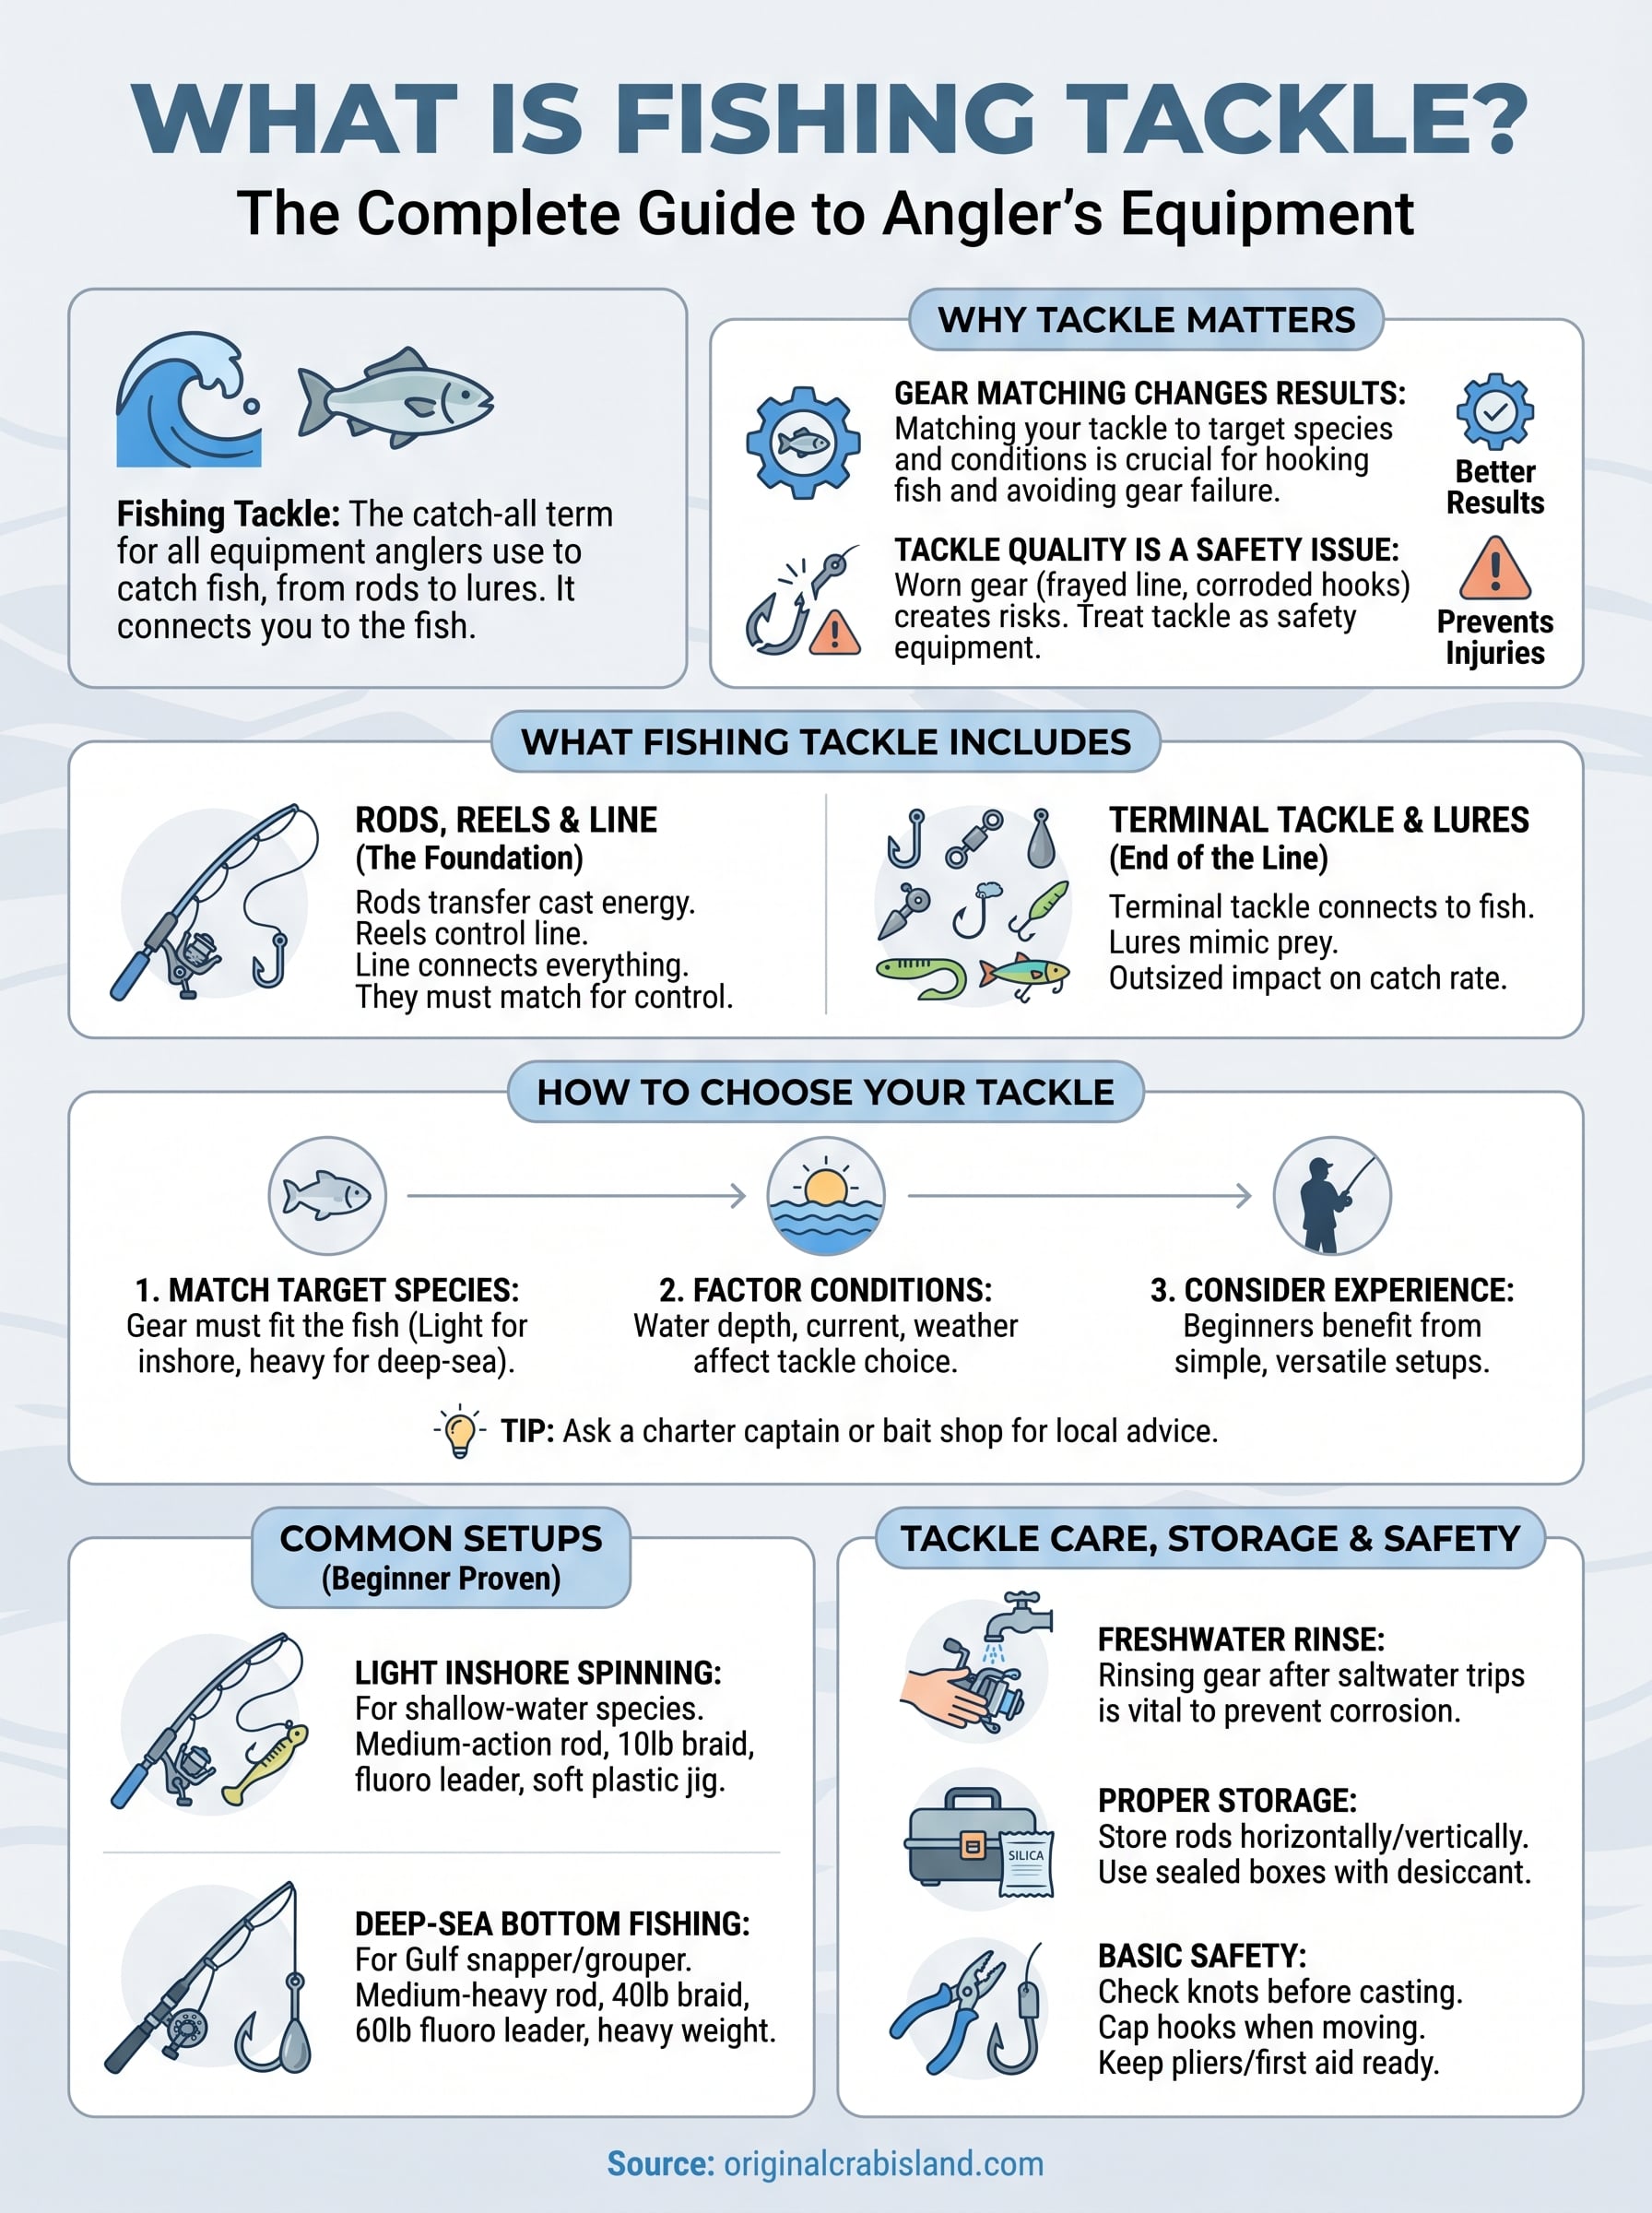
When you break down what is fishing tackle, you’re looking at several distinct categories that each serve a specific function. Every piece of gear plays a role in delivering your bait or lure to the fish and getting it back to the boat.
Rods and reels form the foundation of any fishing setup. The rod transfers energy from your cast, while the reel controls how line pays out and retrieves. Your line connects everything and needs to match the rod’s power rating. Common choices include monofilament, fluorocarbon, and braided line, each with different stretch, visibility, and strength characteristics.
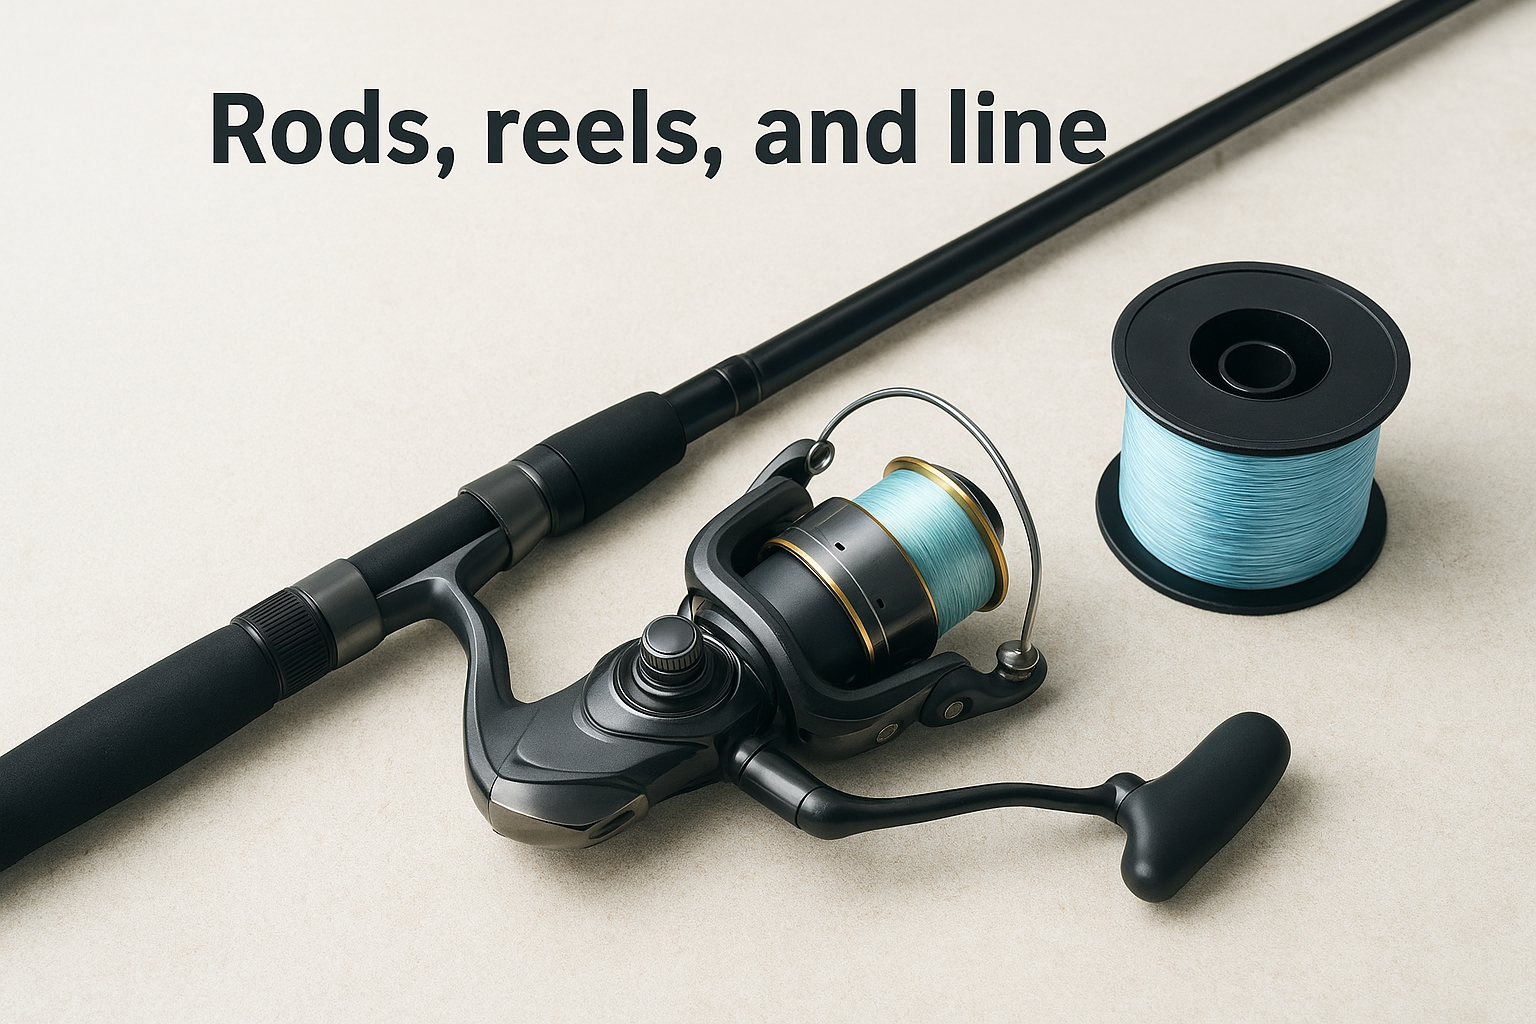
Matching your rod, reel, and line as a single system gives you far more control than buying each piece without thinking about how they work together.
Terminal tackle refers to the components at the end of your line that make direct contact with the fish, including hooks, sinkers, swivels, and leaders. These small pieces have an outsized impact on your catch rate because they determine how your bait sits in the water and how well you set the hook.
Lures are artificial baits designed to mimic the movement or appearance of prey. Soft plastics, hard-bodied plugs, jigs, and spinnerbaits each work best in specific conditions and for specific species. Knowing which lure to use for Gulf fishing versus inshore work keeps your line in the productive zone longer.
Choosing the right gear starts with knowing what you’re after. Once you understand what is fishing tackle and how each piece functions, narrowing down your choices becomes much simpler. Your target species, location, and experience level all point you toward specific rod weights, line strengths, and lure types before you spend a dollar. Starting with those three factors keeps you from buying gear that works against your plans.
The clearest shortcut to choosing tackle is asking your charter captain or local bait shop what’s working right now for the species you want to catch.
Every fish species responds to different presentations, which means your tackle needs to fit the fish, not just your budget. Inshore fishing for redfish or snook calls for lighter rods, smaller hooks, and natural baits or soft plastics. Deep-sea trips in the Gulf require heavy conventional rods, thick braided line, and large circle hooks that can handle the pressure of fighting a big fish at depth.
Water depth, current speed, and weather all affect which tackle performs well on a given day. Beginners benefit most from simple, versatile setups like a medium-action spinning rod with 10- to 15-pound monofilament, which handles a wide range of conditions without requiring advanced casting technique. If you book a guided charter out of Destin, your captain supplies the gear, so you can focus on learning rather than shopping.
Once you understand what is fishing tackle and how each piece connects, the next step is putting together a setup that actually works. Copying a proven combination saves you time and keeps you from making expensive mistakes before you’ve had a chance to develop your own preferences on the water.
This setup handles most shallow-water species you’ll encounter along the Emerald Coast, including flounder, speckled trout, and smaller redfish. Start with a 7-foot medium-action spinning rod paired with a 2500-series spinning reel. Spool it with 10-pound braided line and attach a short fluorocarbon leader of around 12 to 15 pounds. Clip on a 1/4-ounce jig head with a soft plastic paddle tail, and you’re ready for most inshore conditions.
This three-piece combination of braided main line, fluorocarbon leader, and soft plastic lure covers more inshore situations than any other beginner setup.
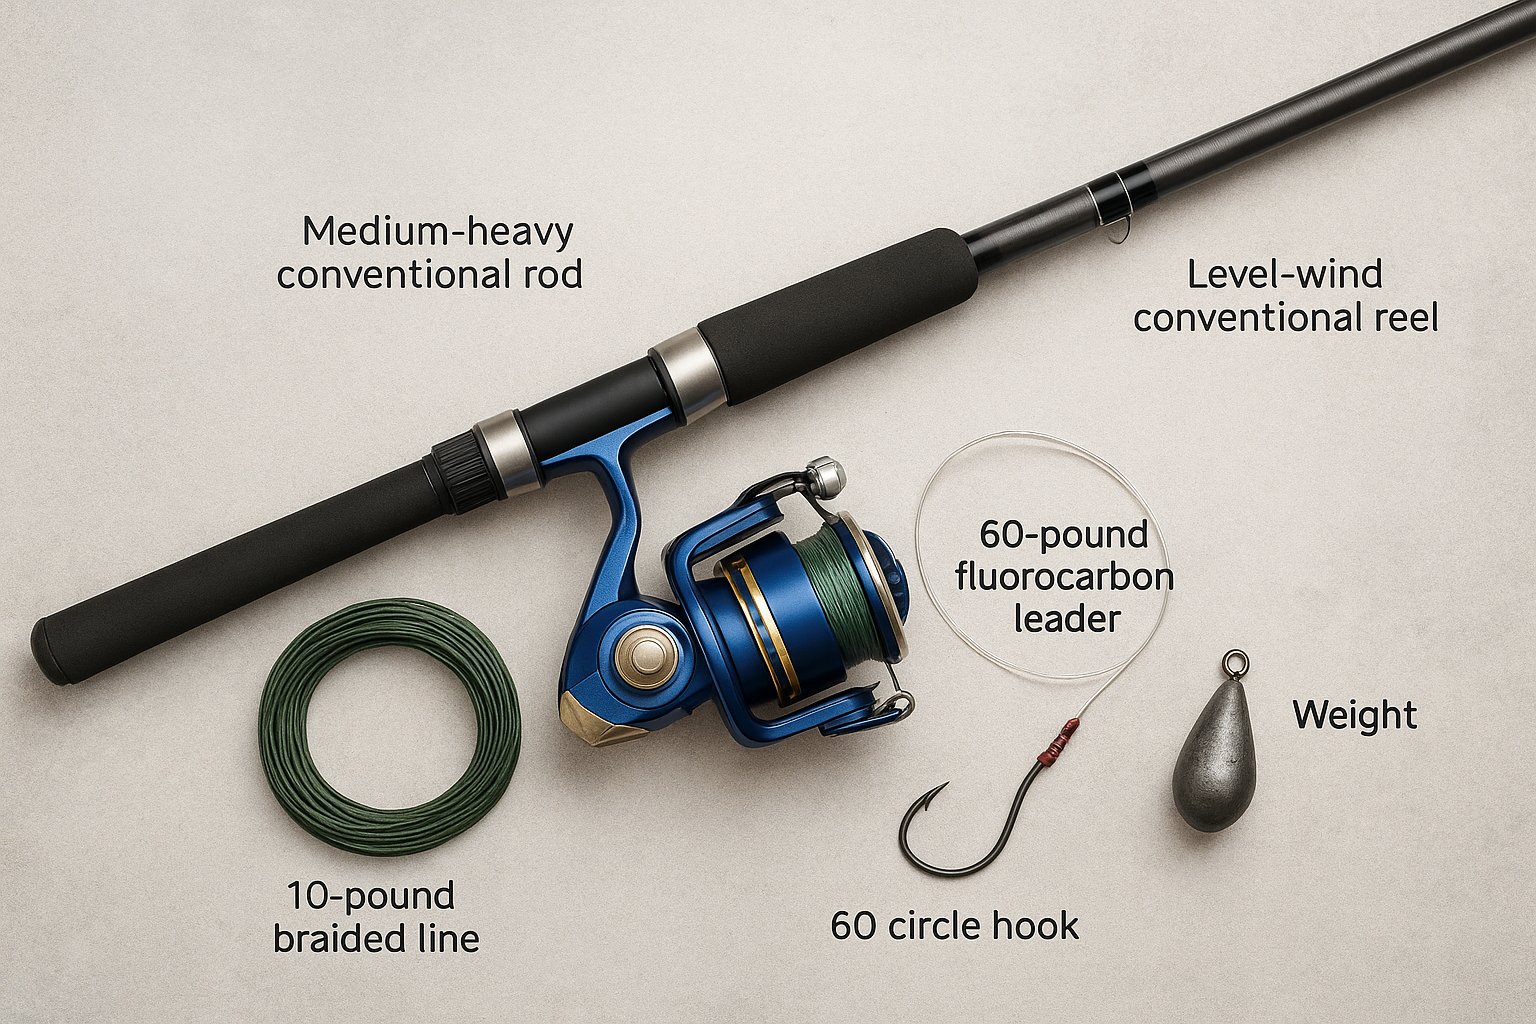
Offshore fishing out of Destin requires heavier gear built to handle depth, current, and larger fish. Use a medium-heavy conventional rod rated for 30 to 50 pounds, paired with a level-wind conventional reel loaded with 40-pound braided line. Add a 60-pound fluorocarbon leader, a 6/0 circle hook, and enough weight to keep your bait on the bottom. This rig works well for snapper and grouper, which are common targets on Gulf charters throughout the season.
Part of understanding what is fishing tackle is knowing how to maintain it between trips. Salt water, UV exposure, and heat break down gear faster than most beginners expect, and ignoring basic care shortens the life of equipment you’ve invested real money in. Rinsing your rods, reels, and terminal tackle with fresh water after every saltwater outing takes a few minutes and prevents the corrosion that quietly destroys metal components.
A quick freshwater rinse after every saltwater trip is the single most effective habit you can build to extend the life of your tackle.
Proper storage protects your investment and keeps your tackle ready to fish without last-minute repairs. Store rods horizontally or hang them vertically to prevent warping. Keep hooks, jigs, and soft plastics in a sealed tackle box away from direct sunlight, which dries out soft baits and weakens plastic components over time.
Placing a small silica gel packet inside your tackle box absorbs moisture and reduces rust forming on hooks and split rings. Organizing your gear by type also saves time on the water when conditions shift quickly and you need to swap rigs fast.
Hooks cause the most common fishing injuries, and most of them are preventable. Always cap your hooks or close treble hooks into a soft plastic when moving around the boat. Check your knots before every cast, since a poorly tied knot fails under pressure and sends terminal tackle flying toward anyone nearby. Keep pliers and a basic first aid kit within reach at all times.
Now that you know what is fishing tackle and how each component fits together, you’re in a much better position to fish with confidence. The right rod, reel, line, and terminal setup won’t guarantee a catch, but they give you a real edge and keep the experience enjoyable from the first cast to the last.
If you’re heading to Destin and want to skip the gear research entirely, a guided fishing charter puts you on the Gulf with professional-grade equipment and a captain who knows exactly where the fish are running. You focus on fishing while the experts handle everything else.
Crab Island and the surrounding Gulf waters offer some of the best fishing on the Emerald Coast, and getting there is easier than you think. Book your trip directly through Original Crab Island and spend less time planning and more time pulling fish over the rail.

Whether you’re rigging up for a weekend bass trip or stocking your tackle box before a Gulf of Mexico fishing charter, searching for a fishing tackle store near me is one of the first things any angler does. The right shop makes all the difference, knowledgeable staff who actually fish, fresh bait that wasn’t sitting in a cooler for a week, and gear that matches what’s biting in your local waters.
Here at Original Crab Island, we put anglers on fish every day through our guided fishing charters out of Destin, Florida. But we also know that half the fun is gearing up on your own, picking the right lures, testing line strength, and getting hands-on advice from people behind the counter who know the local bite. That’s why a solid tackle shop matters, whether it’s an independent bait-and-tackle spot or a big-box sporting goods chain.
This list breaks down 10 of the best options for finding fishing tackle stores near you, covering both local shops and national chains. We’ll look at what each type does well, what to expect when you walk in, and how to pick the right store based on your fishing style and budget.
Before you spend an afternoon searching for a fishing tackle store near me, consider that a guided fishing charter already solves the gear problem for you. Original Crab Island runs guided fishing charters out of Destin, Florida, putting you on the water with everything you need before you ever step aboard. For many anglers, especially first-timers or vacationers, this is the most practical starting point.
When you book a charter, your captain handles all the rod selection, reel setup, and terminal tackle before the boat leaves the dock. You skip the store run entirely, which saves time and eliminates the risk of buying the wrong gear for Gulf of Mexico conditions. Gulf fishing is specific, and what works inshore for redfish is not what you need when you’re targeting amberjack 30 miles offshore.
A guided charter is one of the few fishing options where the right tackle is already guaranteed before you touch the water.
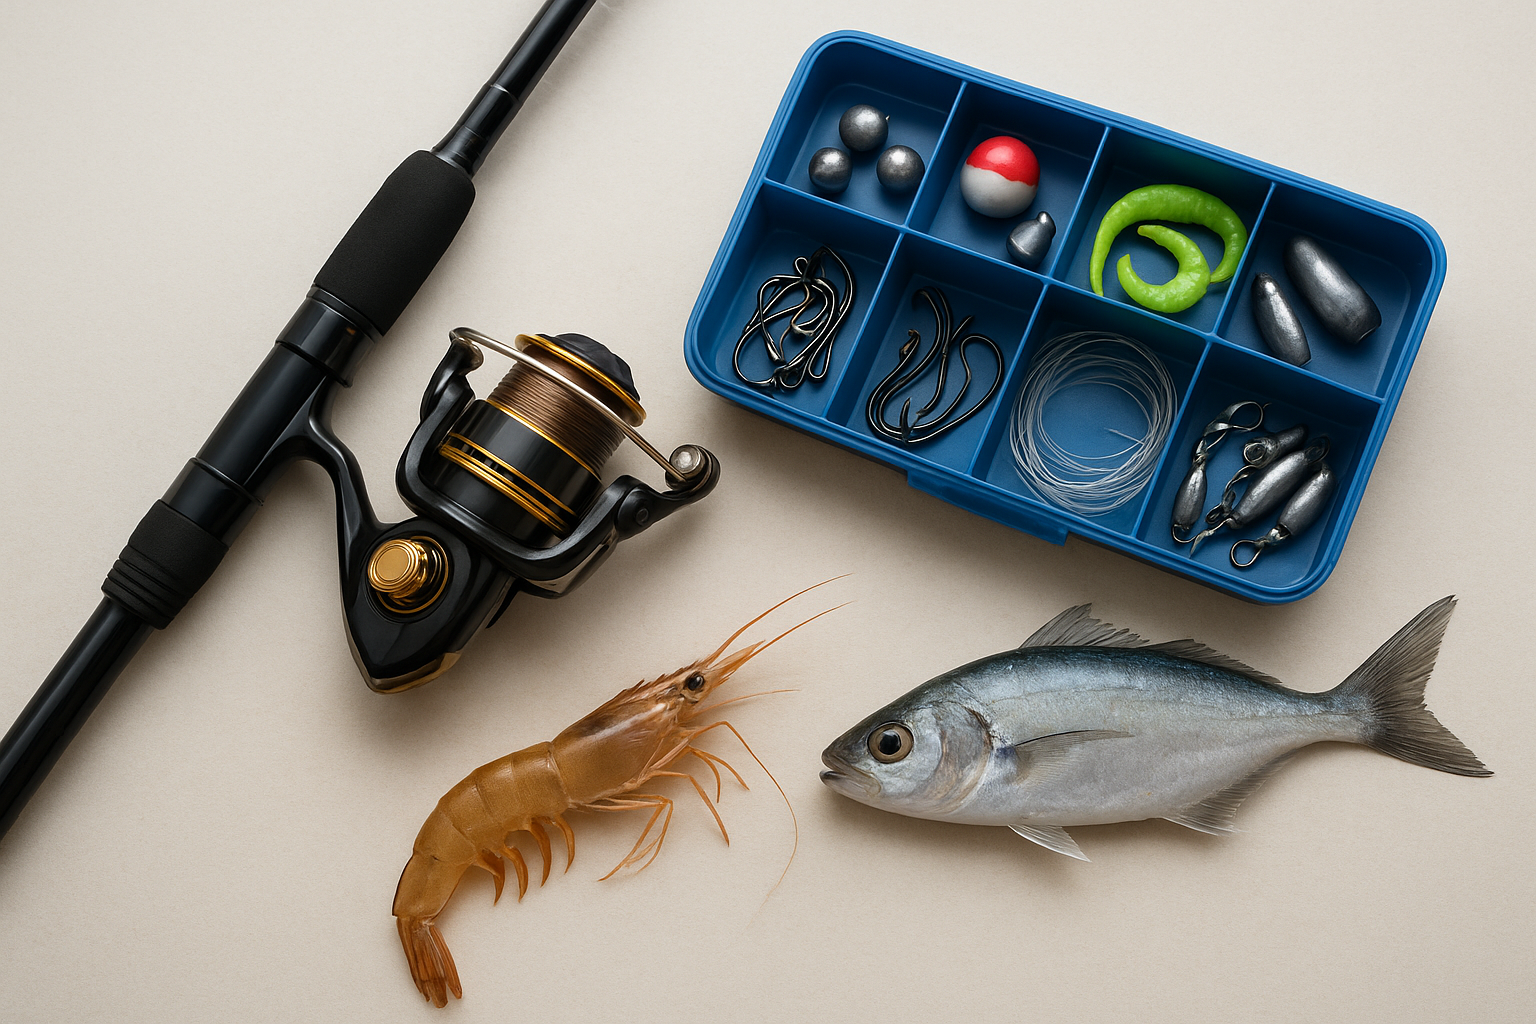
Most Original Crab Island charters supply rods, reels, and live or cut bait matched to the target species that day. Depending on the trip type, you can also expect hooks, weights, and leaders pre-rigged by the mate, along with ice and cooler space to keep your catch fresh on the ride back to the dock.
This option works best for first-time anglers and vacationing families who don’t want to invest in gear they’ll use once and then figure out how to pack home. Groups planning a day on the Gulf also benefit from a structured, guided experience rather than burning vacation time sorting out what to buy at a store and how to rig it properly for local waters.
Experienced anglers traveling from out of state get real value here too. Bringing rod-and-reel combos on a flight is a frustrating, expensive process, and a charter gives you access to local knowledge and properly matched tackle without the oversized bag fees.
Charter prices vary based on trip length, group size, and fishing type (nearshore vs. deep sea). Half-day private group trips generally run between $600 and $900, while full-day offshore trips can reach $1,200 or more. Shared trips bring the per-person cost down significantly, making this option accessible even on a tighter vacation budget.
Factors that push prices higher include fuel surcharges and peak summer demand, as well as how far offshore the trip ventures. Booking directly through Original Crab Island gives you transparent pricing and the ability to tailor your trip to your group’s goals.
When you search for a fishing tackle store near me, an independent bait and tackle shop is often the best result you can find. These locally owned stores know the specific bodies of water around them, stock bait that’s actually fresh, and employ staff who fished those same spots last weekend.
Most independent shops carry live bait, cut bait, and a curated selection of lures matched to whatever is actively biting in the area. Many will rig your leader, tie on your hooks, and help you spool new line before you walk out the door, saving you setup time at the water.
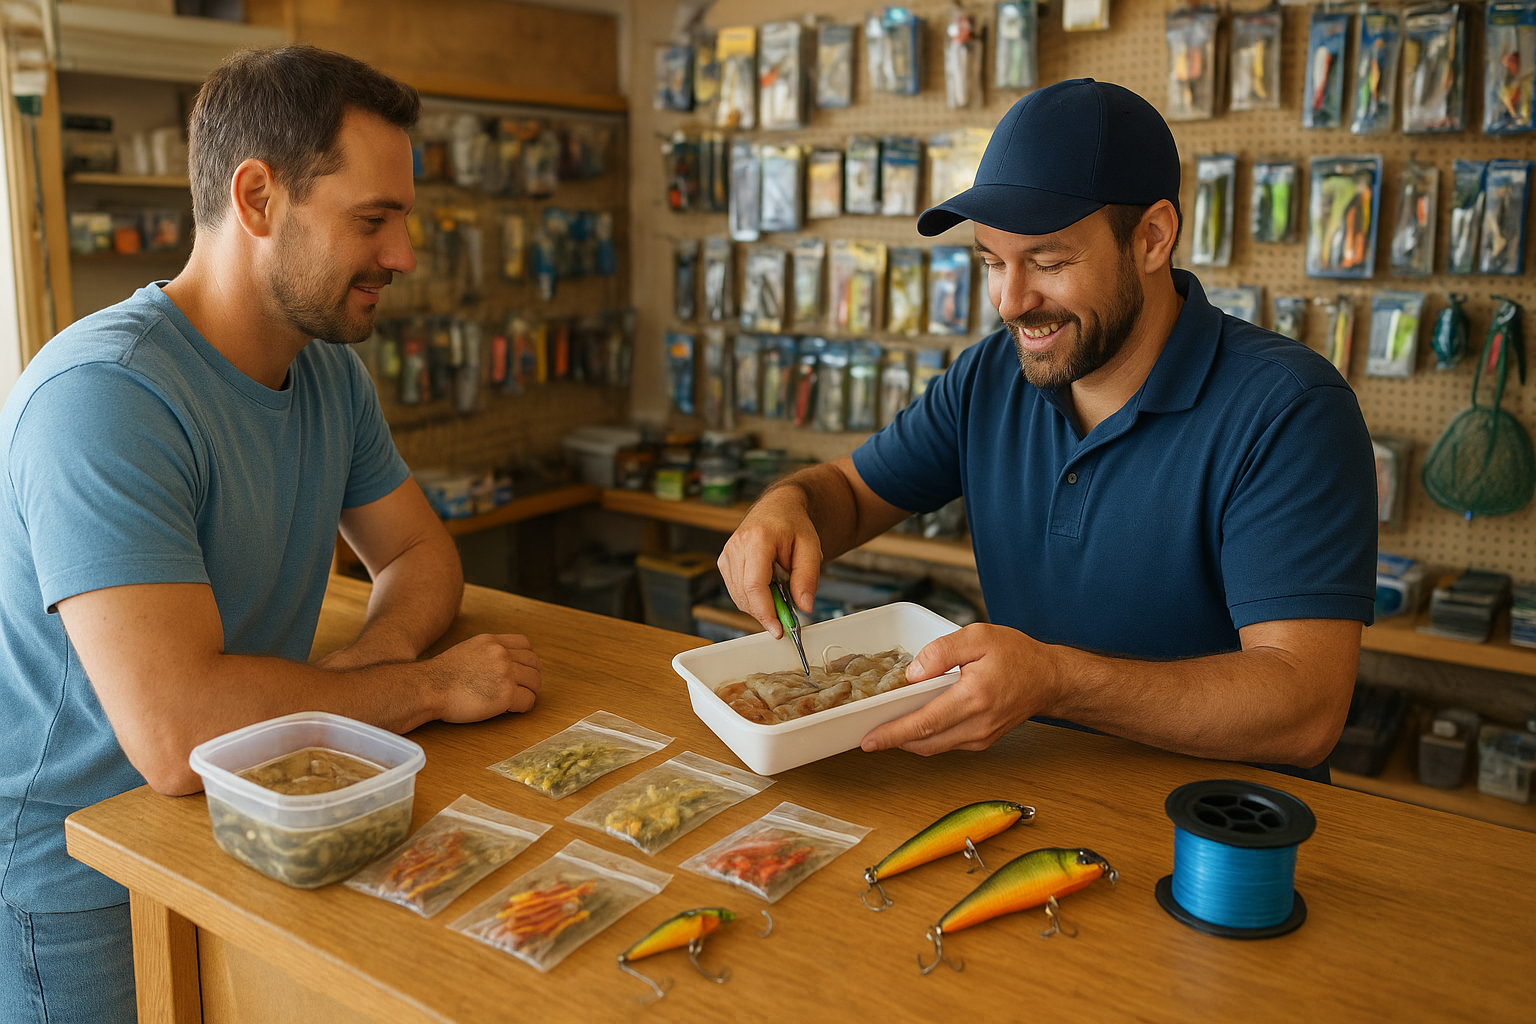
A good independent shop will have you fishing-ready in under 15 minutes, which no big-box store can reliably match.
Walk in and ask specifically what’s been caught this week and where. Staff at independent shops track local reports closely. Ask about water clarity, current bait schools, and whether live or artificial is producing better right now. That 60-second conversation can completely change what you buy.
Independent shops work best for serious local anglers and returning visitors who want accurate, current information rather than generic product suggestions. If you fish the same region more than once a season, building a relationship with one shop pays off consistently.
Expect to pay $4 to $8 for a dozen live shrimp, $6 to $15 for pre-tied leader rigs, and $8 to $20 for quality regional lures. Prices run slightly higher than big-box stores, but the targeted advice you receive is worth the difference.
When you’re near a boat ramp and need supplies fast, a marina bait shop is often the most practical option you’ll find. Searching for a fishing tackle store near me at or near a marina usually turns up one of these compact shops designed to get anglers on the water without a separate detour.
Marina shops focus on immediate needs over broad selection. You’ll typically find live bait (shrimp, minnows, or mullet depending on the region), cut bait, hooks, weights, and pre-rigged leaders suited to local species. Most carry a small lure selection and monofilament line, but not much beyond that. The narrow range is intentional: everything on the shelf was chosen because it catches fish on the nearby water.
A tight inventory at a marina shop is usually a shortcut to buying the right thing, not a limitation.
Live bait moves fast on weekend mornings and peak season days. Arrive 30 minutes before you launch or call the night before if your trip depends on a specific bait type like live pilchards or finger mullet.
Marina shops work best for boaters and kayak anglers launching from a nearby ramp who need a quick, targeted stop before hitting the water. They’re also a strong fit for day-trippers traveling light who prefer picking up everything at the water rather than making a store run beforehand.
Expect to pay $5 to $10 for live bait, $3 to $5 for ice, and $2 to $8 for hooks and weights. Prices run slightly higher than big-box stores, but you save time and avoid an extra stop along the way.
If your search for a fishing tackle store near me turns up a Bass Pro Shops location, it’s worth making the trip. Bass Pro Shops carries one of the widest in-store selections of fishing gear you’ll find under one roof, from ultralight freshwater spinning rigs to heavy-duty offshore saltwater setups.
Most Bass Pro Shops locations stock rods, reels, line, hooks, weights, soft plastics, hard baits, and live bait in a single visit. The fishing department is large enough that you can walk out fully equipped regardless of the species you’re targeting. Staff are generally knowledgeable, and many locations post local fishing reports near the register or on in-store bulletin boards.
Bass Pro Shops is one of the few national chains where you can build a complete setup, from rod to terminal tackle, without visiting a second store.
Before you start pulling gear off the shelf, tell a staff member your target species and the type of water you’re fishing, whether that’s a freshwater lake, an inshore bay, or the open ocean. This narrows your options fast and keeps you from buying mismatched tackle that looks appealing but won’t perform where you’re fishing.
Bass Pro Shops works well for anglers building a new setup from scratch and families who want to browse a large selection without feeling rushed.
Expect to spend $40 to $80 for a beginner rod-and-reel combo, with quality monofilament and fluorocarbon lines running $8 to $20 per spool.
Cabela’s is a strong contender when your search for a fishing tackle store near me turns up a location nearby. Like Bass Pro Shops (the two brands share a parent company), Cabela’s operates large format stores with deep fishing departments, but the store layout and product focus have a few meaningful differences worth knowing before you go.
Cabela’s tends to carry a broader selection of saltwater and fly fishing gear than many competing big-box retailers, making it a solid stop if your fishing style goes beyond standard freshwater bass setups. The stores also stock a range of fishing-specific clothing and waders, which is useful if you’re planning a wade fishing trip or need sun protection for a full day offshore.
Cabela’s is one of the better big-box options for anglers whose needs go beyond basic spin fishing rigs.
Start by identifying your target species and the average water depth you plan to fish. From there, ask a floor associate to help you match rod action and reel gear ratio to those conditions. Avoid buying line purely based on price or packaging, and instead focus on matching line weight to your rod’s rated range, which is printed on the blank near the handle.
Cabela’s works best for intermediate anglers upgrading their gear and traveling anglers who need a reliable, well-stocked stop while away from home.
Mid-range combos typically run $60 to $150, with specialty saltwater and fly rods climbing higher depending on brand and materials.
If a DICK’S Sporting Goods location comes up when you search for a fishing tackle store near me, it can cover your bases in a pinch. It isn’t a dedicated tackle store, but most locations carry enough fishing gear to handle urgent needs before a trip.
DICK’S dedicates a moderate section of floor space to fishing compared to specialty stores, so don’t expect the depth you’d find at Bass Pro Shops or Cabela’s. You’ll find a rotating selection of rods, spinning combos, monofilament line, and a basic lure assortment covering the most common freshwater species. Saltwater options are limited unless the store sits near a coastal market that influences local inventory.
DICK’S works best as a backup plan, not a primary gear stop for serious or specialized fishing trips.
Your best purchases here are replacement items you know by name, such as a specific hook size, a replacement spool of line, or a box of split shot weights. Sticking to name-brand hooks and terminal tackle from manufacturers like Eagle Claw or Berkley keeps you from guessing on quality when the selection is thin.
DICK’S works best for casual anglers and families who fish occasionally and need basic gear without making a dedicated trip to a specialty store. It also suits travelers staying near a mall who need a fast replacement item the morning of a fishing trip.
Spinning combos typically run $30 to $70, with individual rods and reels available separately in the $25 to $60 range depending on brand and length.
When your search for a fishing tackle store near me lands you at an Academy Sports + Outdoors location, you’re looking at one of the better value-oriented options among national sporting goods chains. Academy operates primarily across the South and Southeast, so availability depends on your region, but where it exists, it consistently offers competitive pricing on fishing essentials without sacrificing too much on selection.
Academy built its reputation on keeping prices accessible across outdoor categories, and the fishing department reflects that approach. You’ll find brand-name rods, reels, and tackle at prices that undercut comparable items at Bass Pro Shops or Cabela’s in many cases. The store also runs frequent sales on fishing gear, particularly heading into peak season, which makes it a smart stop if you’re building out a full kit without a large budget.
Academy is one of the few national chains where budget-friendly pricing doesn’t automatically mean giving up recognizable brands.
For freshwater fishing, Academy stocks a solid range of soft plastics, crankbaits, and spinning combos suited to bass, crappie, and catfish. Saltwater options vary by store location, with coastal stores carrying heavier leaders, circle hooks, and surf rigs that inland locations may not stock. Check the store’s app before visiting to confirm what’s available locally.
Academy works best for budget-conscious anglers and families who want reliable gear without paying specialty store prices. It’s also a practical stop for occasional anglers who fish a few times per year and don’t need to invest in premium equipment.
Spinning combos typically run $25 to $60, with individual lures and terminal tackle priced 10 to 20 percent below comparable items at larger outdoor chains.
West Marine sits in a different category than most results you’ll find when searching for a fishing tackle store near me. It’s primarily a marine supply retailer, which means the fishing gear it stocks is built around boaters and saltwater anglers rather than general outdoor recreation. If you’re fishing from a vessel or targeting species in open coastal water, this distinction matters.
West Marine stocks rigging supplies, stainless steel hardware, and heavy monofilament leader material that most bait shops and sporting goods chains simply don’t carry. You’ll also find quality rod holders, fighting belts, and outrigger components that serve serious offshore anglers. If your trip involves trolling or targeting large pelagic species, West Marine often has the terminal tackle and rigging components that other stores are missing.
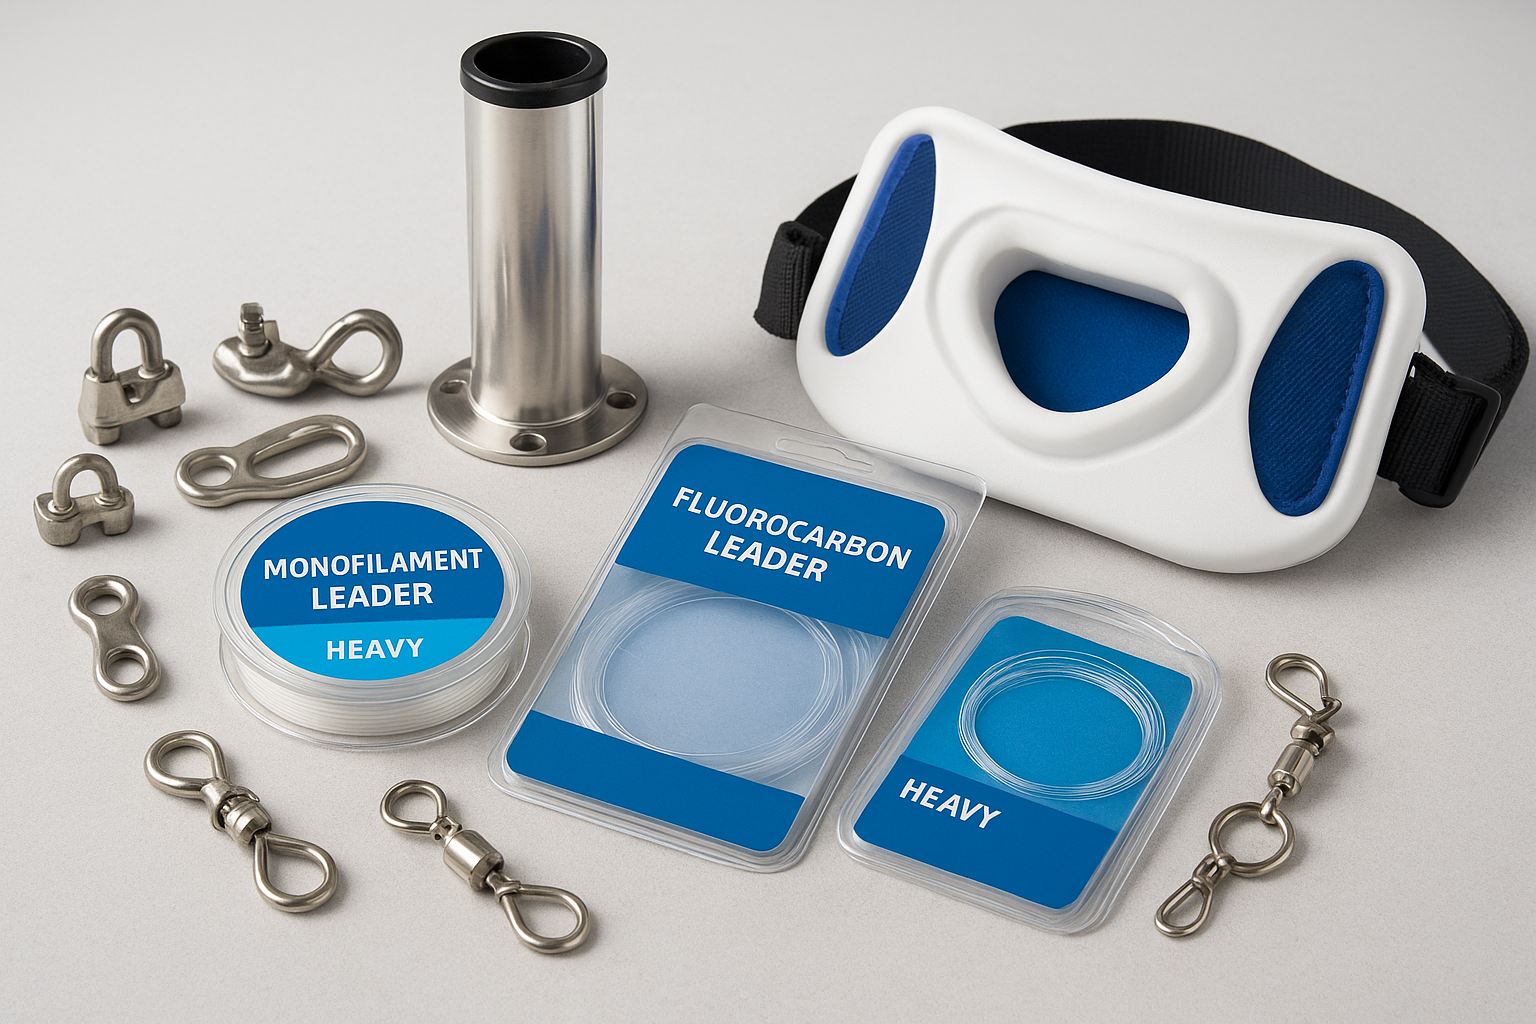
West Marine is the most reliable national retailer for finding offshore-grade rigging materials in a single stop.
Focus your visit on heavy fluorocarbon leaders, swivels rated for your target species, and circle hooks sized to what you’re fishing for. Ask staff to help you match your leader pound test to your main line rather than buying the two separately without comparing specs.
West Marine works best for offshore anglers and boaters who need marine-grade gear and rigging components that go beyond what standard tackle stores stock.
Expect to pay $12 to $30 for quality leader spools and $15 to $50 for rigging components, with pricing reflecting the marine-grade construction rather than general-use alternatives.
When your search for a fishing tackle store near me turns up only a Walmart, you still have a workable option on your hands. The sporting goods section won’t rival a dedicated tackle shop, but it carries enough fishing basics to get you on the water when nothing else is nearby or open.
Walmart stocks nationally recognized brands like Zebco, Eagle Claw, and Berkley, which means the hooks, weights, and pre-spooled spinning combos you pick up here are genuinely functional. Where the department falls short is depth, so skip specialty items like fluorocarbon leaders, quality swivels, or saltwater-specific rigs since the selection thins out quickly beyond the everyday basics.
Walmart is best used as an emergency stop for replacing known items, not as a first choice for building a complete setup.
Check the rod’s label near the handle for its recommended line weight range before you grab any line off the shelf. Stick to that range and match your hook size to your target species rather than buying whatever comes bundled together in a value pack. Avoid generic no-name combo packs that pair undersized hooks with overly heavy line, since these combinations tend to underperform once you’re actually on the water.
Walmart works best for casual anglers and complete beginners who want an inexpensive starting point without committing to a specialty store visit. It also fits anyone who needs a last-minute replacement item before an early morning trip when other shops aren’t yet open.
Spinning combos typically run $20 to $45, with hooks and weights priced noticeably below what you’d pay at a dedicated sporting goods retailer or independent tackle shop.
Sometimes your search for a fishing tackle store near me simply doesn’t turn up anything useful within a reasonable drive. That’s where online retailers like Discount Tackle fill the gap, offering a wide catalog of saltwater and freshwater gear at prices that consistently undercut most physical stores.
Online shopping makes the most sense when you have at least two or three days before your trip and need specialty items that local stores don’t stock. If you’re targeting a specific soft plastic color, a particular circle hook size, or a brand that independent shops rarely carry, online ordering gets you exactly what you need without compromising on selection.
Online tackle retailers carry a depth of inventory that no single physical store can match, which makes them the right call for specific or hard-to-find gear.
Before you add anything to your cart, confirm your rod’s line weight rating and your target species so you can match line, hooks, and lures to actual fishing conditions rather than guessing based on product photos. Read recent customer reviews filtered to your specific fishing region or species since performance varies significantly by water type.
Online tackle shopping works best for experienced anglers who already know what they need and want to stock up between trips without paying retail markups. It also suits anyone building a full kit in advance of a planned fishing vacation.
Most tackle items run 10 to 30 percent less than in-store prices, with free shipping commonly available on orders over $50 to $75 depending on the retailer.
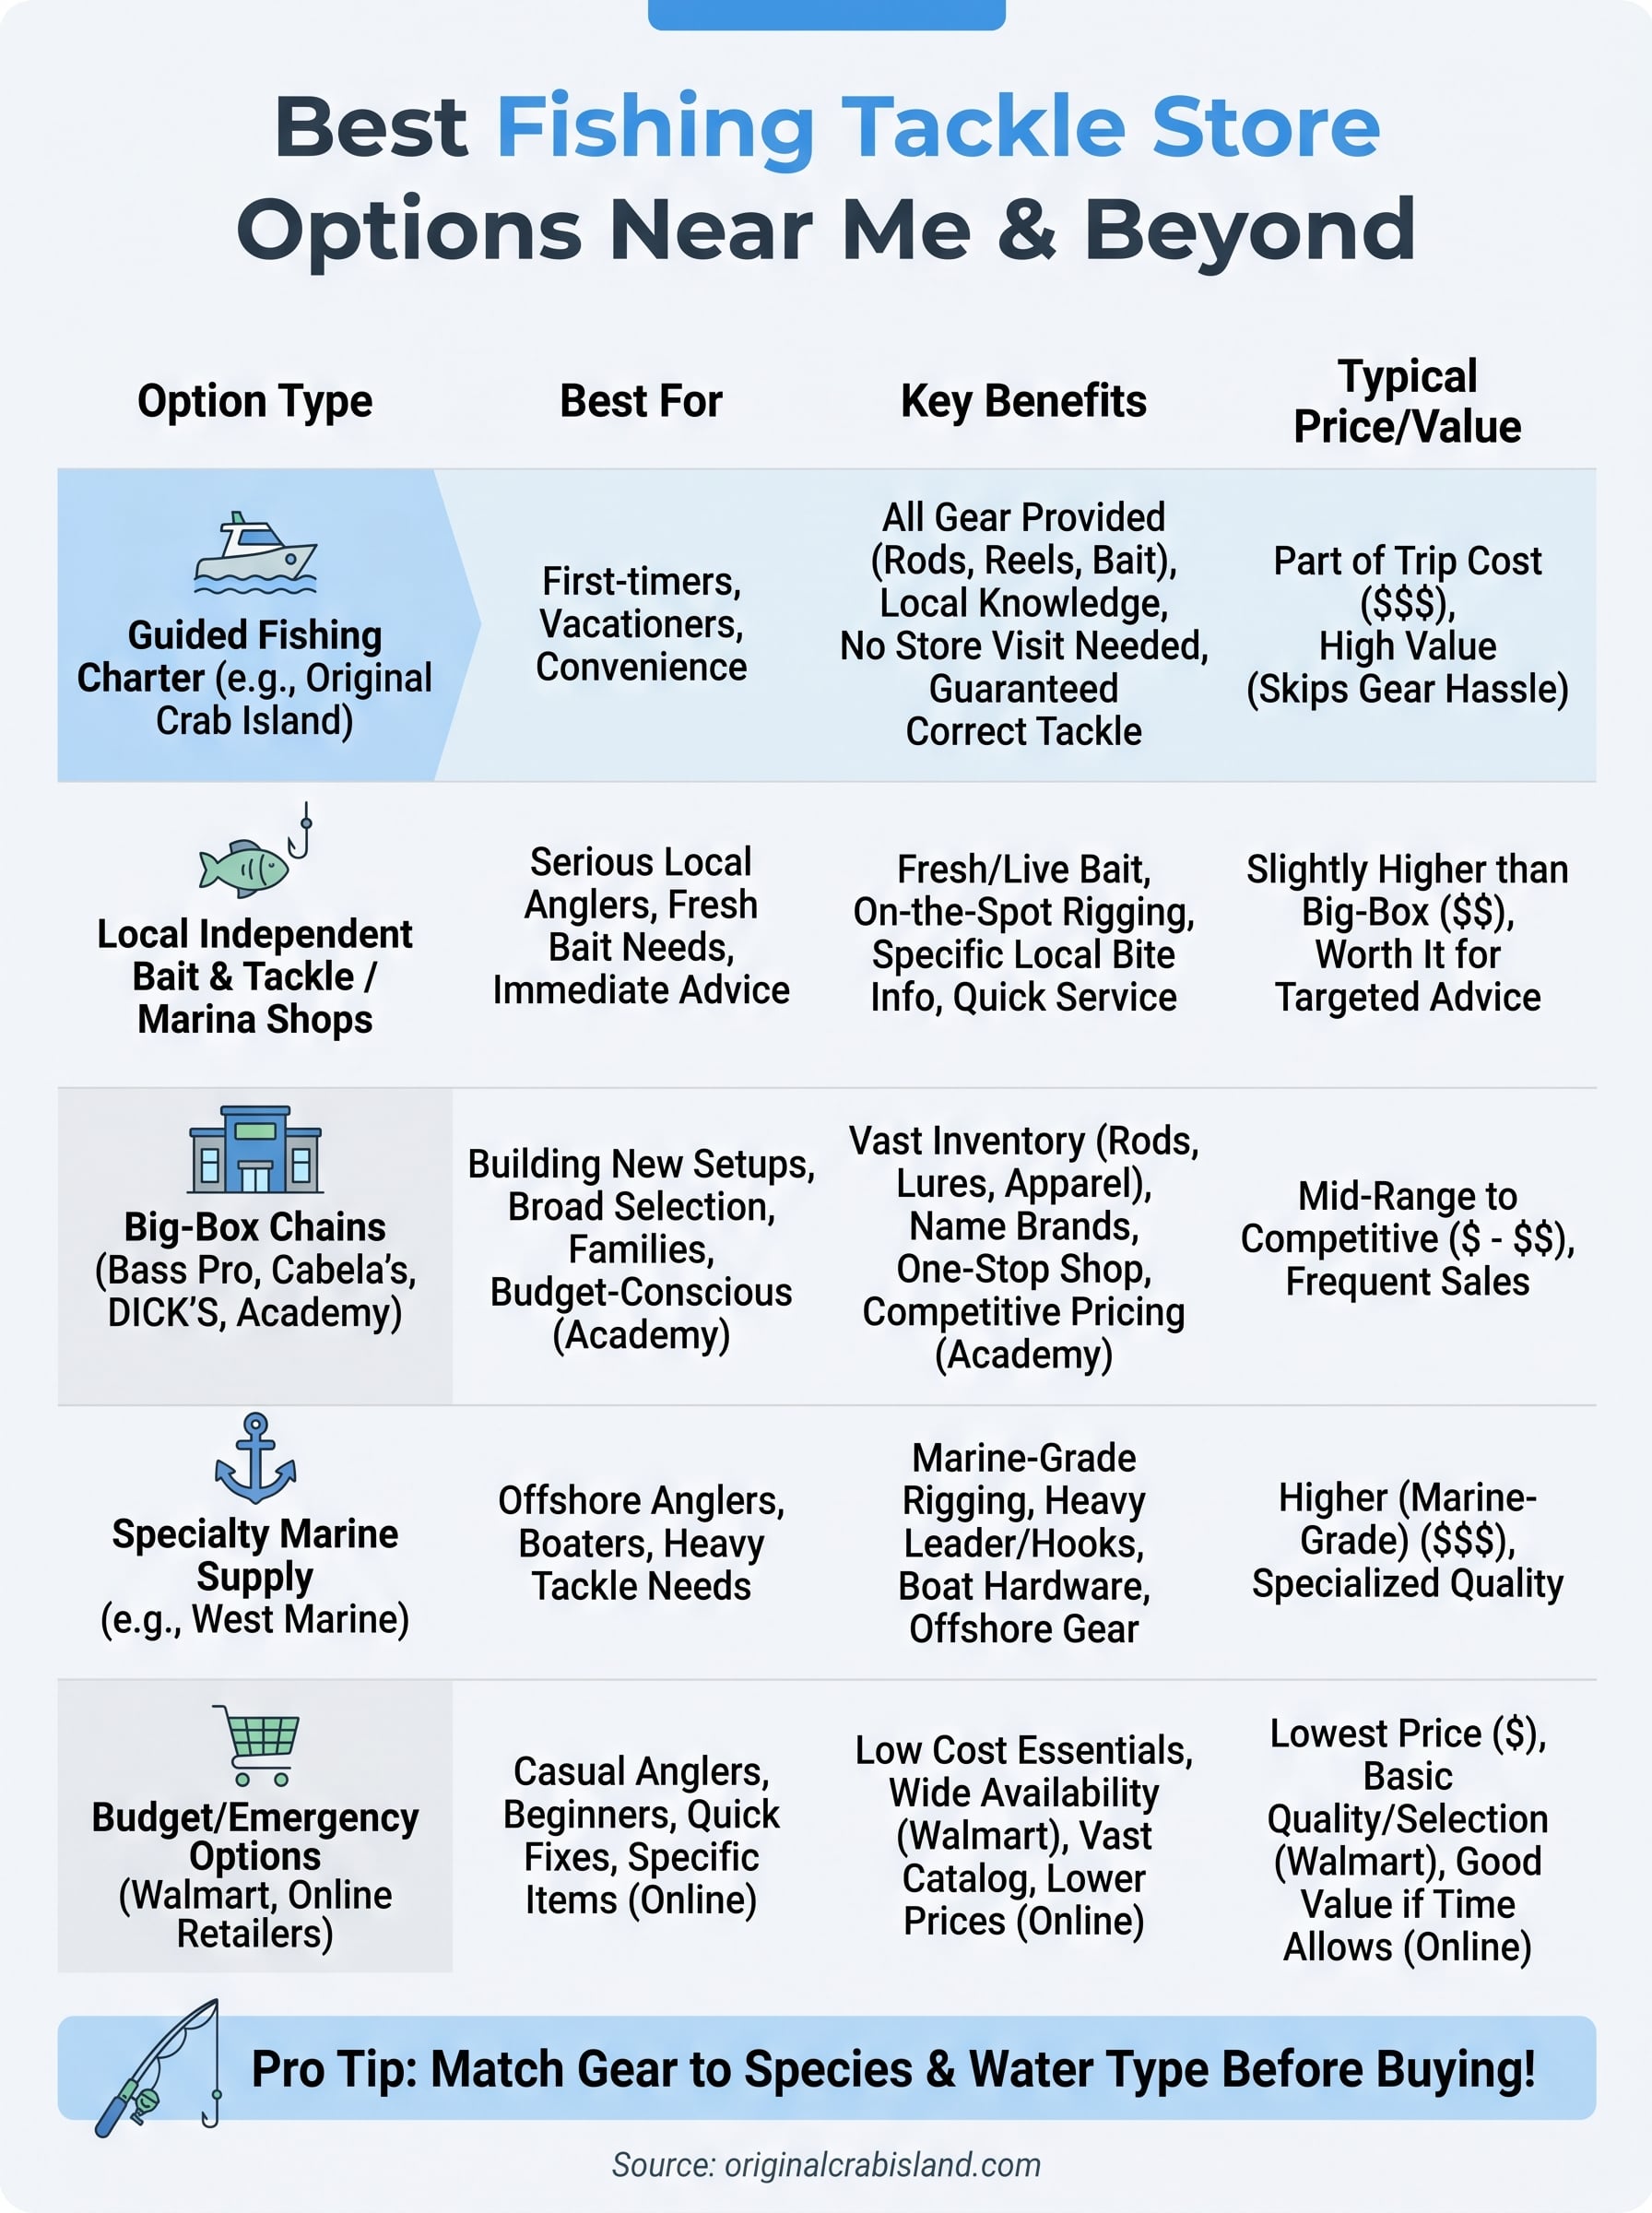
Your best move depends on where you’re fishing and how much time you have before your trip. If you’re near Destin, Florida, and want live bait, rigged gear, and local knowledge without running down a fishing tackle store near me search, a guided charter handles all of that for you. For everyone else, start with an independent bait shop or marina store if one exists near your launch point, and fall back on a national chain when you need a broader selection or a last-minute replacement.
Before you buy anything, confirm your target species and water type so every purchase matches actual fishing conditions. Build your kit around those two factors first, then fill gaps with whatever store fits your location and budget. If you’re ready to skip the gear run entirely and get straight to catching fish, book a fishing charter with Original Crab Island and let the captain handle the rest.

Rip currents are responsible for over 100 drownings in the United States every year, and the Gulf Coast beaches around Destin see their fair share. Knowing how to spot a rip current before you step into the water is one of the most practical safety skills any beachgoer can have, whether you’re wading with your kids near the shore or heading out to Crab Island for the day. At Original Crab Island, we put guests on the water daily, pontoon rentals, jet skis, parasailing, fishing charters, and water safety is something we take seriously. Our staff sees the conditions around Destin’s shoreline and the Emerald Coast firsthand, and we know that a fun day on the water starts with knowing what to watch for. This guide breaks down seven visible signs you can use to identify a rip current from shore before you ever get wet. You’ll learn what to look for in the water’s color, how wave patterns shift, and what the movement of foam and debris is telling you. Each sign is something you can spot with your own eyes, no special equipment needed.
 Destin’s Gulf water is famously clear and green-tinted, which actually works in your favor when you’re trying to read the surf. A rip current disrupts that visual pattern in ways you can learn to recognize. Knowing how to spot a rip current here is slightly different from other coastlines because the Emerald Coast’s shallow sandbars and clear water make some signs more visible, while the calm appearance of the Gulf on a low-wind day can make others easy to miss.
The most reliable visual cue is a distinct band of discolored water cutting through the normal surf zone. In Destin, a rip current often looks darker than the surrounding water because it’s pulling deeper, sandier water away from the bar. Sometimes it looks brown or murky against the green-blue of the calmer water on either side. 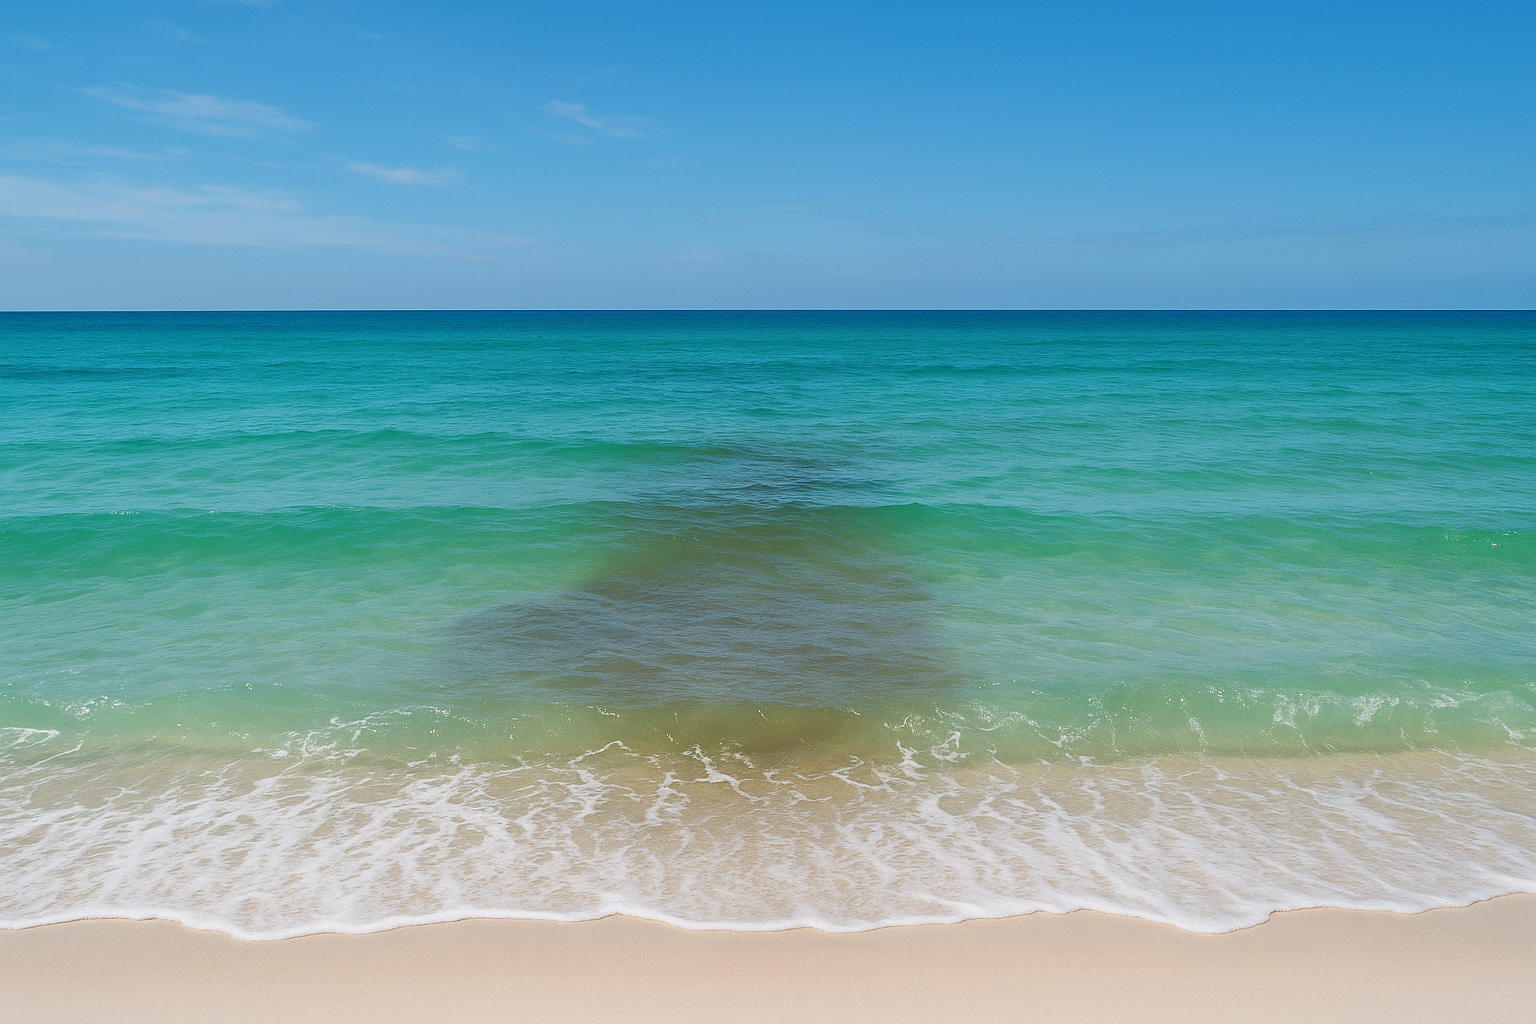
If you see a strip of water that looks a noticeably different color from what’s around it, treat that as a warning until you can rule it out.
This color difference is clearest when you look from an elevated spot, like a beach access boardwalk or a dune, rather than from the waterline. The higher your vantage point, the easier it is to see the full shape of the channel.
A rip current also changes the surface texture of the water. While waves around it are breaking and foaming normally, the rip channel often looks choppy, rippled, or even smoother and flatter than the surf on either side. That flat patch in the middle of breaking waves is the current pushing water offshore, suppressing the wave action above it. Watch where foam and floating debris travel. In normal surf, foam moves toward shore. In a rip, it moves steadily away from the beach, often in a straight or slightly curved line out past the break.
Rip currents don’t form randomly. They need a gap in a sandbar or a break in a submerged structure to push water offshore. Destin’s sandbar system and the shallow flats around Crab Island create natural conditions where rips can develop quickly, even on days that look calm from the beach.
The most active formation areas include jetties, piers, and natural breaks in sandbars. Structures like the Destin East Jetty funnel water in ways that concentrate current, and any gap along Henderson Beach or Crystal Beach is a likely spot. Breaks between sandbars are the most common trigger you’ll encounter along this stretch of coast. 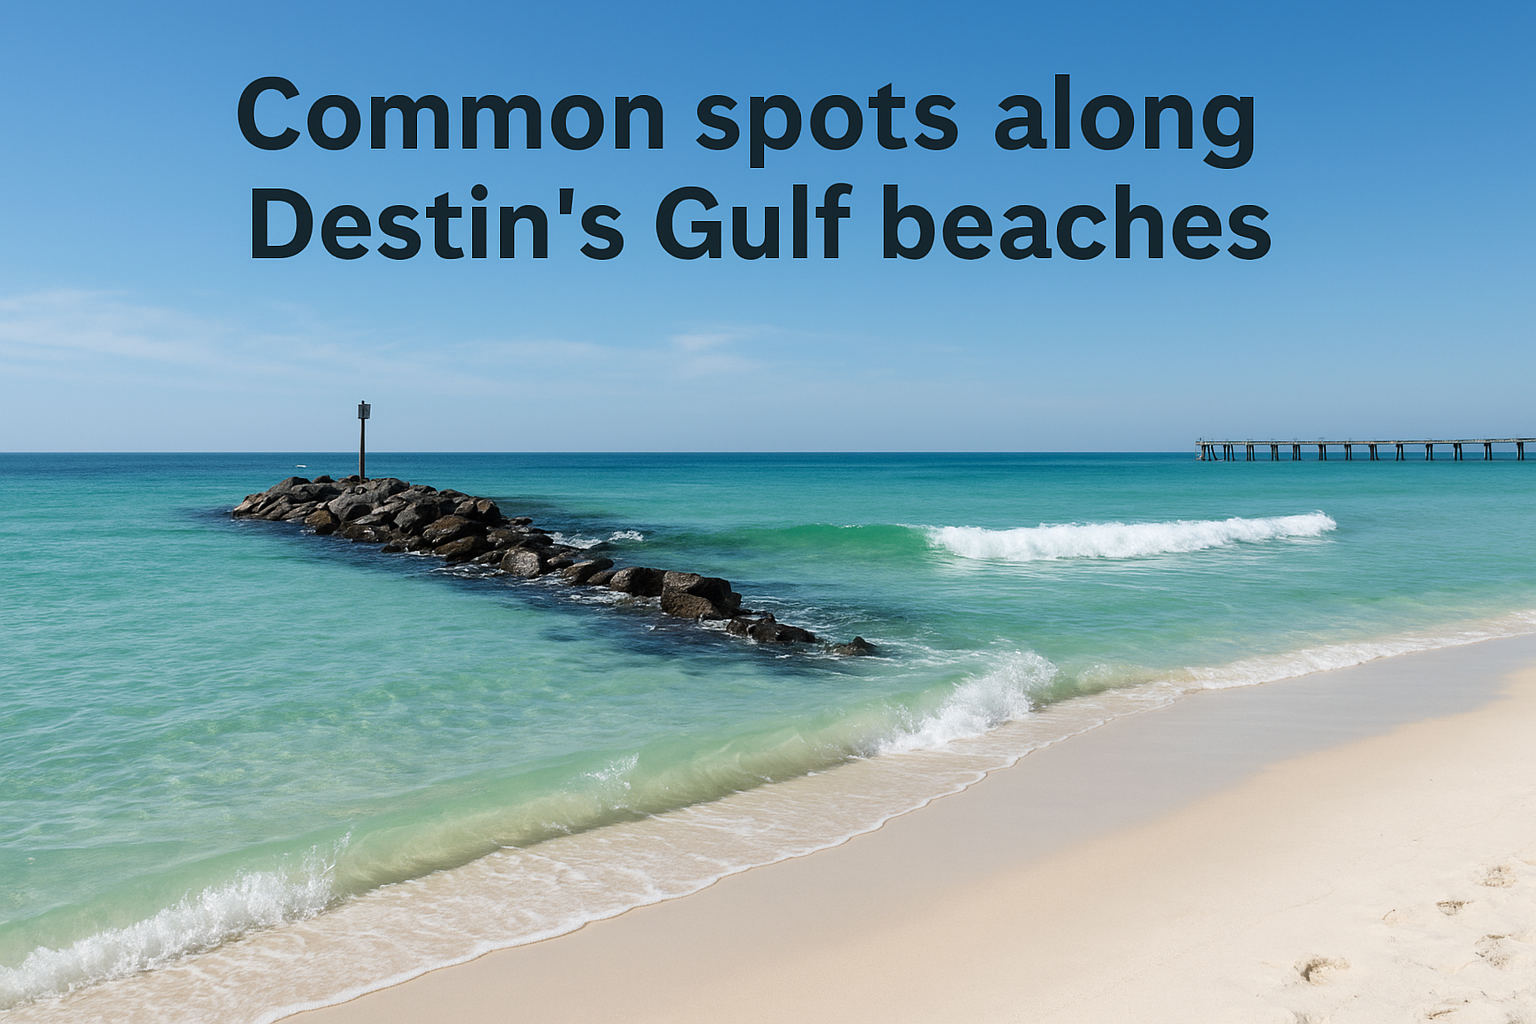
Crab Island sits in Choctawhatchee Bay rather than the open Gulf, so wave-driven rip currents are less of a concern there. However, strong tidal flow and boat traffic around the sandbar can still create unexpected lateral pulls in the water. Knowing how to spot a rip current matters most on Destin’s Gulf-side beaches, where conditions shift the fastest.
Always check the flag warning system posted at beach access points before you enter the water. Double red flags mean the water is closed to swimmers entirely.
Learning how to spot a rip current comes down to reading a handful of specific visual cues. Each sign below is something your eyes can detect from dry sand before you commit to entering the water.
Scan the surf zone for at least 60 seconds from an elevated spot before you wade in.
Commit these seven cues to memory and run through them as a quick check every time you approach the Gulf. Spotting even one should prompt you to pick a different entry point or speak to a lifeguard first.
These cues frequently cluster together, so seeing two or three at once is a strong signal to stay out of that section of water entirely.
Building a simple habit before you enter the water takes less than two minutes and costs nothing. Knowing how to spot a rip current is only useful if you actually pause and look before you step in. Most people walk straight from their towel to the waterline without stopping, and that is where the risk builds.
Start by finding an elevated vantage point, like a dune, a boardwalk ramp, or even just standing on your tiptoes. Height gives your eyes a wider angle across the surf zone. Spend at least 60 seconds watching the water move, not just glancing at it.
Track floating debris or foam for a full minute before deciding whether the water looks safe near your entry point.
Run through this sequence every time:
| Step | What to do | What to look for |
|---|---|---|
| 1 | Scan left to right across the surf zone | Color changes, flat patches |
| 2 | Watch foam and debris movement | Anything drifting offshore |
| 3 | Identify wave gaps | Spots where waves stop breaking |
| 4 | Check posted flag warnings | Red or double-red flags mean stay out |
Repeat this check any time conditions change, including after a storm or a shift in wind direction.
Even when you know how to spot a rip current, conditions can change fast or a current can form under your feet while you’re already in the water. Panicking is the most dangerous response you can have, because it burns energy quickly. The rip pulls you offshore, not underwater, and that distinction matters for every decision you make next.
Stay calm and do not fight the current by swimming straight toward shore. Swimming directly against a rip will exhaust you before you gain any ground. Instead, swim parallel to the shoreline until you clear the channel, then angle back to the beach at a diagonal.
If you cannot swim clear, float on your back, conserve energy, and signal for help by waving one arm above your head.
Never enter the water to rescue a struggling swimmer unless you are a trained lifeguard. Throw them something that floats and call 911 immediately. Quick action from shore saves more lives than an untrained water entry.
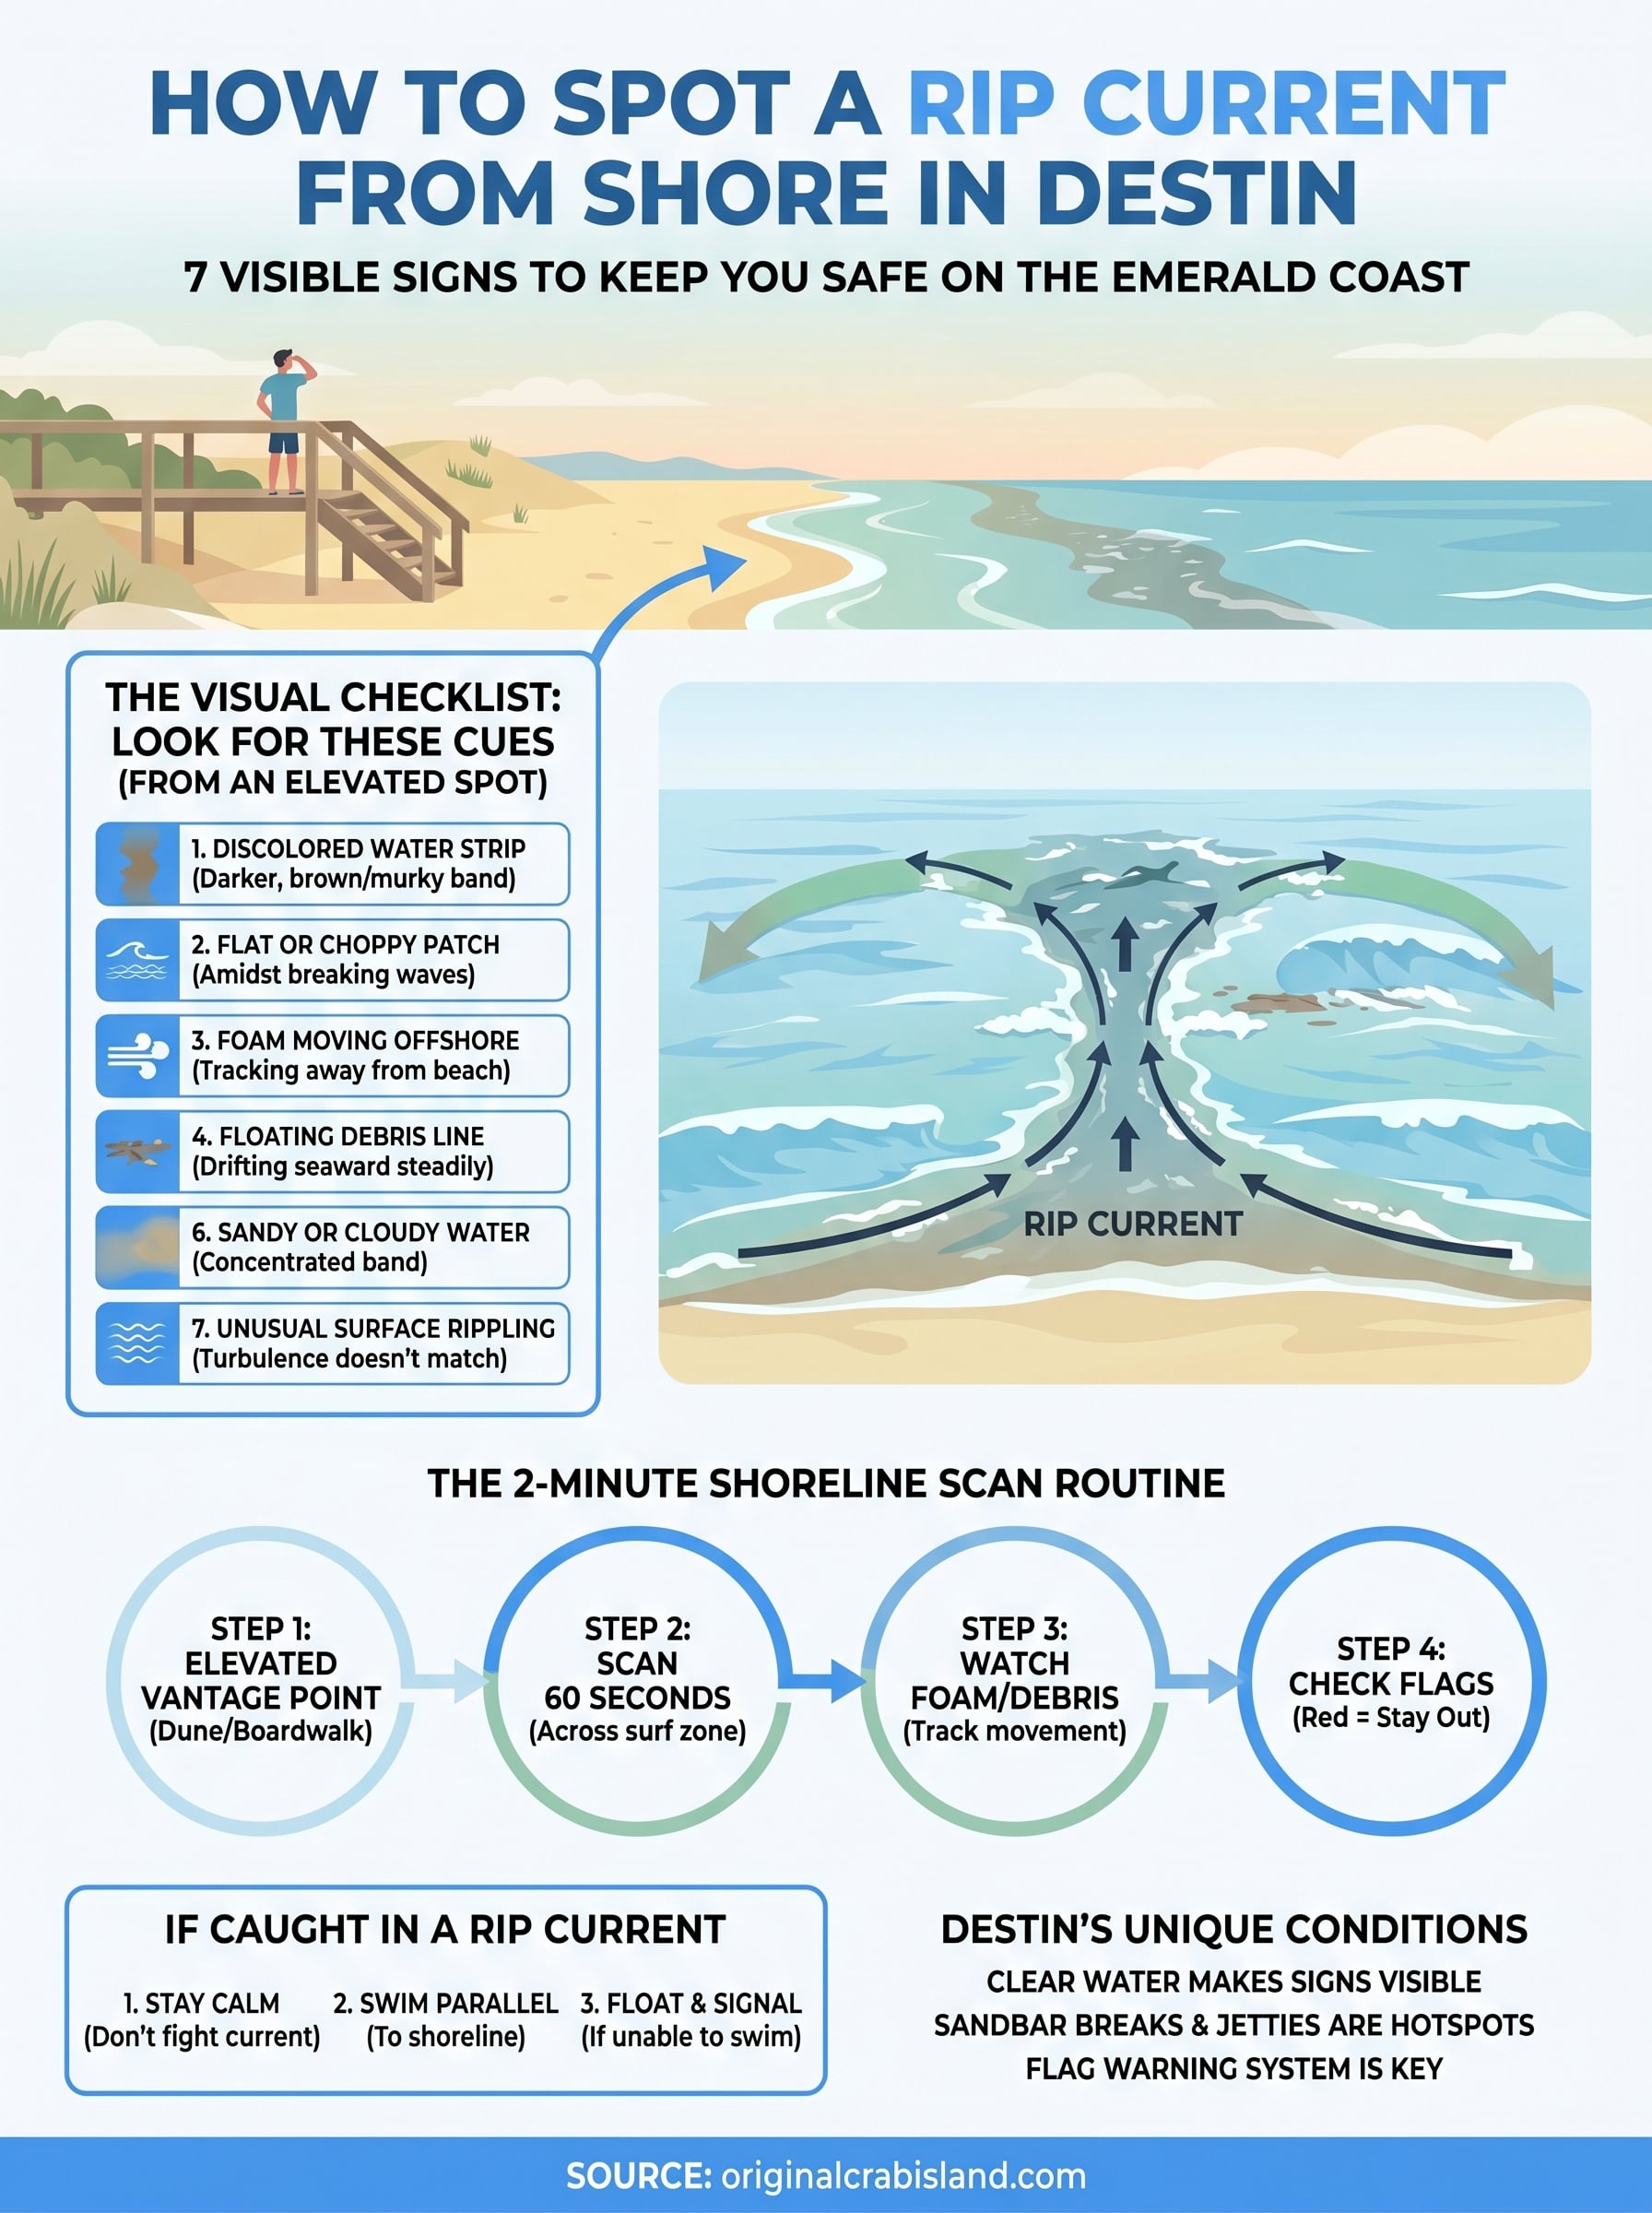
Knowing how to spot a rip current from shore is a skill you can build in a single afternoon at the beach. Look for discolored water, flat patches in the surf, foam tracking offshore, debris drifting seaward, gaps in the wave break, cloudy bands of sandy water, and unusual surface turbpling. Run through that checklist from an elevated spot before every entry, and check the posted flag system each time you arrive. Your response if you get caught matters just as much as your ability to read the water. Swim parallel to shore, conserve energy, and signal for help rather than fighting the current head-on. Destin’s Gulf beaches offer some of the best water in the country, and a little preparation keeps that experience exactly what it should be. When you’re ready to get out on the water safely, book your next Crab Island adventure with our team. For more options, explore our Destin, fl page. For more options, explore our our services page.

You searched for snorkel gear rental near me, which means you’re probably gearing up for a day on the water and don’t want to lug your own equipment across the country. Smart move. Renting locally saves you luggage space, money, and the hassle of maintaining gear you’ll use a handful of times a year.
If you’re heading to Destin, Florida, you’re in luck. The Emerald Coast has some of the clearest water in the Gulf of Mexico, and Crab Island alone draws thousands of snorkelers every season. At Original Crab Island, we help visitors get out on the water every day with pontoon rentals, jet skis, and guided trips, so we know the local rental scene inside and out. We’ve seen what works, what gear holds up, and which shops actually deliver on their promises.
This list breaks down seven solid snorkel gear rental shops worth your time and money right now in 2026. We cover what each one offers, what they charge, and what to expect when you walk through the door, so you can stop scrolling and start snorkeling.
Not every shop that shows up in a snorkel gear rental near me search is worth your time. Before you hand over your credit card, you need to check a few things that separate a good rental experience from a frustrating one. Gear quality, fit, and rental terms vary widely between shops, and a bad mask seal can ruin your entire snorkeling session before it even starts.
The single biggest mistake snorkelers make is grabbing whatever mask is closest without checking the fit first.
Ask the rental shop to show you the gear before you pay. Masks with cracked silicone skirts or cloudy lenses will leak and fog constantly, which means you spend more time clearing water than looking at anything underwater. A properly fitted mask creates a seal when you hold it to your face and inhale lightly through your nose without using the strap. Fins should fit snugly over your feet without pinching your toes or slipping at the heel.
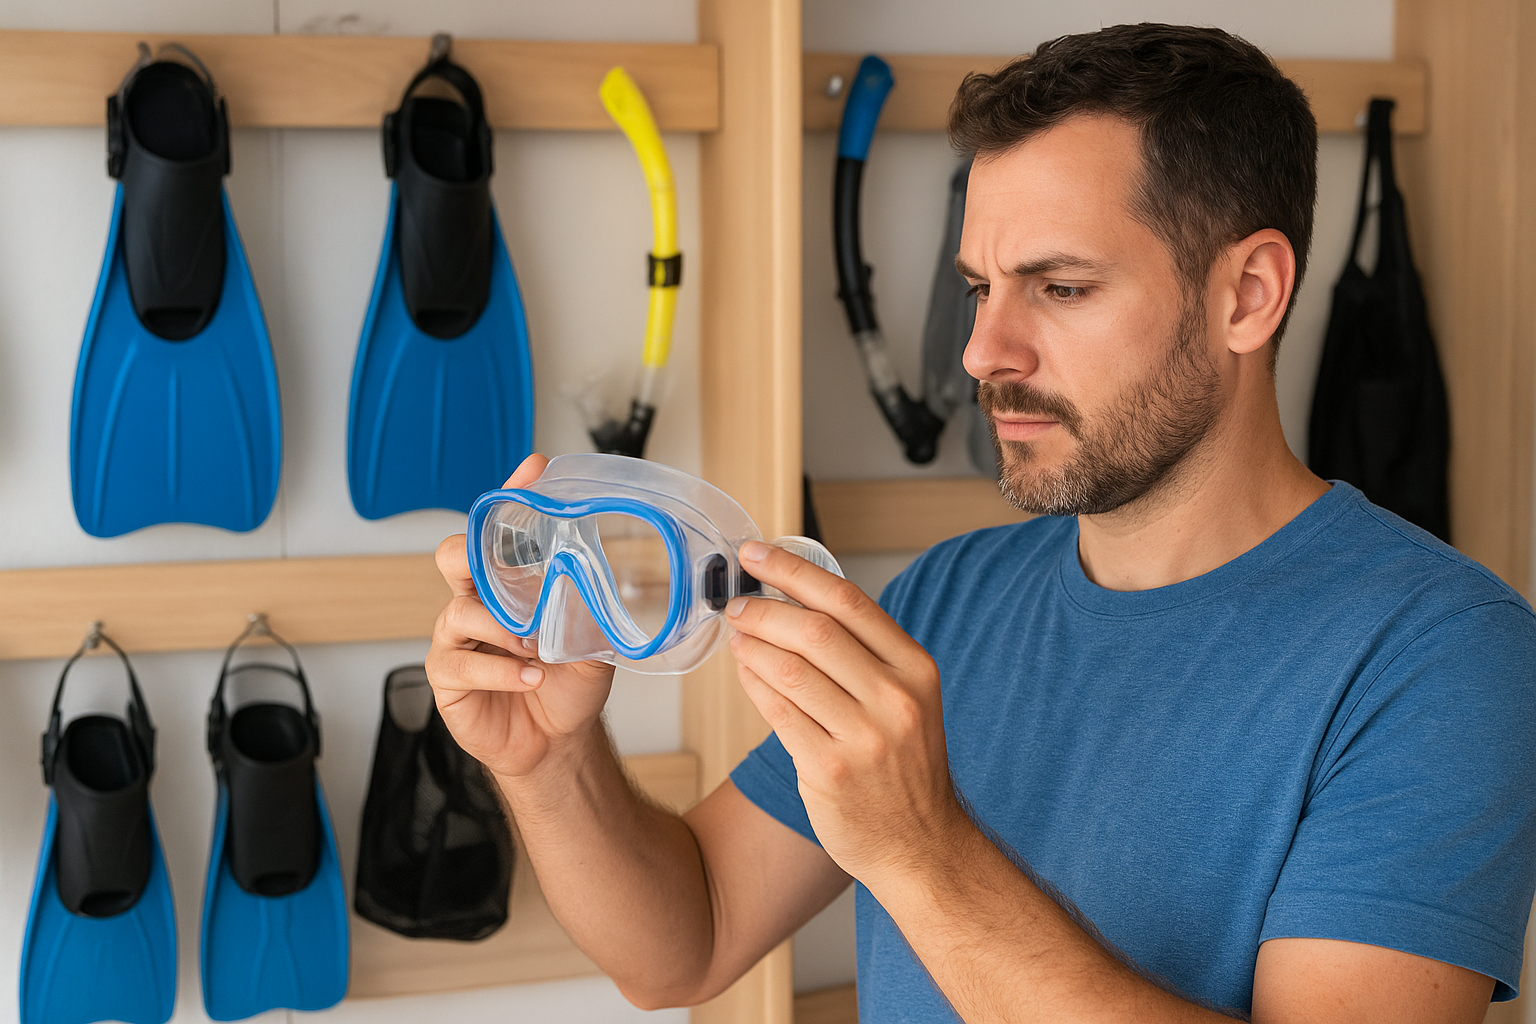
When evaluating a shop, look at how they store and clean the gear between rentals. UV exposure and improper storage degrade silicone faster than regular use does. A well-organized rental shop with clean gear on display signals that they take maintenance seriously and won’t hand you something that fails in the water.
Many shops bundle masks, snorkels, and fins together, but some charge separately for each piece. Ask what the rental period covers before you book, because a four-hour rental that technically starts when you sign the form may not give you four hours in the water. Also find out whether the shop provides a mesh bag or carry case for transport, since loose fins and masks on a boat deck tend to get damaged or lost quickly.
Check the deposit policy too. Some shops require a credit card hold in case of damage, while others charge a simple flat rental fee. Knowing this ahead of time prevents any surprises when you check out and keeps your vacation budget intact.
Original Crab Island sits right at the heart of Destin’s waterfront scene, making it one of the most convenient snorkel gear rental near me options for anyone already planning a boat trip or a full day at the sandbar.
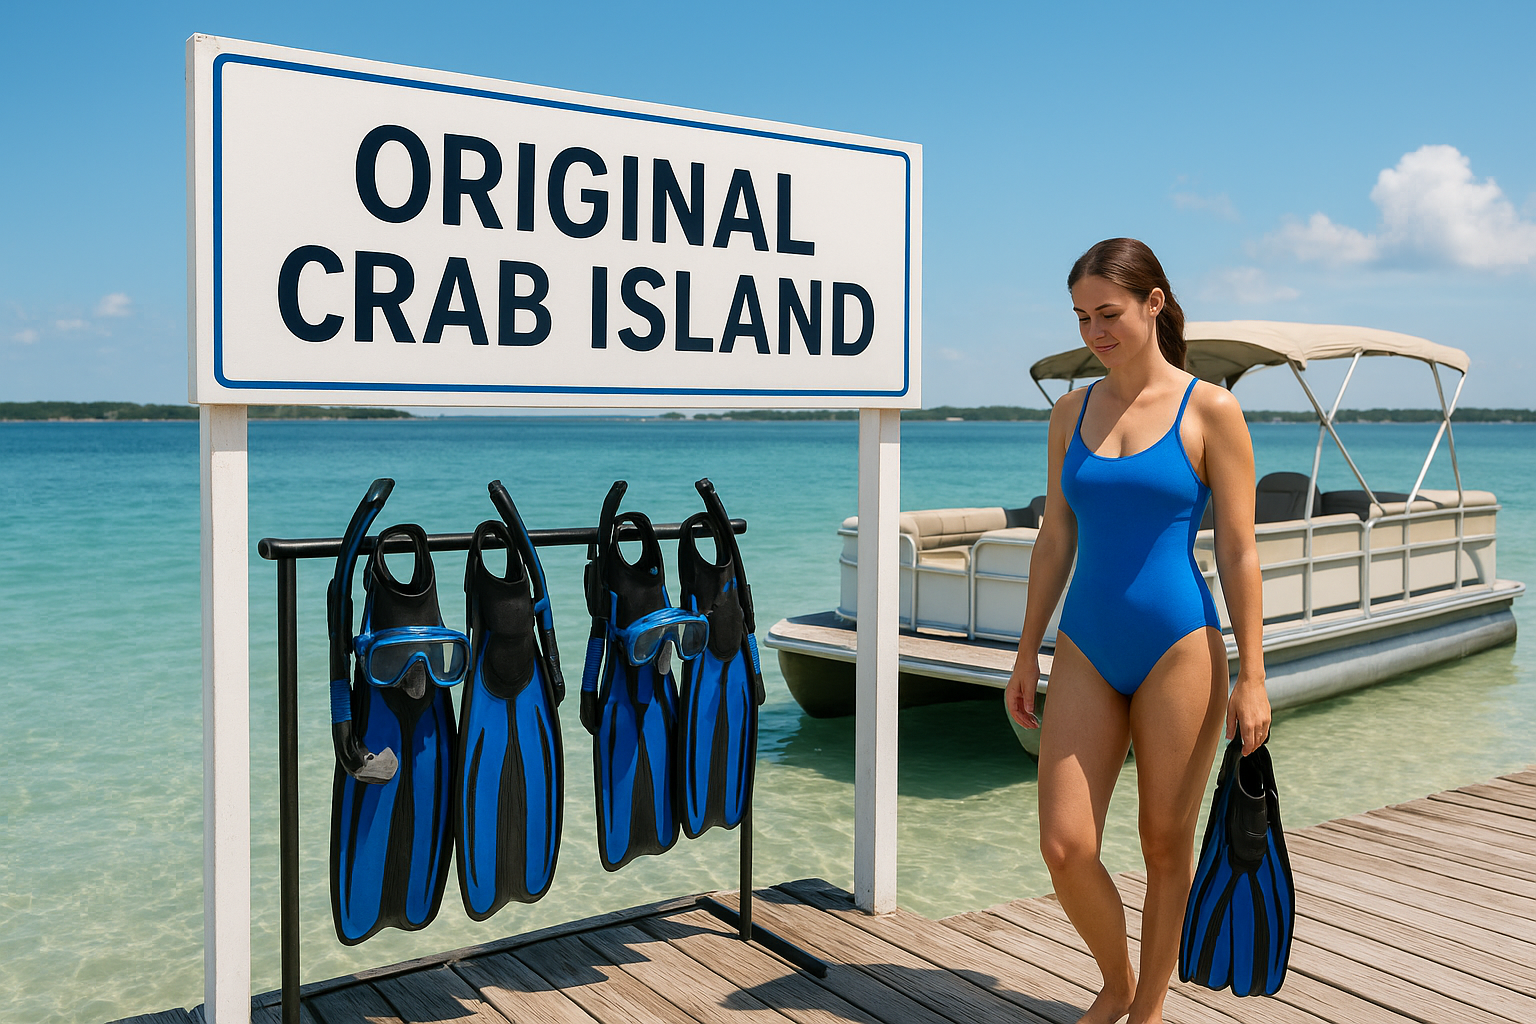
Book your rental through the Original Crab Island website before your trip. Pairing snorkel gear with a pontoon or jet ski rental gets everything handled in one booking, so you show up ready rather than scrambling at the dock on a busy summer morning.
Combining gear with a boat rental saves time and often opens up package pricing that booking each piece separately won’t get you.
This option fits anyone already planning to rent a watercraft in Destin. It works especially well for:
Rentals stay competitively priced with other Destin waterfront shops. Expect a per-person daily rate that covers a mask, snorkel, and fins as a complete set rather than charging for each piece separately.
Verify that your gear check-out time aligns with your boat rental window so nothing gets delayed at the dock. Also confirm the deposit and damage policy in writing before you finalize your reservation to avoid surprises on the day.
Dedicated beach and watersports rental shops are often the first result you see when you run a snorkel gear rental near me search in a coastal town. These shops specialize in ocean recreation, which means their staff understands the gear, the water conditions, and what you actually need for a good session.
Most beach rental shops put together a standard three-piece set covering a mask, snorkel, and fins. Some locations add a mesh carry bag and a flotation vest at no extra cost, which is useful if you have younger swimmers in your group.
A complete package deal saves you the confusion of pricing each item separately and usually works out cheaper overall.
This option suits walk-in visitors who decide to snorkel on the same day without a pre-planned itinerary. It also works well for solo travelers who need a single set quickly and want flexible rental windows rather than a full-day booking.
Expect to pay $15 to $30 per person for a half-day rental and slightly more for a full-day set. Busy summer weekends tend to push prices toward the higher end, so booking ahead when possible keeps your costs predictable.
Ask about gear sanitization procedures between rentals, since shared equipment that isn’t properly cleaned is a real hygiene concern. Also confirm whether the shop replaces damaged or ill-fitting gear on the spot before you head down to the water.
Scuba dive shops and dive centers don’t always appear at the top of a snorkel gear rental near me search, but they’re worth seeking out. These businesses stock professional-grade equipment because their primary customers demand gear that works reliably at depth, which means the snorkel sets they rent out are built to a higher standard than what you’ll find at a general beach shop.
Dive shop staff know equipment. They’re trained to fit masks correctly, and they’ll take the time to match you with a frame and skirt size that seals properly on your face rather than just handing you whatever’s on the shelf. Ill-fitting masks fog up constantly and leak water, so getting sized correctly at a dive shop makes a real difference once you’re in the water.
A properly fitted mask from a knowledgeable staff member is worth more than a discounted rental from someone who doesn’t check the seal.
Dive shops work best for detail-oriented snorkelers who want gear that performs and staff who can answer questions about local dive spots and water visibility conditions.
Daily rentals typically run $20 to $40 per set, reflecting the higher quality of the gear available.
Ask whether the shop offers dry snorkel technology in their rental inventory and confirm the minimum rental period before you commit.
Surf shops and paddleboard rental shops don’t advertise snorkeling as their main service, but many carry basic snorkel gear on the side because their customers often ask for it. If you’re already renting a paddleboard for the morning, picking up a mask and snorkel set from the same counter saves you an extra stop.
This option makes the most sense when you want flexibility without a structured booking. Surf shops typically operate on walk-in traffic, so you can show up, grab gear, and head out without a reservation. If your snorkel gear rental near me search pulls up a surf shop that’s close to the water you’re already planning to visit, it’s a practical choice.
Convenience matters more than you’d think on a vacation day when your time is limited.
Paddleboard shops work best for casual snorkelers who want to combine activities in a single outing. This option also suits solo travelers and couples who need a single set rather than a large group package.
Expect to pay $10 to $25 per set for a half-day rental, often without a deposit requirement on shorter windows.
Check whether the shop carries fins that fit properly, since many surf shops stock a limited size range. Also confirm their return window so your snorkel session doesn’t cut into the rest of your afternoon.
Marinas and boat rental offices don’t market themselves as snorkel gear rental near me destinations, but many carry basic snorkel sets because their customers need them. If you’re already picking up a boat for the day, adding gear at the same counter is the most efficient way to handle your entire trip in one stop.
Most marinas keep snorkel gear stocked alongside their boat rental inventory as a convenience add-on rather than a dedicated service. You request the gear when you check out your vessel, the staff logs it on your rental agreement, and you return everything together when you bring the boat back. The whole process takes a few extra minutes at most.
This setup works best when your primary goal is getting on the water quickly without visiting multiple rental locations.
Marina rentals suit boaters who decide to snorkel mid-trip rather than planners who organize every detail in advance. Groups already splitting a boat rental cost will find the add-on pricing easy to absorb.
Most marinas charge $10 to $25 per snorkel set, tacked onto the boat rental total. Some offer a bundled rate that covers gear for the entire group at a discount.
Ask whether the marina carries fins in multiple sizes, since limited inventory is common. Also confirm the return procedure for gear so nothing gets left on the boat by mistake.
If your hotel sits on the beach or near a waterway, check the activity desk in your lobby before running a snorkel gear rental near me search. Many resorts stock snorkeling equipment specifically to keep guests on-site, and the convenience factor is hard to beat when you’re already there.
Walk up to the activity or concierge desk and ask what water gear they carry. Most resort activity desks handle the full transaction on the spot, charging rentals to your room account so you don’t need to carry cash or a card down to the beach.
Renting through your hotel works best when your beach access is directly in front of the property and you don’t need to travel to get into the water.
This setup suits families with young children who need a low-effort experience and guests who didn’t plan to snorkel in advance but want to go on a whim.
Resort rentals typically run $20 to $45 per set per day, often higher than standalone shops, because you’re paying for proximity and convenience rather than selection.
Verify that the gear is sanitized between guests and ask whether the desk carries multiple fin sizes, since resort inventories tend to be small and may not fit everyone in your group.
Some snorkel gear rental near me searches lead you to tour operators rather than standalone shops, and that’s not a bad outcome. Many guided snorkel tours in coastal areas like Destin include a full gear set in the tour price, which eliminates the separate rental step entirely.
Booking a tour makes more sense than renting gear independently when you’re unfamiliar with local snorkeling spots or when you want someone else to handle the logistics. Tour operators bring you to productive locations, handle safety briefings, and supply everything you need for the session. If you’d otherwise spend time researching where to go and what to bring, a guided tour pays for itself in convenience alone.
Combining gear and guided access into one price often costs less than renting equipment separately and hiring a boat to reach the same spots.
This works best for first-time snorkelers and families who want structured guidance rather than a self-directed outing on unfamiliar water.
Guided snorkel tours with gear included typically run $40 to $80 per person depending on trip length, boat size, and locations visited.
Verify that the tour price explicitly covers mask, snorkel, and fins for every participant. Also ask about group size limits so you’re not sharing water with 30 other people at the same spot.
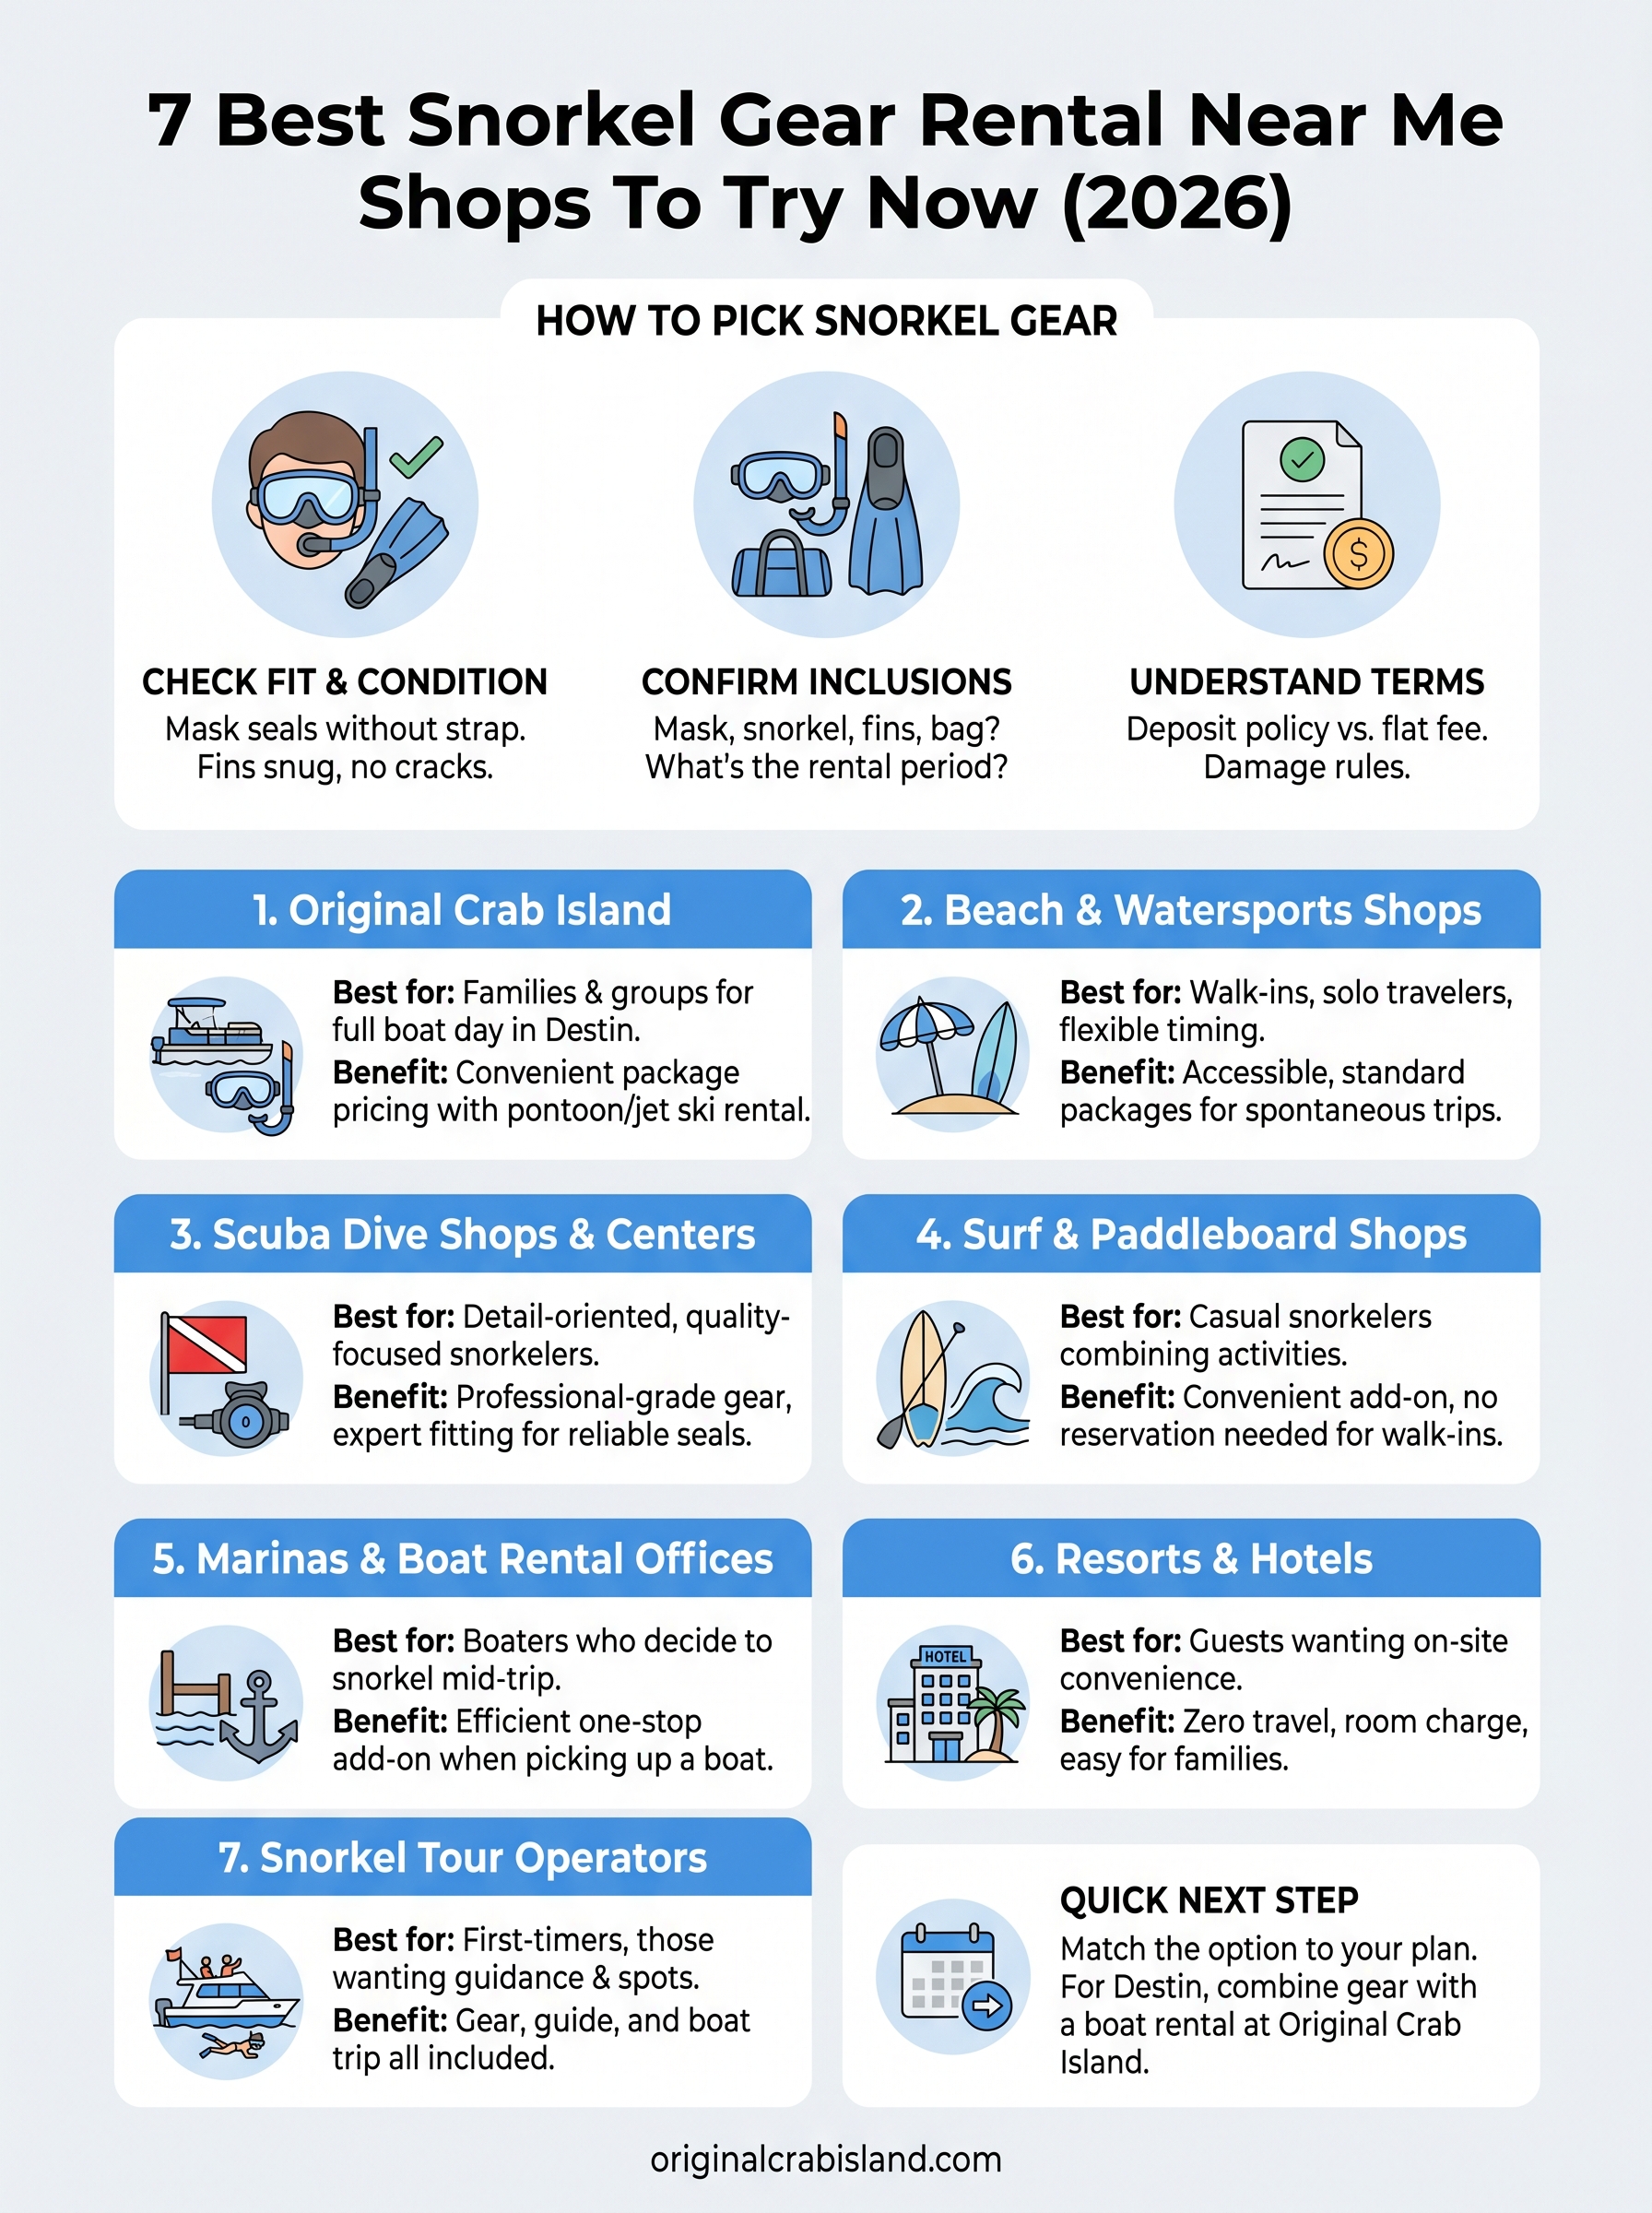
You now have seven solid options to work through the next time you run a snorkel gear rental near me search, whether you’re in Destin for a weekend or planning a longer stay on the Emerald Coast. Each option on this list fits a different type of traveler, so match your choice to how you actually want to spend your day rather than defaulting to whatever shows up first in a search result.
If you’re heading to Destin and want to make the most of your time on the water, start with a trip to Crab Island. Renting a pontoon, jet ski, or joining a guided cruise puts you right where the action is, and pairing that with snorkel gear keeps your whole group covered from one booking. Head over to Original Crab Island to check availability and lock in your reservation before the summer schedule fills up. For more options, explore our our services page.

A good snorkel mask can make or break your time in the water. Too much fogging, a poor seal, or an uncomfortable fit, and suddenly you’re fiddling with gear instead of watching stingrays glide below you. That’s exactly why so many snorkelers trust TUSA, a Japanese brand with decades of dive and snorkel engineering behind it. If you’ve been searching for the right TUSA snorkel mask, you’re already on the right track toward quality optics and a reliable fit.
At Original Crab Island, we help visitors get the most out of Destin’s crystal-clear waters every single day, from Crab Island sandbar adventures to dolphin cruises along the Emerald Coast. We see firsthand what gear holds up and what doesn’t. That hands-on experience is exactly why we put this guide together: to help you pick the best TUSA mask before your next trip.
Below, you’ll find five standout TUSA snorkel mask options broken down by features, comfort, and best use case. Whether you need a low-volume freediving mask or a wide-view set for casual reef snorkeling, there’s a TUSA model here that fits. Let’s get into the specific picks and what makes each one worth your money.

The TUSA Freedom HD M-1001 is the brand’s flagship single-lens mask and a solid pick for snorkelers who want maximum underwater visibility without overspending on dive gear. It consistently earns high marks and holds up well in real open-water conditions.
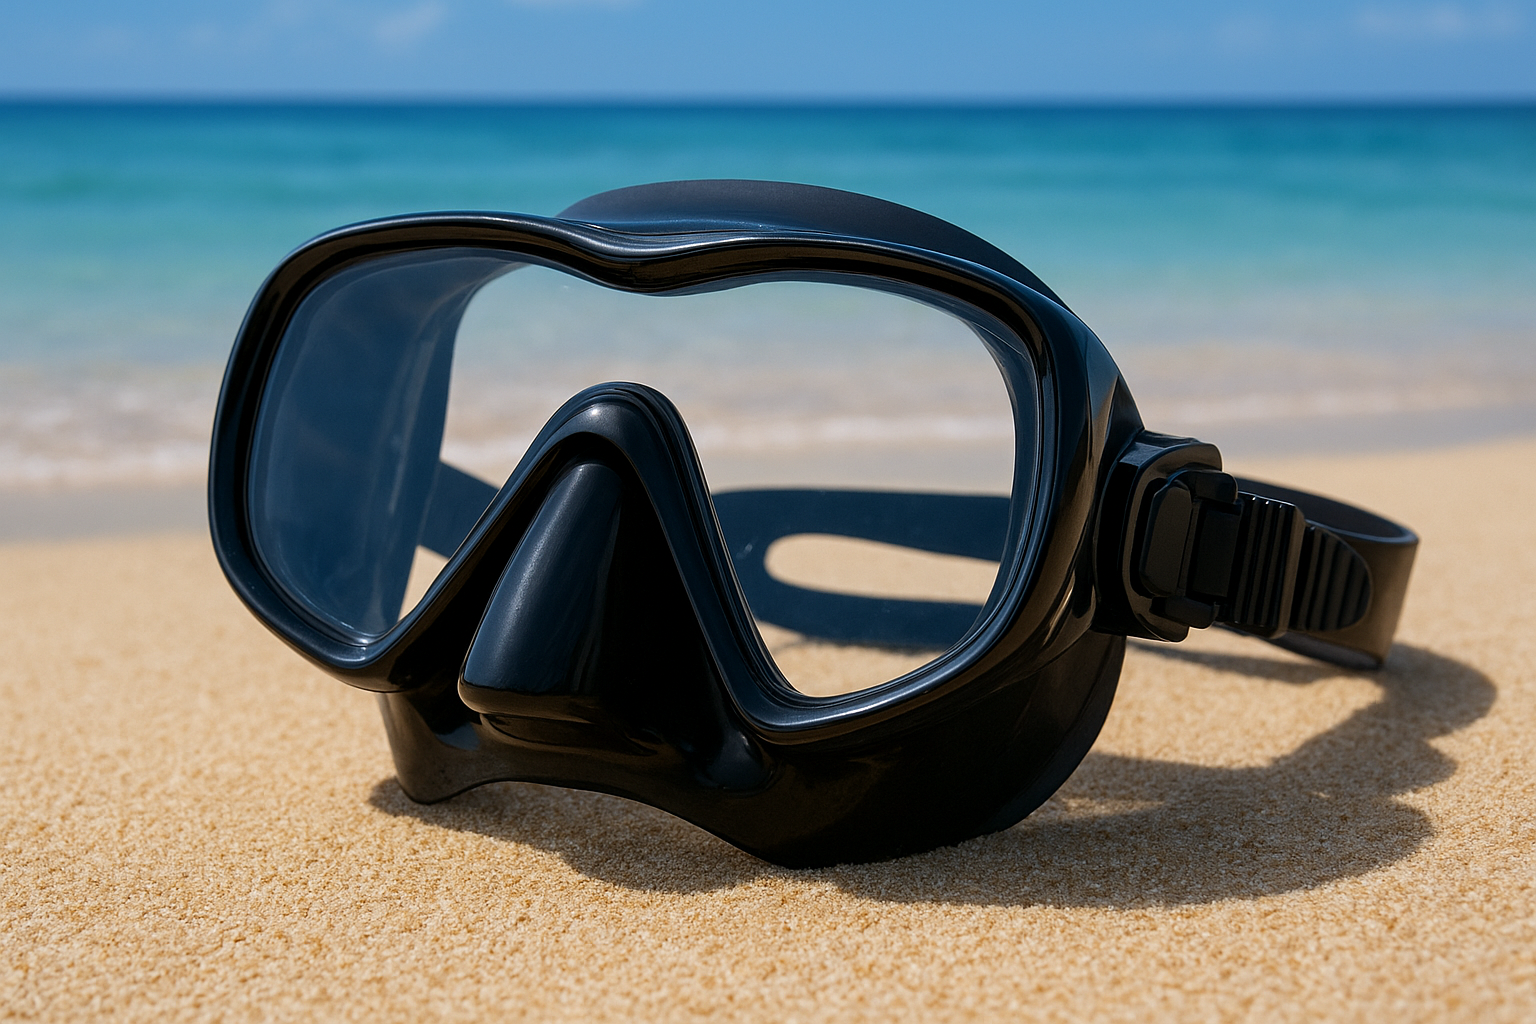
TUSA built the M-1001 around a wide-angle, high-definition single lens made from tempered glass. The frame pairs with TUSA’s Freedom Technology silicone skirt, which flexes independently from the lens frame so the skirt shapes to your face rather than pressing rigidly against it.
A single tempered glass lens gives you a panoramic field of view, which most snorkelers prefer over a two-lens setup. You can also order the M-1001 with prescription corrective lenses through authorized TUSA dealers, a real advantage if standard masks have given you blurry underwater views in the past.
If you wear corrective lenses, the prescription option on the M-1001 makes it one of the most practical tusa snorkel mask choices available.
The dual-buckle strap system lets you make quick micro-adjustments while you’re already in the water. Both standard and wide-face silicone skirt versions exist, so you won’t be stuck with a one-size-fits-all seal that leaks at the edges of your face.
One tradeoff worth noting is that the single large lens adds slightly more internal volume than low-profile dual-lens masks. This matters if you freedive regularly and need to equalize mask pressure often. For casual reef snorkeling or Crab Island float sessions, it’s a non-issue.
Expect to pay between $60 and $90 for the M-1001, depending on the lens configuration and where you buy. Prescription lens upgrades add to that cost but pay off if standard masks have never sealed or focused well for you.
The TUSA Zensee Pro M-1010 takes a different direction from the M-1001 by focusing on an ultra-low-profile, frameless construction. It suits snorkelers and freedivers who want minimal internal volume and a close, streamlined fit.
TUSA built the M-1010 by wrapping the silicone skirt directly around the lens, eliminating a rigid frame entirely. This reduces internal air volume and gives the mask a barely-there feel once you’re in the water.
Two tempered glass lenses sit close to your eyes, which sharpens your field of view and reduces peripheral distortion. Prescription lens inserts are available through authorized TUSA dealers, making this tusa snorkel mask a practical choice if you need vision correction.
The low-profile lens placement on the M-1010 noticeably improves depth perception compared to higher-volume single-lens designs.
The wide silicone skirt adapts well across different face shapes and creates a reliable seal. Quick-release buckles let you fine-tune strap tension without pulling the mask off entirely.
The frameless build sacrifices some structural rigidity, so store it flat and away from pressure to keep the lenses properly aligned.
Expect to pay between $70 and $100 for the M-1010.
The TUSA Paragon M-2001 targets serious snorkelers and recreational divers who want professional-level optics in a mid-range package. It builds on TUSA’s core design philosophy but adds a more refined lens system for improved clarity.
TUSA designed the M-2001 with a dual-lens tempered glass setup and a reinforced frame that holds its shape across repeated use. The inner silicone face skirt uses TUSA’s Freedom Technology for a flexible, face-conforming seal.
The dual-lens configuration sits at a low profile, keeping the glass close to your eyes for sharper depth perception. You can also order this tusa snorkel mask with optical corrective lenses through TUSA’s authorized dealer network.
The M-2001’s low-volume lens placement gives you noticeably better spatial awareness in the water compared to higher-volume single-lens designs.
Stainless steel spring buckles snap into adjustment easily, even with wet hands. The wide-contact skirt seals reliably across both narrow and broad face shapes.
The dual-lens frame adds a slight center divider to your view, which some snorkelers find distracting during extended sessions underwater.
Expect to pay between $80 and $110 for the M-2001, depending on retailer and lens configuration.
The TUSA Intega M-2004 is TUSA’s take on a high-end, unified single-lens mask built for snorkelers who want a wide, wrap-around field of view with a cleaner visual experience than standard dual-lens designs.
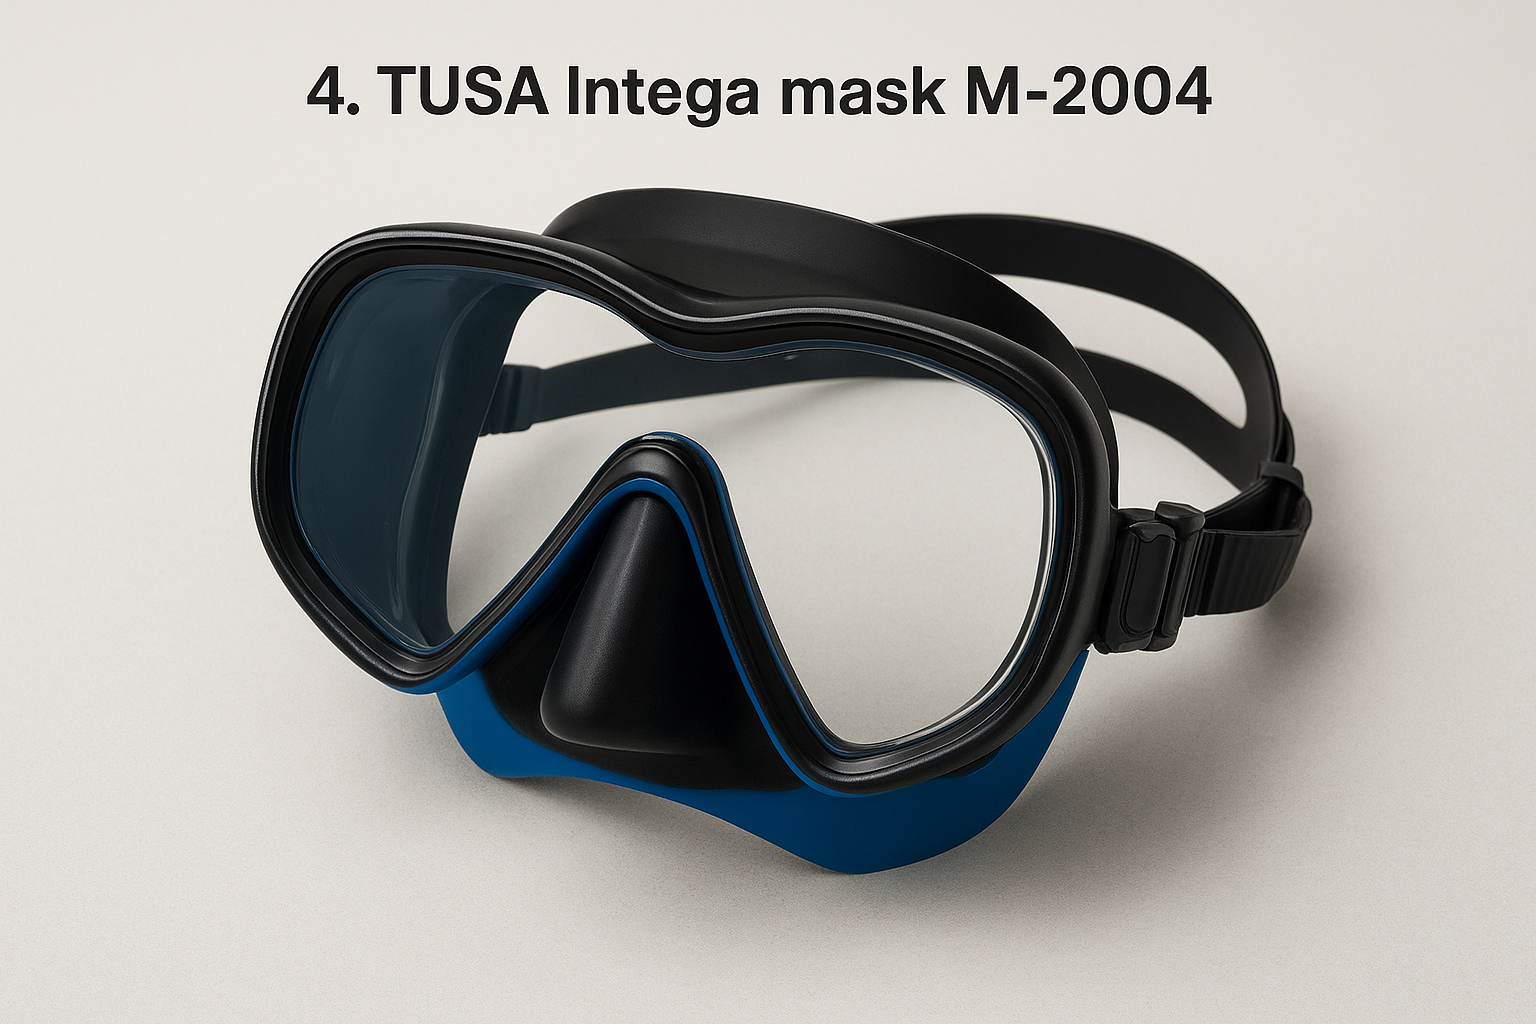
TUSA engineered the M-2004 with a single curved tempered glass lens that arcs across your full visual range, paired with an integrated inner frame that keeps the skirt and lens moving together for a more consistent seal.
The curved lens design gives you exceptional peripheral vision compared to flat single-lens masks. This tusa snorkel mask also supports optical corrective lens inserts through authorized dealers if standard masks have never given you a sharp view.
The M-2004’s curved lens noticeably reduces the visual cutoff at the edges of your field of view, which makes a real difference on open-water swims.
The dual-buckle system with pull-tab adjusters makes tension changes fast and easy, even with wet hands. TUSA’s soft silicone skirt conforms well to a range of face shapes.
The curved lens makes prescription inserts harder to source than flat-lens alternatives, so confirm availability before purchasing.
Expect to pay between $90 and $120 for the M-2004.
The TUSA Sport Serene set bundles a snorkel mask with a matched dry snorkel, making it the most complete out-of-the-box option on this list. If you want to skip the gear-pairing guesswork, this set gets you in the water faster.
This tusa snorkel mask and snorkel combo comes ready to use with no separate purchases required. The dry-top snorkel valve seals automatically when submerged, keeping water out of the tube.
The single tempered glass lens gives you clear, wide views suited to casual reef snorkeling and sandbar floats. Prescription lens options are limited for this set, so it works best for snorkelers with standard vision.
This set is the most practical entry point if you’ve never owned dedicated snorkel gear before.
The adjustable strap buckles let you dial in tension quickly. The soft silicone skirt creates a reliable seal across most face shapes without extra fuss.
The set skips premium features like spring buckles or low-volume frameless construction, so experienced snorkelers may outgrow it after a season or two.
Expect to pay between $40 and $65 for the full set, making it the most budget-friendly option in this guide.
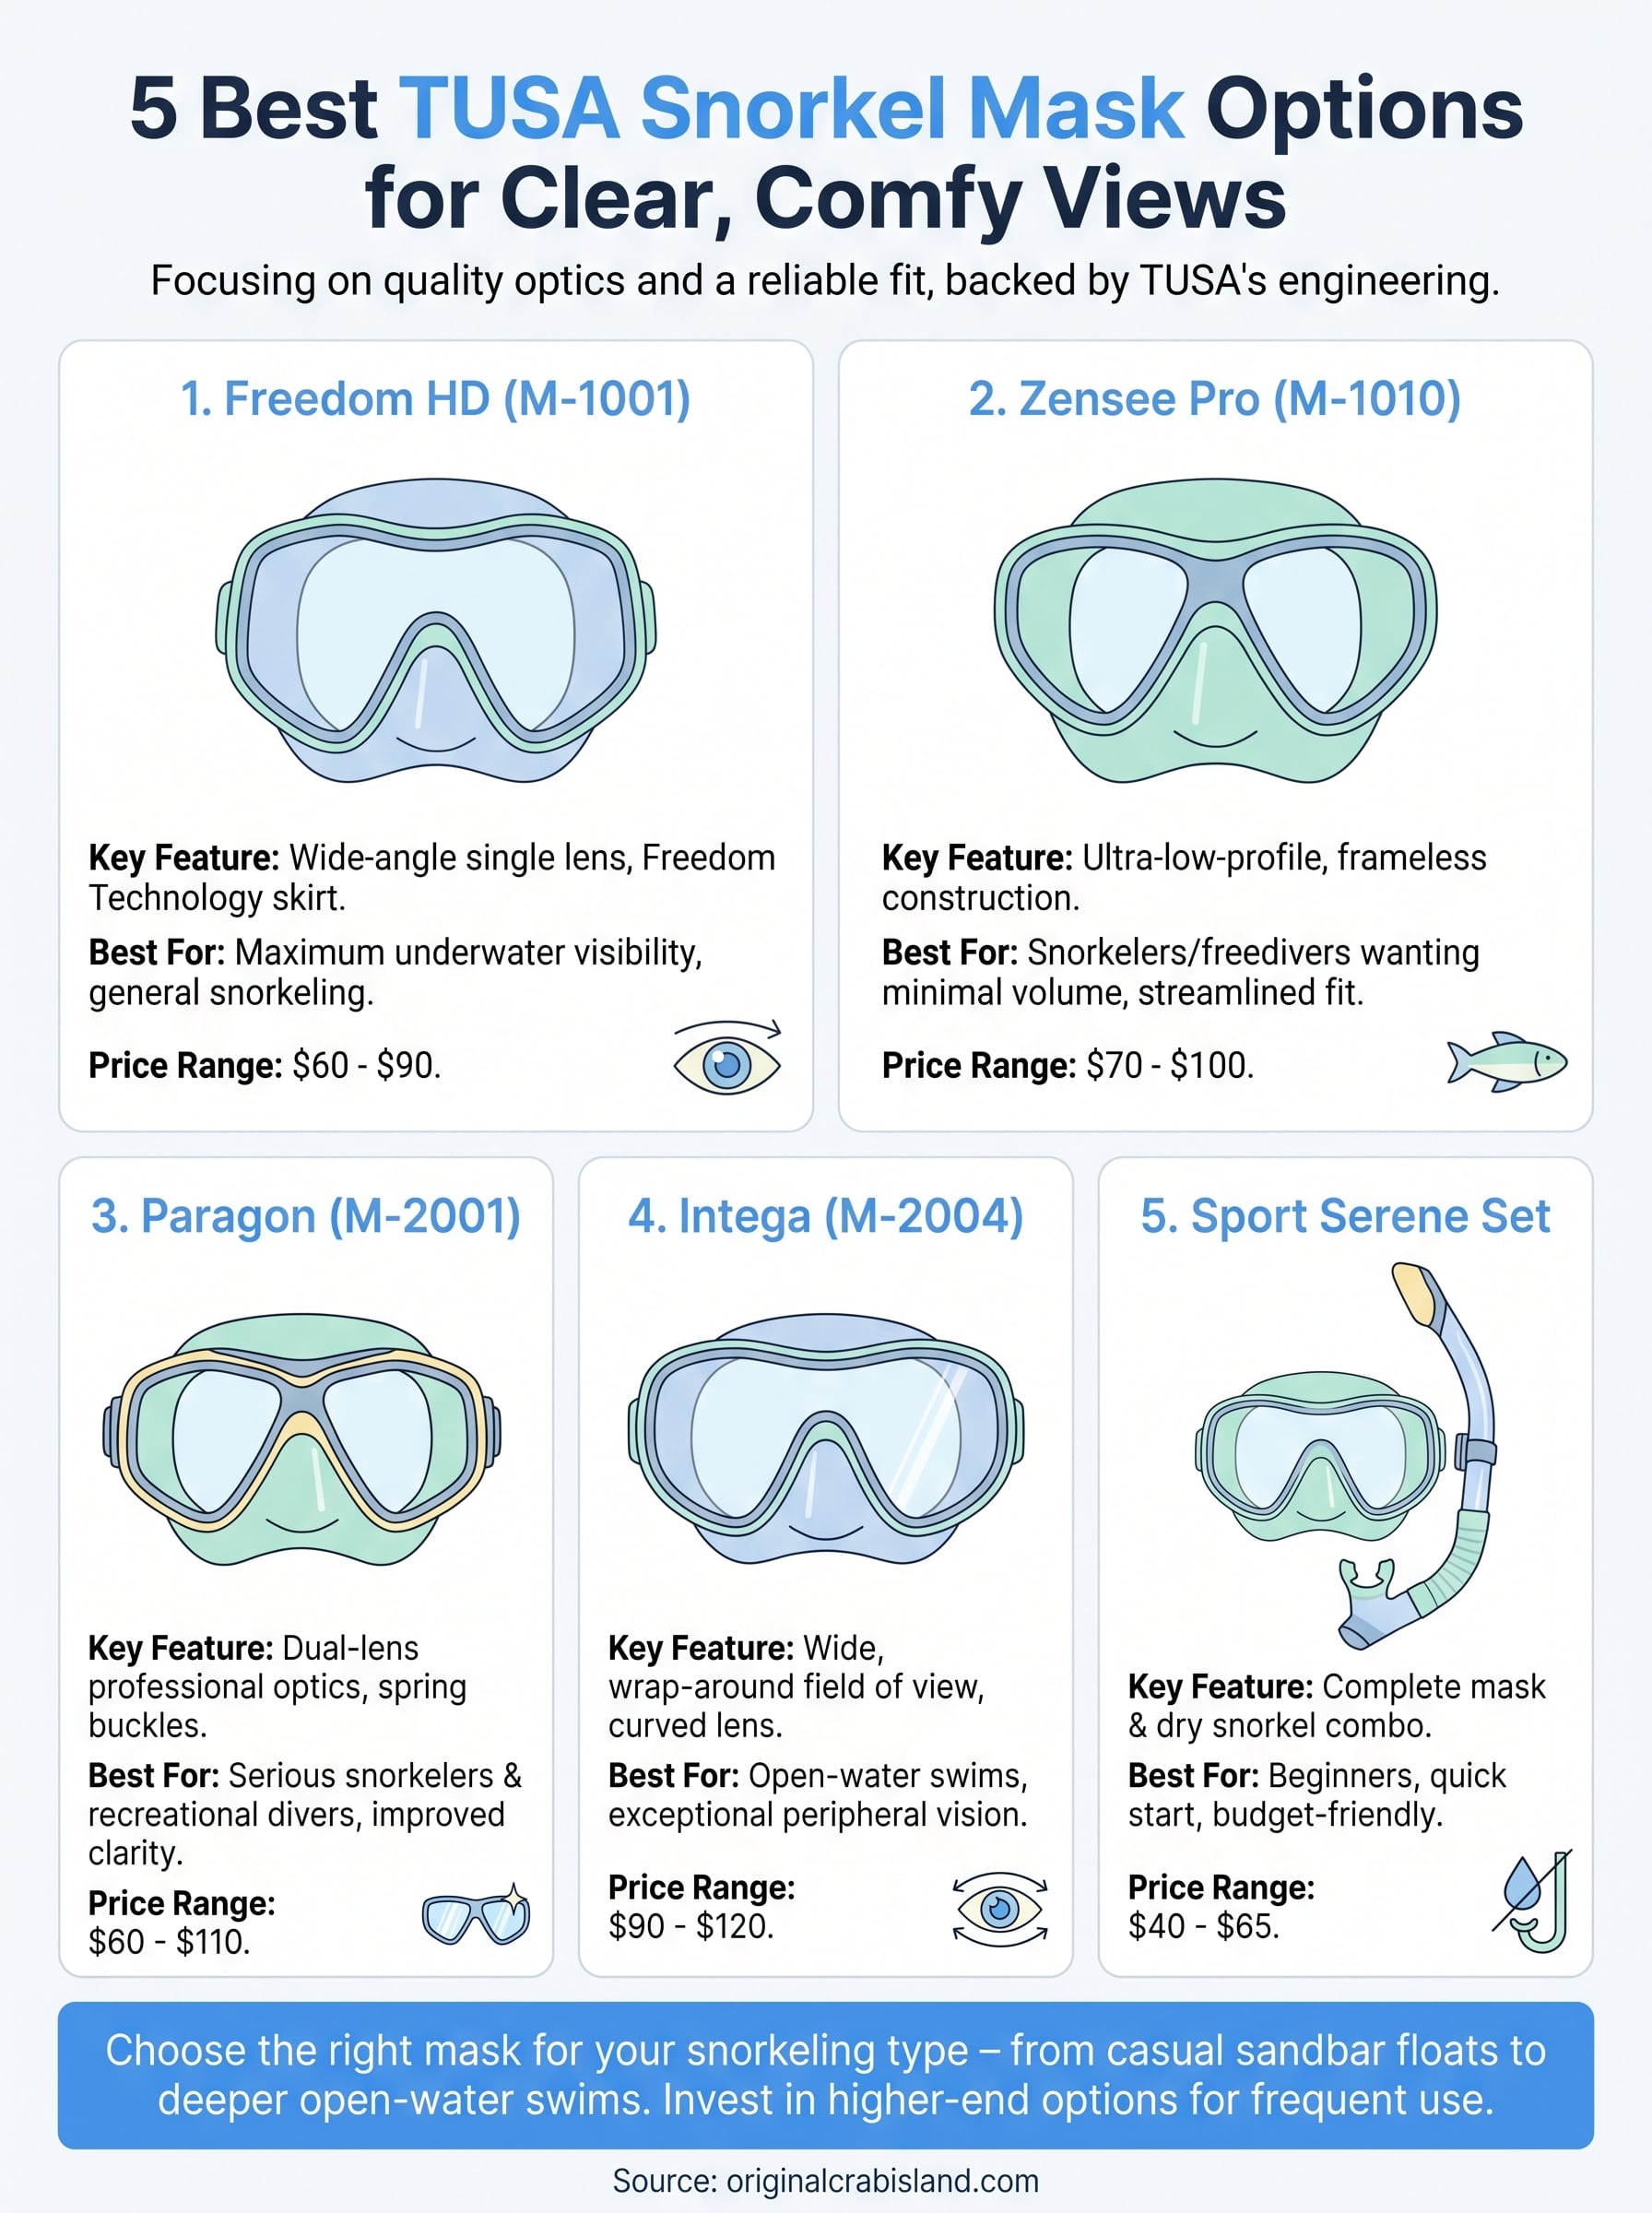
Each tusa snorkel mask on this list solves a different problem. The M-1001 gives you the best balance of visibility and value for general snorkeling. The M-1010 and M-2001 suit snorkelers who prefer a low-volume, close-fitting feel. The M-2004 delivers the widest peripheral view if open-water swims are your priority. The Sport Serene set gets beginners in the water with zero gear-pairing effort.
Your final pick comes down to how and where you snorkel. If you plan to float above a sandbar and watch marine life drift by, any of these masks will do the job well. If you push deeper or snorkel frequently, invest in the higher-end options with spring buckles and prescription lens availability.
Ready to put your new gear to use? Book a water activity in Destin, Florida and see what the Emerald Coast looks like through a proper mask. For more options, explore our our rentals page.

If you’re planning a trip to Destin and want to drop a line in the Gulf of Mexico, one of the first questions you’ll run into is: do you need a fishing license in Florida? The short answer is yes, most anglers ages 16 and older are required to carry a valid fishing license before casting in both freshwater and saltwater. But there are important exemptions, cost differences, and a few scenarios where you might not need one at all.
At Original Crab Island, we help visitors make the most of Destin’s waters every day, from pontoon rentals at Crab Island to guided fishing charters in the Gulf. Licensing questions come up constantly, and we’ve seen folks confused by conflicting information online. So we put together this straightforward breakdown.
Below, you’ll find exactly who needs a license, who’s exempt, what it costs for residents versus non-residents, and where to buy one before your trip. We’ll also cover how charter boat fishing affects your license requirements, a detail that catches a lot of first-time visitors off guard.
If you’re 16 or older, you need a fishing license to fish in Florida waters. Whether you’re a Florida resident or a visitor from another state, the rule applies equally to freshwater and saltwater fishing. The only real difference between residents and non-residents is the price of the license, which we’ll break down in a later section.
If you’re fishing from a pier, a kayak, a rental boat, or directly from the beach, you still need a valid license in hand unless a specific exemption applies to you personally.
Florida does not carve out exceptions for out-of-state visitors when it comes to licensing requirements. So if you’re wondering “do you need a fishing license in Florida” as a tourist, the answer is yes. Non-resident licenses are priced higher than resident licenses, but both are mandatory before you make your first cast.
You can purchase your license online through the Florida Fish and Wildlife Conservation Commission (FWC), by phone, or in person at most bait-and-tackle shops and major sporting goods retailers statewide.
This is the detail that catches many first-time visitors off guard. When you book a trip with a licensed saltwater charter, the boat itself typically carries a Recreational Saltwater Fishing License that covers all paying passengers on board. You do not need to purchase your own saltwater license for that specific trip.
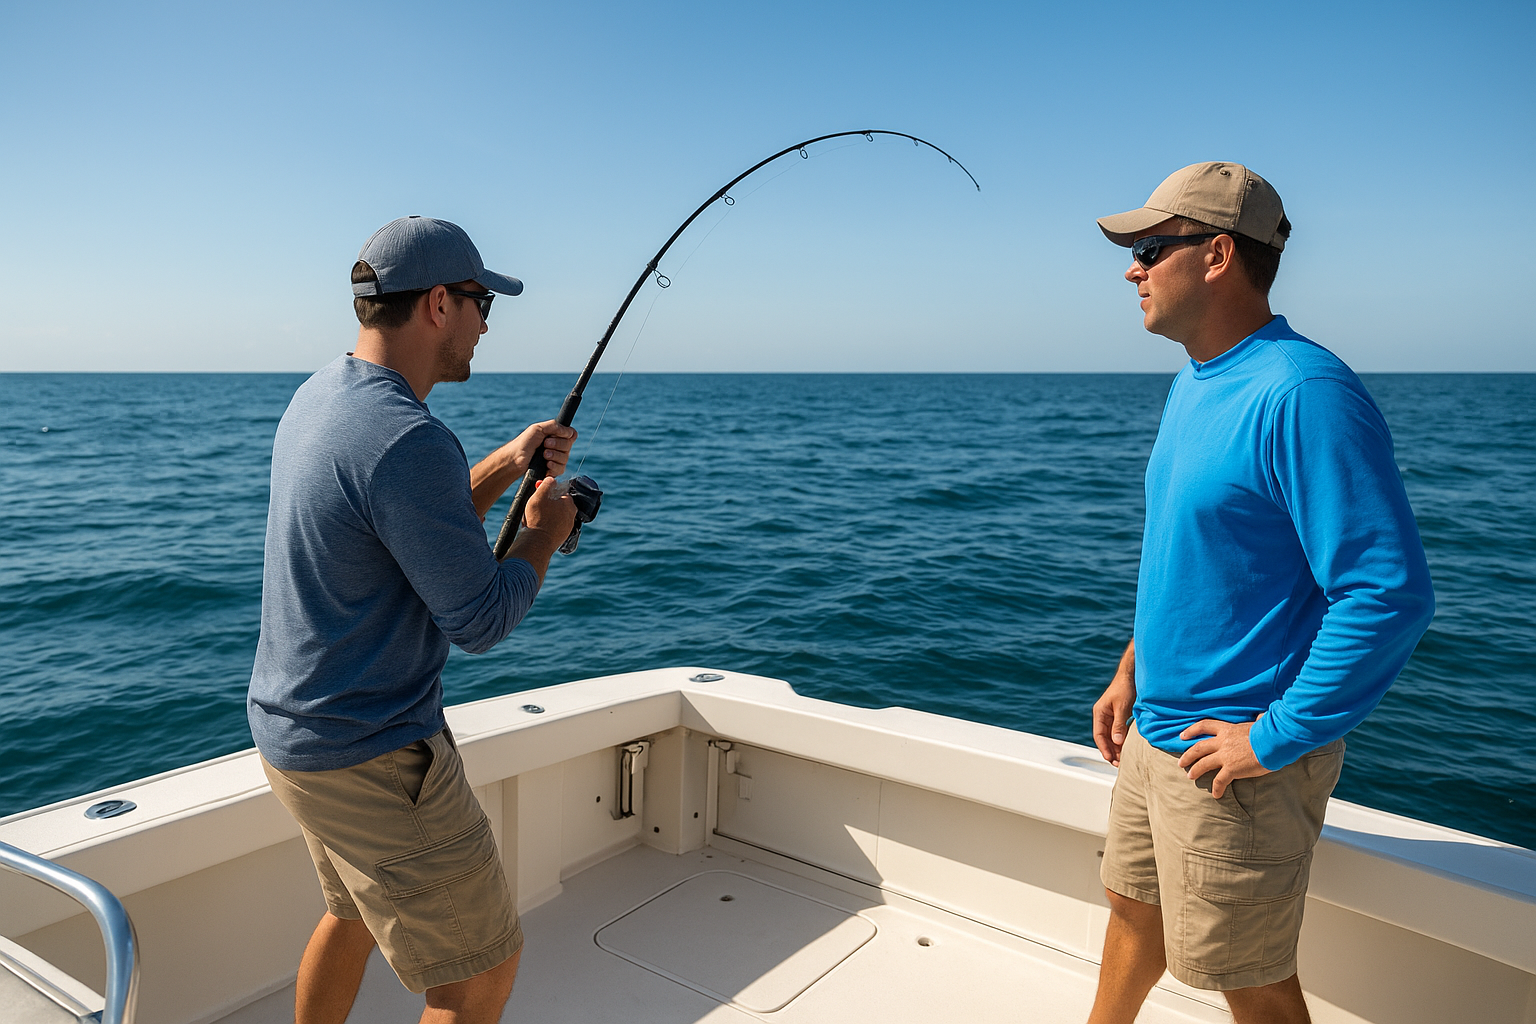
Freshwater guided charters, however, do not work the same way. Each angler on a freshwater guided trip generally needs their own individual freshwater license, regardless of whether the guide holds one. Before you board any charter, confirm with the operator exactly what their license covers so you are not caught unprepared.
Any person 16 years of age or older must hold a valid license to fish in Florida, whether you’re casting from a bank, a boat, or a pier. If you’re still asking yourself do you need a fishing license in Florida, consider this the definitive answer: yes, unless a specific exemption applies to you directly.
Children under 16 are fully exempt from the fishing license requirement in Florida, regardless of residency. You do not need to purchase any fishing permit on their behalf before they drop a line.
This exemption covers both freshwater and saltwater, so kids can join you anywhere on the water without any paperwork.
They can fish from a pier, a rental boat, or the shoreline with nothing required. The rule applies to Florida residents and out-of-state visitors equally, so you never need to worry about licensing for young anglers in your group.
Residents and non-residents age 16 and up must carry a valid license while fishing. Active-duty military members stationed in Florida may qualify for reduced-fee or free licenses, so check your eligibility before purchasing. These groups always need a valid license:
Florida separates its fishing licenses into two distinct categories: freshwater and saltwater. If you’re asking do you need a fishing license in Florida for both types of water, the answer is yes, and you need to purchase the correct category based on where you actually plan to fish.
Saltwater licenses cover fishing in the Gulf of Mexico, the Atlantic Ocean, and any tidal or coastal waters connected to them. If you’re planning to fish around Destin or anywhere along the Emerald Coast, this is the license you need. Non-residents have several duration options to match the length of their trip:
If you book a licensed saltwater charter in Destin, the captain’s vessel license typically covers all paying passengers, so you won’t need to purchase your own for that specific trip.
Freshwater licenses apply to lakes, rivers, and inland streams throughout Florida. These are completely separate from saltwater licenses, and one does not substitute for the other. If your vacation includes both lake fishing and Gulf fishing, you need to buy both types or look into a combination license that bundles them together under one purchase.
Even if you’re 16 or older, several exemptions can apply to your situation. Knowing these before you ask do you need a fishing license in Florida can save you the cost of a license you may not need.
Florida law grants exemptions to specific groups beyond just children under 16. These include:

Check the FWC’s official eligibility list before purchasing to confirm whether your situation qualifies.
The Florida Fish and Wildlife Conservation Commission designates several free fishing days each year across both freshwater and saltwater. On these specific dates, anyone can fish without a license, regardless of age or residency status.
These days are a good opportunity for first-time anglers or families who want to try fishing before committing to a full license purchase. The FWC announces these dates in advance on their official website, so check their schedule before planning your trip.
Before you fish, knowing what a license costs and where to get one saves you time on the water. Florida keeps the process straightforward, and you can handle everything before you leave home.
Non-resident saltwater licenses run roughly $17 for 3 days, $30 for 7 days, and $47 for an annual license. Florida resident licenses cost significantly less, with an annual saltwater license around $17. Freshwater licenses follow a similar pricing structure. If you fish both fresh and saltwater, a combination license bundles both into one purchase and saves you money over buying each separately.
You can buy your license directly through the Florida Fish and Wildlife Conservation Commission, by phone at 1-888-347-4356, or in person at most bait-and-tackle shops across Destin and throughout Florida.
If you’re still wondering do you need a fishing license in Florida, consider that fishing without a valid license is a second-degree misdemeanor in Florida. That means fines up to $500 and a potential court appearance. No one wants to spend vacation money on a penalty that a $17 license would have prevented.
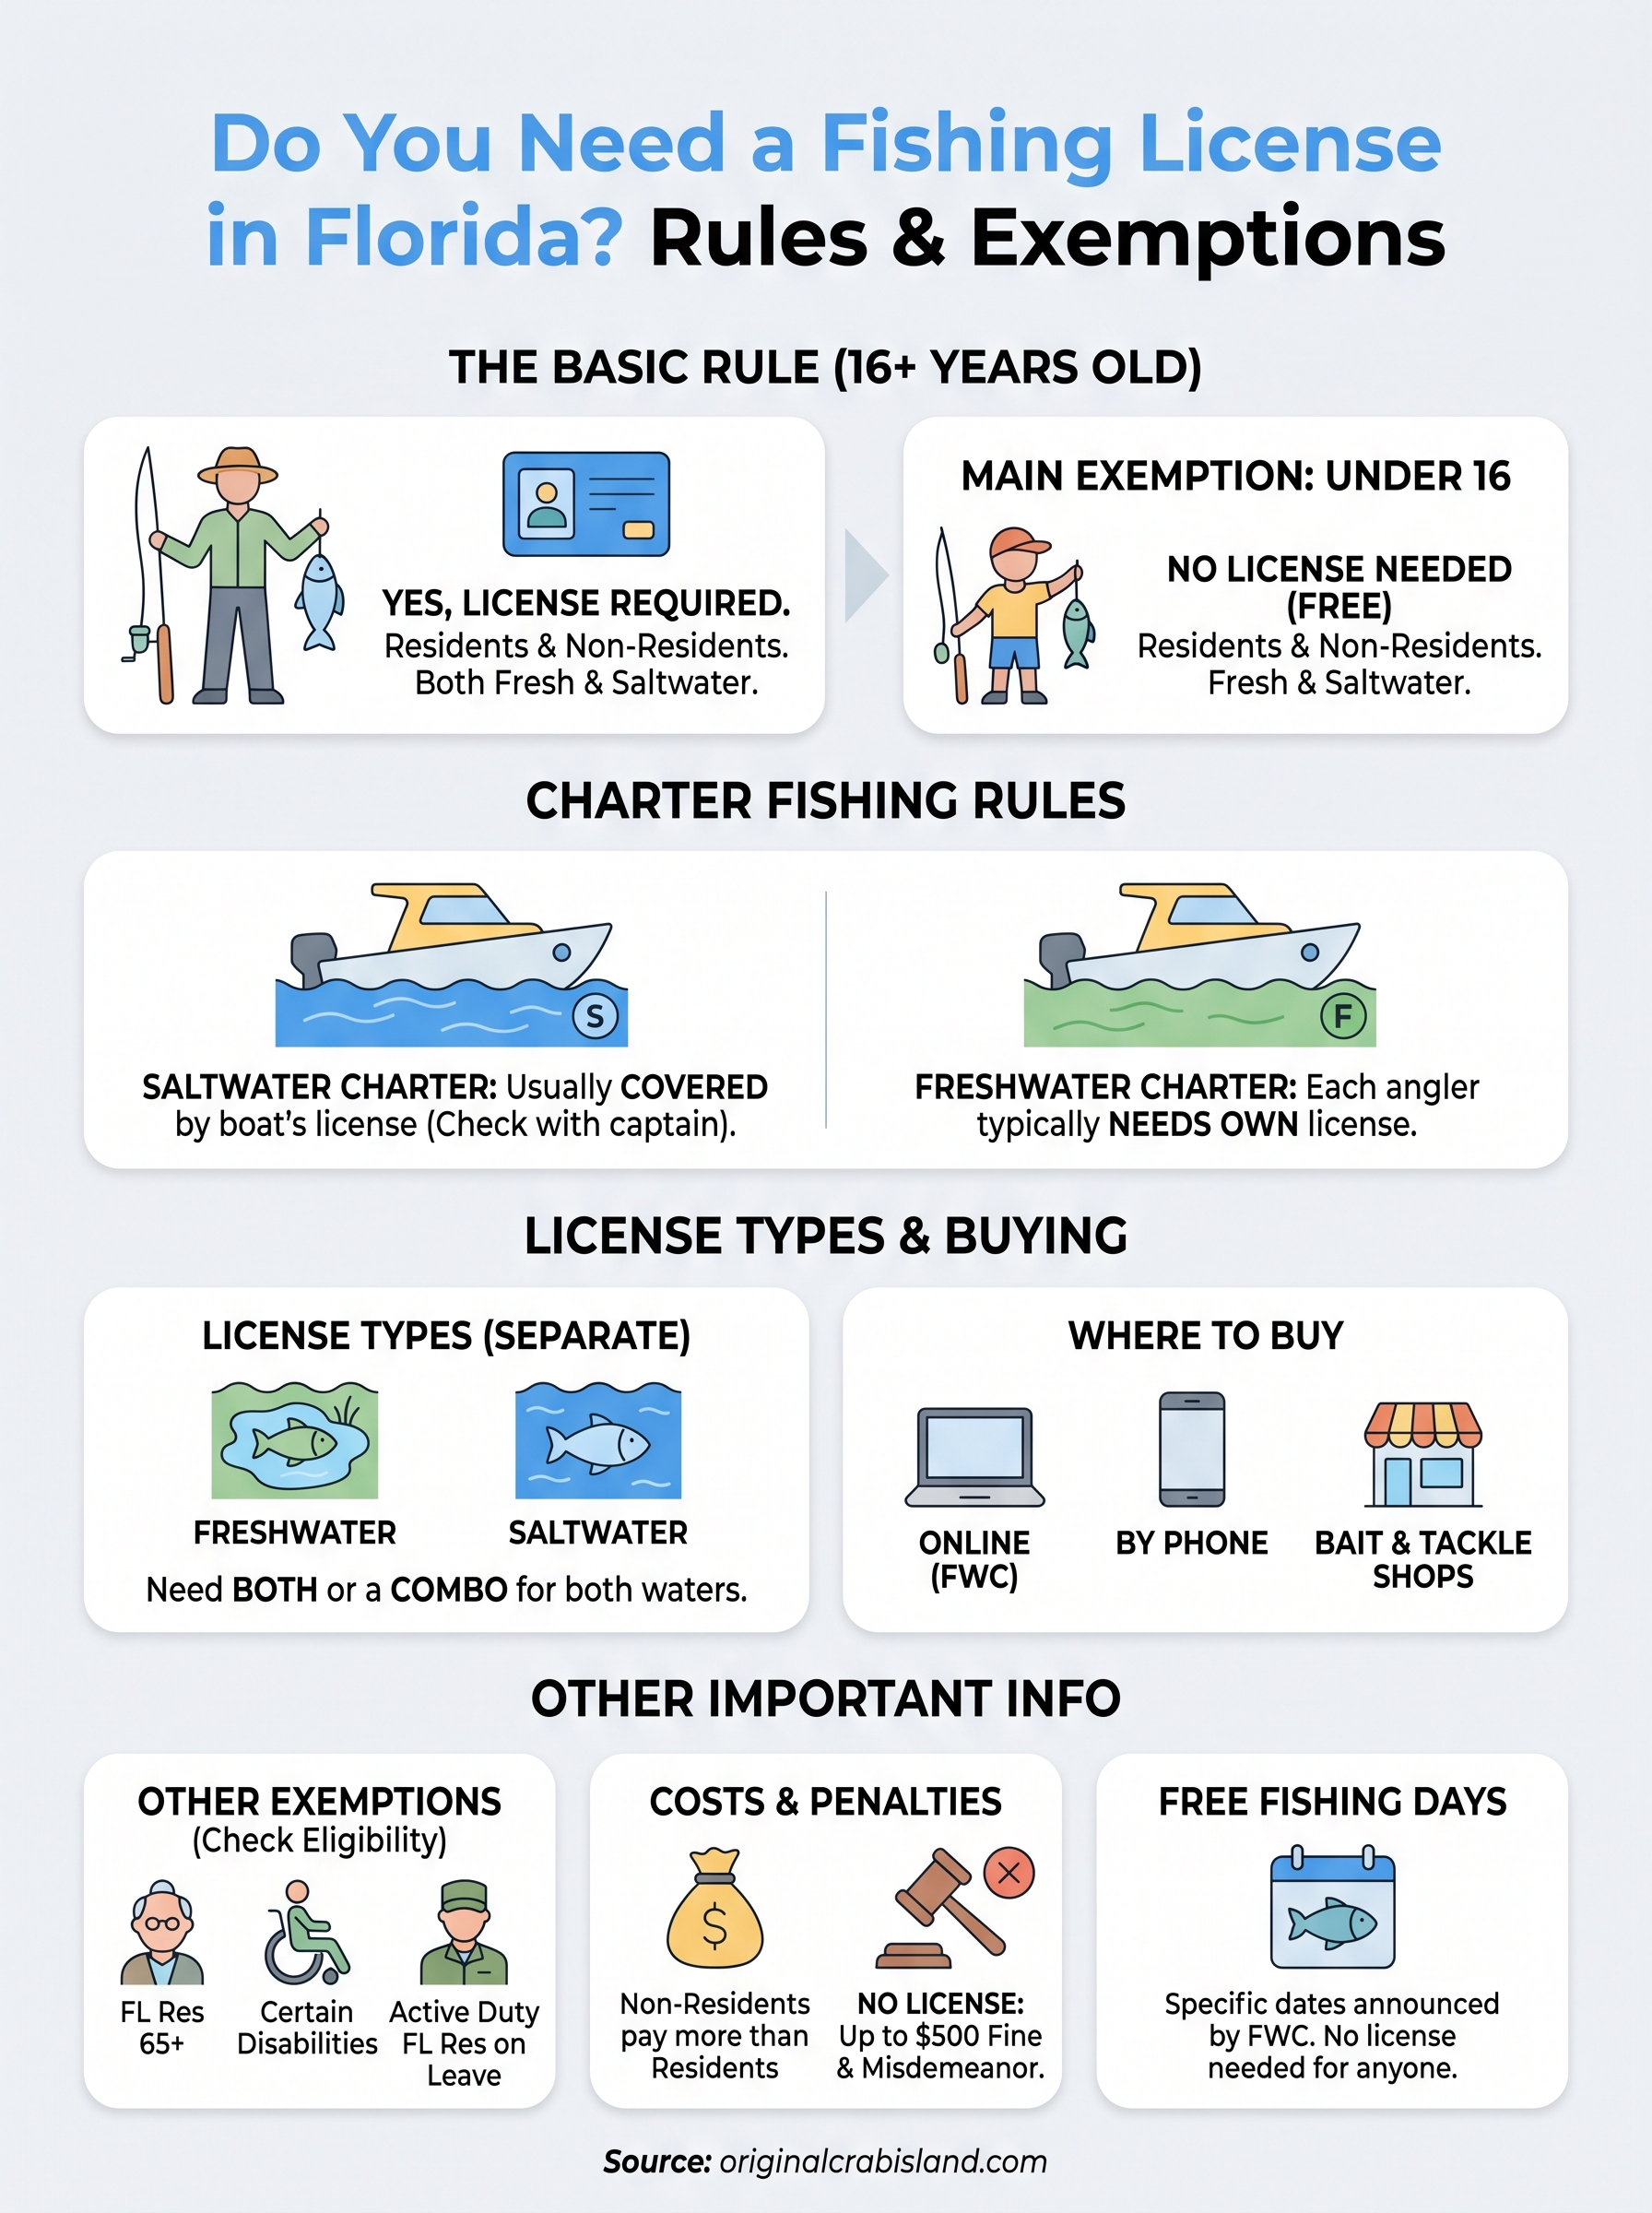
Before you cast, run through this quick list to make sure you’re covered. If you’re 16 or older, you need a valid fishing license that matches the water you’re fishing, whether that’s saltwater along the Gulf or a freshwater lake inland. Kids under 16 are exempt, and charter passengers on a licensed saltwater boat typically don’t need their own license for that specific trip.
Here’s what to confirm before you head out:
So, do you need a fishing license in Florida? In most cases, yes. Once that’s sorted, all that’s left is getting on the water. Book a fishing charter or rent a boat with Original Crab Island and spend your time actually fishing instead of handling last-minute paperwork on the dock.

Snorkeling around Crab Island and the crystal-clear waters of Destin, Florida, is one of those experiences that hooks you immediately. But if your mask leaks, your snorkel floods, or your fins give you blisters, that first outing can go from exciting to frustrating fast. Finding the best snorkeling gear for beginners starts with knowing what actually matters, and skipping the stuff that doesn’t.
Here at Original Crab Island, we put visitors on the water every single day. Pontoon trips, jet ski runs, dolphin cruises, we see firsthand what gear works and what ends up tossed in a bag after ten minutes. That hands-on experience with hundreds of guests each season has taught us exactly what beginners need to feel comfortable, safe, and ready to explore Destin’s Emerald Coast underwater.
This guide breaks down 11 beginner-friendly snorkeling gear picks for 2026, including complete sets and individual pieces worth your money. We’ll cover what to look for in a mask that actually seals, why a dry-top snorkel saves you from swallowing half the Gulf, and which fins won’t wreck your feet. Whether you’re prepping for a Crab Island trip or your first snorkeling adventure anywhere, you’ll walk away knowing exactly what to buy, and what to avoid.
If you’re visiting Destin and want to snorkel Crab Island or the surrounding Emerald Coast waters, renting gear on-site is the most practical option for most first-timers. You skip the hassle of packing equipment, checking it through an airline, and guessing what size fins to order online. Original Crab Island provides rental gear that’s been tested season after season with real guests, so you’re not gambling on something that just arrived in a box.
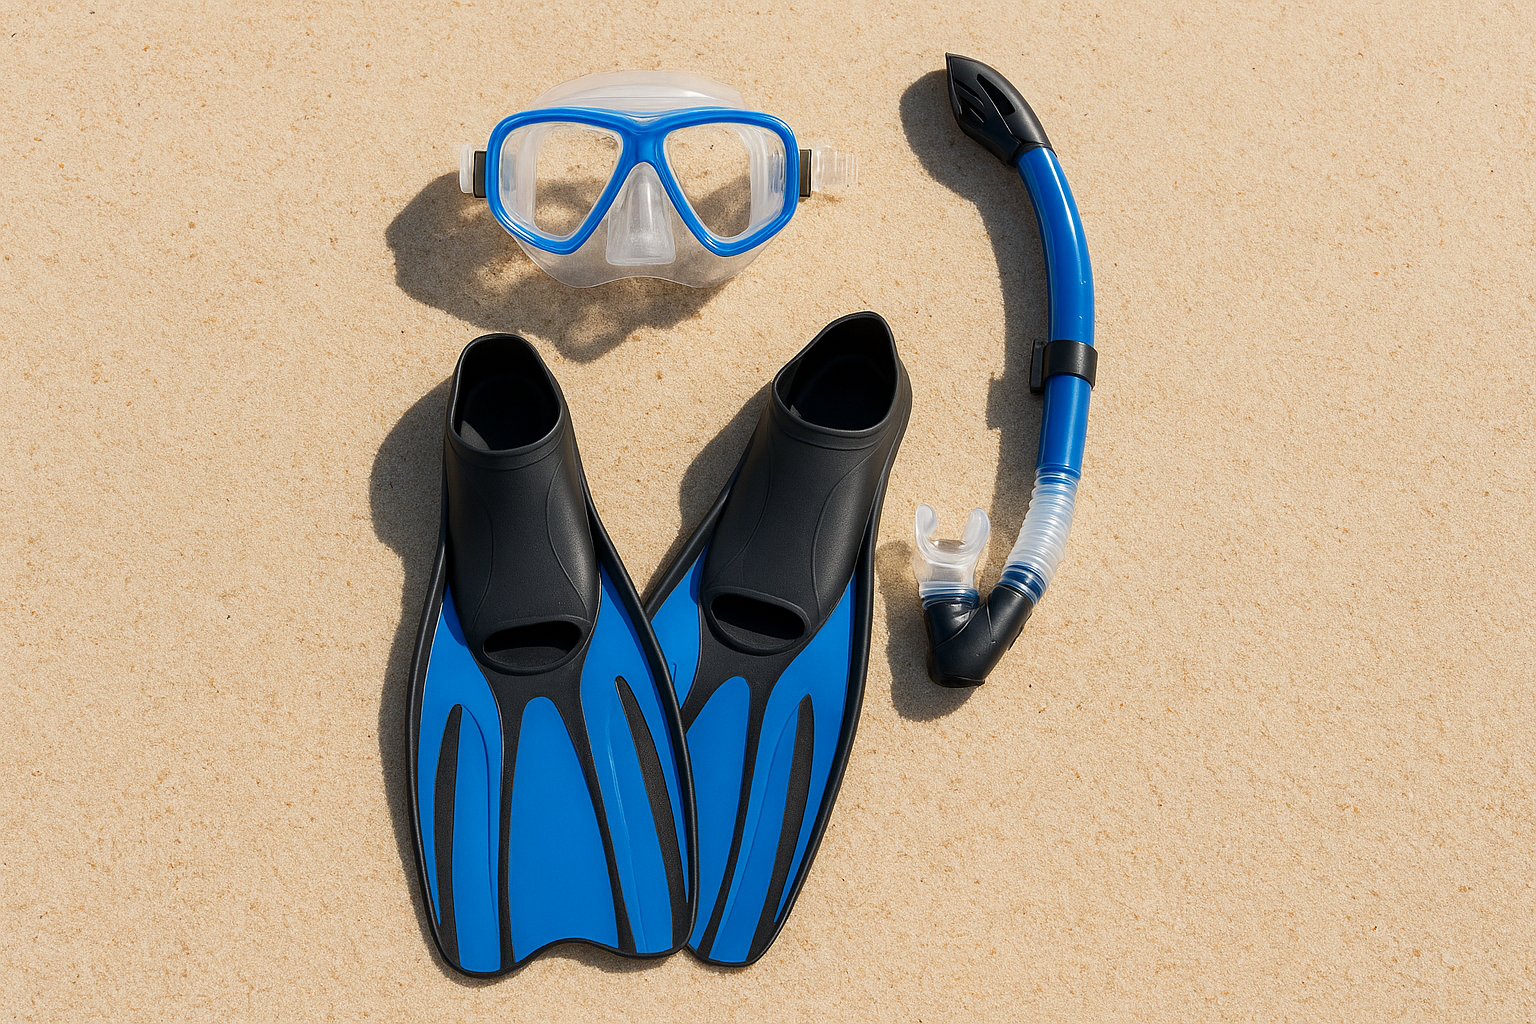
A standard rental package from Original Crab Island includes a mask, snorkel, and fins sized to fit you before you ever hit the water. Staff match the mask to your face shape so you’re not fighting a leaky seal mid-session. You also get basic orientation on how to clear your snorkel and adjust your strap, which is something most packaged purchases don’t include. A typical rental set covers:
Renting works especially well if this is your first time snorkeling or you’re not sure whether you’ll enjoy it enough to invest in your own kit. You get properly fitted, maintained equipment without committing to a purchase. That matters because poorly fitted gear is the single biggest reason beginners have a frustrating first session, and rental staff catch fit problems before you step into the water.
Trying rental gear first gives you a clear benchmark for what to buy if you decide to make snorkeling a regular habit.
Rental gear at Original Crab Island also pairs naturally with their pontoon boat and dolphin cruise packages, so you can snorkel directly from the boat at Crab Island without hauling your own equipment to the sandbar. For families and groups, that convenience alone makes renting the smarter call.
Before you accept any rental set, run a quick visual check on the mask skirt for cracks or stiffness, and confirm the snorkel keeper clip holds the tube firmly against the strap. Ask staff whether the fins are the correct size for your foot length, since fins that run too loose will slip off and fins that pinch will blister your heels within minutes. These two checks take about two minutes and prevent most common beginner complaints.
Rental pricing at Original Crab Island is competitive with other Destin operators. Expect to pay roughly $15 to $30 per person for a full snorkel set for the day. Bundling your rental with a boat trip or activity package often reduces the per-person cost, making this one of the most affordable ways to access the best snorkeling gear for beginners without buying a thing.
The Cressi Palau LAF set is one of the most consistently recommended beginner snorkel kits on the market, and for good reason. Cressi is an Italian brand with decades of dive equipment history, and the Palau set packages their core technology into an affordable, all-in-one option that removes most of the guesswork for first-time buyers.
The Palau LAF set includes a single-lens tempered-glass mask, an LAF (low, added features) snorkel with a dry-top valve, and a pair of open-heel fins. The mask uses a soft silicone skirt to create a comfortable face seal, and the snorkel’s dry-top mechanism closes automatically when submerged to block water entry. The fins run large and open-heeled, so you can wear them with or without booties depending on the water temperature.
You get a complete, matched system designed to work together rather than three separate pieces that may not fit properly as a pair. The dry-top snorkel reduces the chance of accidentally inhaling water, which is the most common confidence-killer for beginners. Cressi’s silicone mouthpiece is softer than many budget alternatives, so your jaw won’t ache after a 30-minute session.
Buying a matched set from a single reputable manufacturer is one of the fastest ways to avoid the compatibility problems that plague mix-and-match beginner kits.
Confirm you’re purchasing the LAF version specifically, since Cressi sells multiple Palau configurations. Check that the mask skirt color matches your face shape preference (clear silicone lets in more light, black silicone reduces glare), and verify the fin size chart against your actual foot length before ordering.
The Cressi Palau LAF set typically runs $60 to $90 depending on the retailer and size. It represents solid value for the best snorkeling gear for beginners who want a reliable kit without overspending on their first purchase.
If you buy only one piece of snorkel gear, make it a quality mask. A mask that fits your face and keeps water out changes your entire underwater experience, and the tempered-glass mask with a silicone skirt is the standard that most experienced snorkelers start and often finish with.
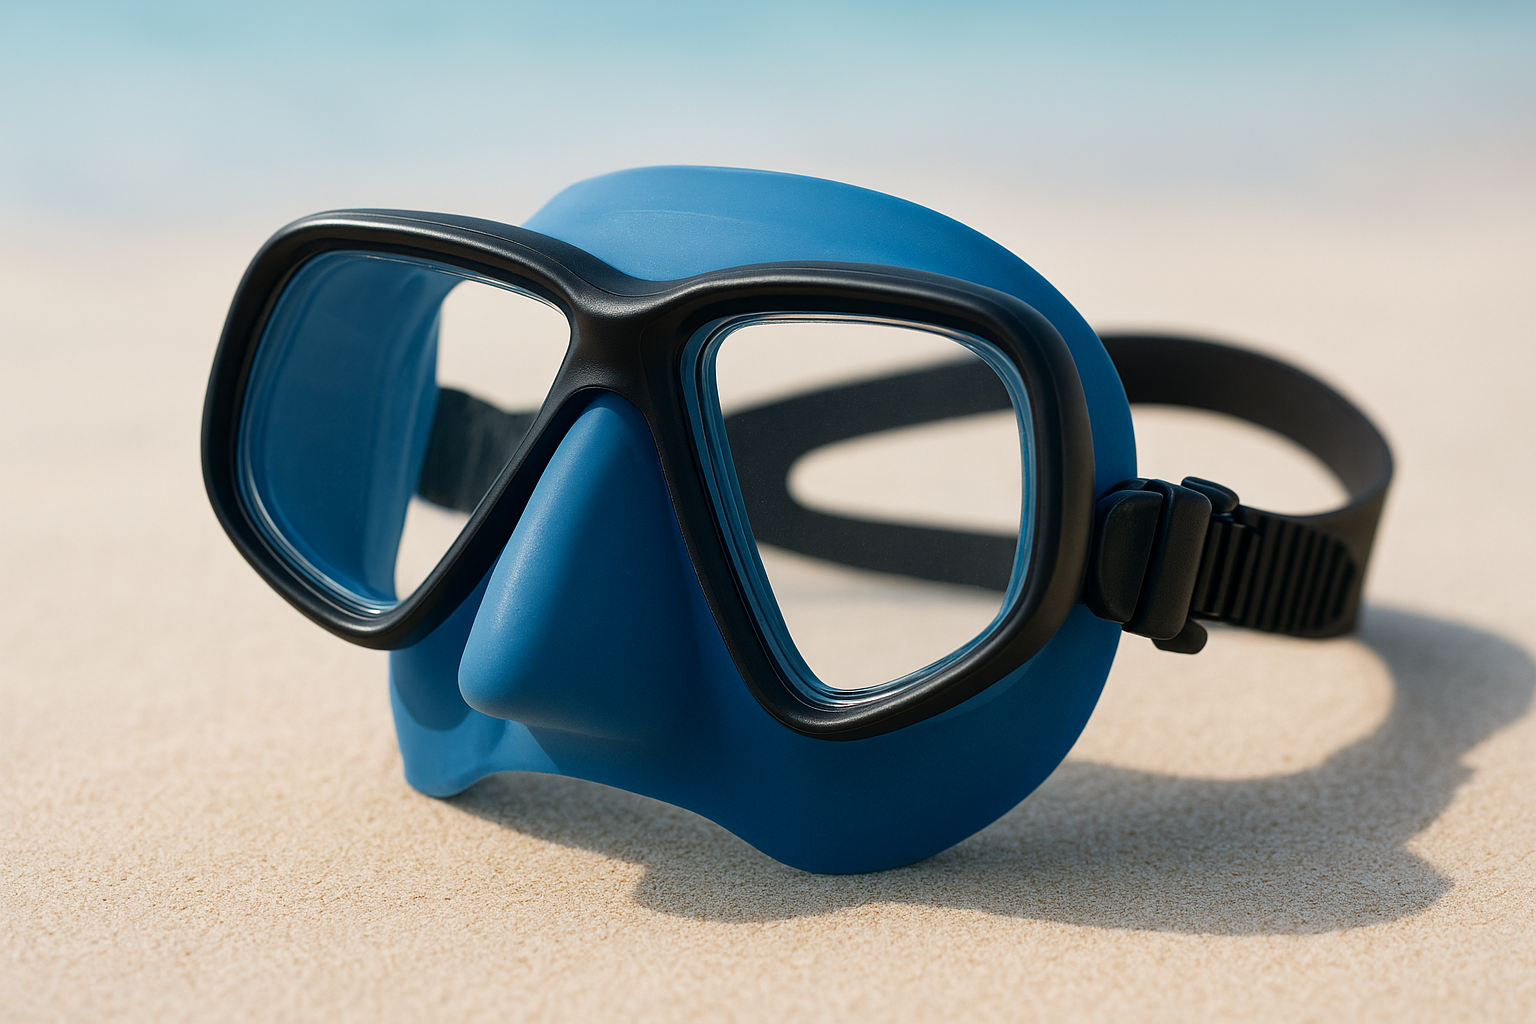
A tempered-glass mask uses impact-resistant glass lenses that stay clear under pressure and resist fogging better than plastic alternatives. The silicone skirt is the flexible seal that presses against your face, and soft, medical-grade silicone forms a more reliable seal than cheaper rubber or PVC materials. Most models come with an adjustable split strap at the back to distribute tension evenly across your head.
The main reason beginners struggle with masks is leaking, and tempered glass paired with a quality silicone skirt solves that problem more reliably than any other combination. Silicone stays flexible in cold and warm water, so it conforms to your face rather than hardening into a shape that lets water seep in.
A mask that fits well from the start lets you focus on what you’re seeing underwater, not on managing a flood inside your lens.
Tempered glass also delivers optical clarity and scratch resistance that lets you see fish, coral, and sandy bottoms without distortion, which matters more than most beginners expect on their first session.
Run the no-strap suction test before committing: press the mask to your face without using the strap, inhale lightly through your nose, and let go. If it holds for a few seconds, the skirt fits your face. Also confirm the lens material is explicitly marked “tempered”, since some budget masks use plastic that scratches easily and distorts your view.
Standalone tempered-glass masks with silicone skirts range from $25 to $60 for beginner-quality options. This price range covers the best snorkeling gear for beginners who want reliable performance without overpaying for features they won’t use on their first few outings.
A dry snorkel is one of the most impactful upgrades you can make to your beginner snorkel kit. Unlike a basic open-top tube, a dry snorkel uses a float mechanism at the top to seal the tube automatically when you dip below the surface, which means water stays out rather than rushing in every time you take a breath.
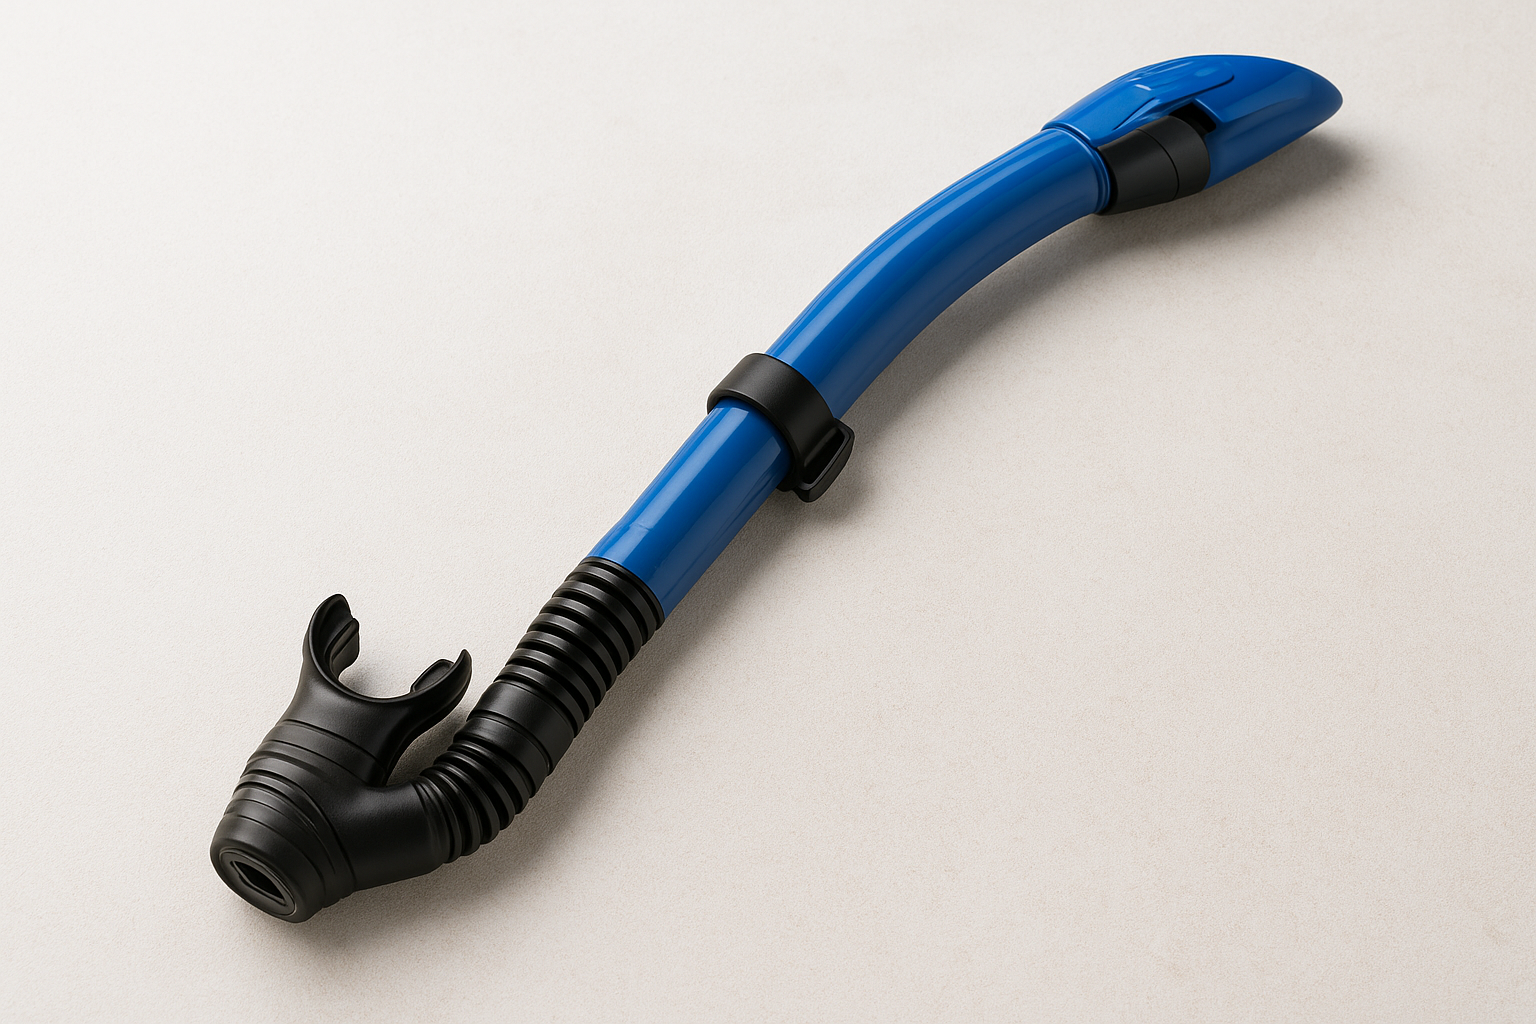
Two features define a dry snorkel: a splash guard or dry-top float valve at the top of the tube that closes on submersion, and a purge valve at the bottom near the mouthpiece. The purge valve is a one-way silicone flap that lets you blow out any water that enters the tube with a single firm exhale, rather than lifting your head out of the water to clear it. Most dry snorkels also include a flexible silicone mouthpiece that reduces jaw fatigue during longer sessions.
Swallowing or inhaling water is the fastest way to ruin a beginner’s confidence in the water. The dry-top mechanism eliminates that risk almost completely in calm, shallow conditions like those you’ll find at Crab Island. When you combine it with a purge valve, clearing the snorkel takes one breath instead of a full head lift, which means you stay relaxed and horizontal rather than thrashing around at the surface.
A dry snorkel with a purge valve is one of the most practical pieces of the best snorkeling gear for beginners because it removes the two biggest friction points in the first 10 minutes.
Check that the dry-top valve opens and closes freely by tilting the tube upside down and watching the float mechanism respond. Confirm the purge valve seals completely when you press it lightly with your finger, and look for a snorkel with a corrugated flex section below the mouthpiece for a more natural jaw position.
Standalone dry snorkels typically cost $20 to $45 for beginner-grade models from brands like Cressi, Mares, or U.S. Divers.
A semi-dry snorkel sits between a basic open-top tube and a full dry snorkel, giving you most of the water protection with a more natural breathing feel. If you’ve tried a dry snorkel and found the valve mechanism slightly restrictive, or if you’re spending most of your time at the surface in calm, shallow water like Crab Island, a semi-dry is often the more comfortable everyday choice for new snorkelers.
Semi-dry snorkels feature a splash guard at the top of the tube rather than a floating seal valve. This deflector redirects waves and surface splash away from the opening without fully closing the tube, so air flows more freely compared to a dry-top design. Most models also include a purge valve at the bottom and a flexible corrugated section near the mouthpiece for a more relaxed jaw angle during longer sessions.
The breathing resistance on a semi-dry snorkel is noticeably lower than a fully dry model, which makes it easier to settle into a calm, steady rhythm at the surface. That matters when you’re new because controlling your breathing is one of the first real skills to develop in the water, and fighting a stiff valve while learning adds unnecessary stress to an already unfamiliar situation.
A semi-dry snorkel is one of the best snorkeling gear for beginners options when you’re spending most of your session at the surface rather than diving below it.
Look for a wide-bore tube diameter of at least 2.5 cm, which reduces breathing effort significantly on longer surface swims. Confirm the splash guard sits at a forward-angled position on the tube so it deflects water effectively rather than funneling it straight in.
Semi-dry snorkels typically run $15 to $35 from reliable brands like U.S. Divers, Cressi, or Mares, making them one of the most budget-friendly upgrades in a beginner snorkel kit.
Full-foot fins are the most beginner-friendly fin style available, and they’re the right call for snorkeling in warm, calm, shallow water like you’ll find at Crab Island in Destin. They slip on like a shoe, cover your entire foot, and get you moving efficiently through the water without any complicated gear adjustments.
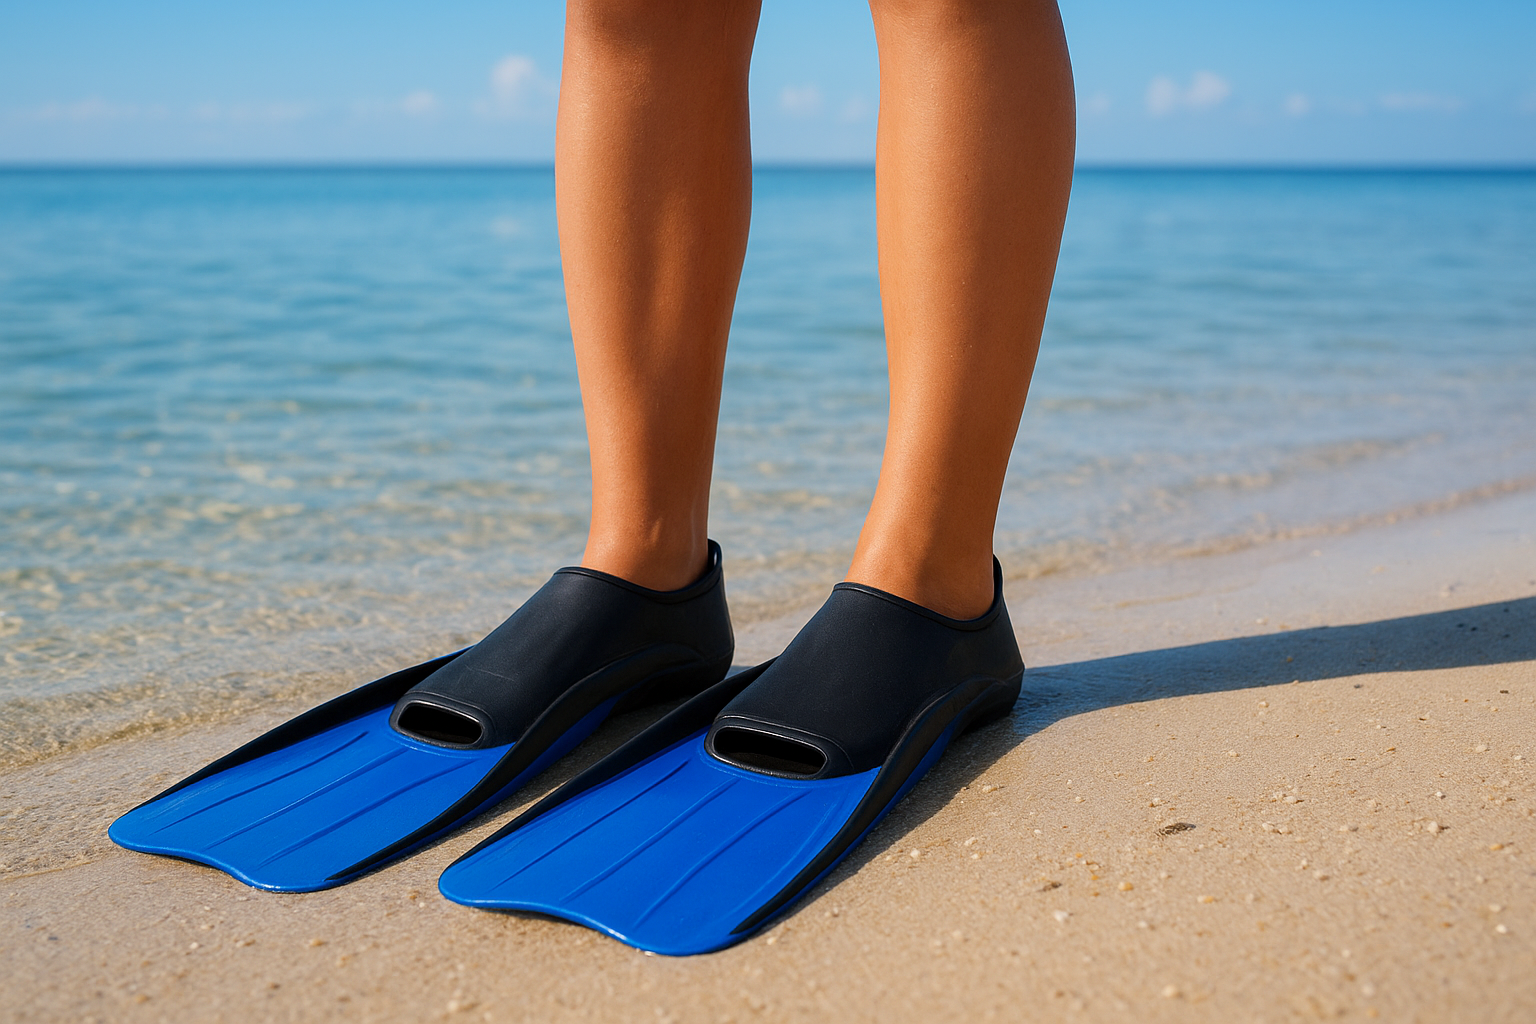
Full-foot fins feature a closed heel pocket that encases your entire foot, similar to a rubber shoe. The blade extends forward from your toes, and the whole fin is typically made from soft rubber or silicone-blend materials that flex naturally with your kick. Most beginner-grade full-foot fins run at a medium stiffness, which balances propulsion and comfort well for surface snorkeling.
These fins generate solid forward movement with minimal kicking effort, which helps beginners conserve energy and stay relaxed at the surface. You don’t need booties or neoprene socks underneath, which removes one more piece of gear from your setup.
Full-foot fins are consistently cited as part of the best snorkeling gear for beginners because they reduce complexity without sacrificing performance in the conditions beginners actually snorkel in.
The enclosed heel also prevents blisters better than open-heel designs in warm water, since there’s no adjustable strap buckle pressing against your ankle during a long session.
Check the size chart carefully because full-foot fins run differently across brands. Your foot should fit snugly without curling your toes inside the pocket. Also look for a vented blade design, which reduces drag on your upstroke and makes the flutter kick noticeably less tiring over longer snorkel sessions.
Full-foot fins for beginners typically run $20 to $55 depending on blade length and material quality. Brands like Cressi, U.S. Divers, and Mares offer reliable options in this range without overloading you on features you won’t use in shallow water.
Open-heel fins give you a different kind of control compared to full-foot designs, and they’re worth considering if you plan to snorkel from rocky shores, boat ladders, or uneven sandy entries where walking in bare feet inside a full rubber pocket isn’t practical. The adjustable heel strap makes them easy to put on and take off, and they pair with booties for added protection and warmth.
Open-heel fins feature an exposed heel with an adjustable rubber or bungee strap that locks the fin around your foot. The blade is typically stiffer than full-foot equivalents, which translates to more thrust per kick in open water. Because the foot pocket is open, you can wear neoprene booties or fin socks underneath to prevent chafing and improve fit across different water temperatures.
The adjustable strap means you get a more precise fit than sizing into a closed pocket, which matters when you’re buying fins for the first time without trying them in person. Open-heel fins are also easier to walk in on a boat deck or uneven shore entry because the bootie underneath gives you grip and cushioning before you enter the water.
Open-heel fins are among the best snorkeling gear for beginners who plan to snorkel from multiple locations rather than exclusively calm, sandy entry points.
Confirm the heel strap mechanism uses a quick-release buckle rather than a friction clip, since quick-release buckles are far easier to operate with wet hands. Also look for a spring strap upgrade if the stock rubber strap feels too stiff, since spring straps last longer and adjust more reliably through repeated use.
Open-heel fins for beginners typically run $35 to $75 from brands like Cressi, Mares, or Scubapro, not including the cost of booties.
Booties and fin socks are easy to overlook when building your first snorkel kit, but they solve real problems. They protect your feet from fin friction and rough sandy entries, and they give open-heel fins a better, more secure fit without the bulk of a full diving bootie.
Snorkel booties are thin neoprene shoes, typically 1.5 mm to 3 mm thick, with a grippy rubber sole and a low ankle cut. Fin socks are the lighter version, made from lycra or thin neoprene, designed purely to prevent chafing inside your fin pocket rather than provide thermal protection. Both slip on quickly and take up almost no space in a gear bag.
Your feet take the most punishment during a snorkel session. Full-foot fins create friction along the heel and toe box, and open-heel fins can pinch at the ankle strap if you’re wearing them directly on bare skin. Booties or fin socks eliminate that friction, which means you can stay in the water longer without cutting the session short because your feet hurt.
This is one of the most underrated pieces of the best snorkeling gear for beginners because it directly affects how long you can comfortably stay in the water.
Thin booties also give you traction on wet boat decks and rocky shore entries, which matters when you’re carrying fins and a mask and trying to step into the water safely.
Choose 1.5 mm neoprene for warm-water destinations like Destin, where thermal protection is secondary to fit and comfort. Confirm the sole has non-slip grip, and check that the bootie fits snugly without adding so much bulk that it forces your foot out of the fin pocket.
Snorkel booties typically run $15 to $35, while fin socks start as low as $8 to $15 per pair from brands like Cressi or Mares.
A snorkel vest keeps you buoyant at the surface without the bulk of a full life jacket, and for beginners who aren’t strong swimmers, it removes a significant source of anxiety before you even enter the water. You inflate it orally through a small valve, adjusting how much lift you want based on how confident you feel in the water.
Snorkel vests are lightweight, inflatable bladders worn around your torso, typically made from durable PVC or nylon with neoprene backing to prevent chafing. Most designs feature an oral inflation tube and deflation valve on the front so you can adjust buoyancy quickly while floating on the surface. Some models include a whistle attachment point or reflective panel for added safety in busier waterways like Crab Island on a peak summer day.
The vest lets you float with minimal physical effort, which frees up your mental attention for looking underwater rather than staying afloat. That reduced effort translates directly into longer, more relaxed sessions because you’re not burning energy just to keep your face in the water.
A snorkel vest is one of the most confidence-building additions to the best snorkeling gear for beginners, especially for those who haven’t spent much time swimming in open water.
Check that the vest uses a self-sealing oral inflation valve that holds pressure reliably rather than slowly deflating mid-session. Also confirm the fit range covers your chest circumference since most vests come in small, medium, and large rather than fully adjustable sizing.
Snorkel vests typically run $15 to $35 from brands like U.S. Divers or Innovative Scuba Concepts, making them one of the most affordable safety additions you can add to your kit before hitting the water.
Sun protection is one of the most overlooked parts of any snorkel kit, and the Destin sun in summer can burn exposed skin in under 20 minutes when you’re floating face-down on the surface. A UPF-rated rash guard and swim leggings cover your back, arms, and legs without restricting movement or adding thermal bulk to your setup.
A UPF rash guard is a lightweight, quick-dry shirt made from nylon, polyester, or spandex blends that block ultraviolet radiation before it reaches your skin. Paired with swim leggings of the same material, you get full coverage from your wrists to your ankles. Most UPF 50+ garments block over 98% of UV rays, which is significantly more protection than a layer of sunscreen that washes off in saltwater within the first 30 minutes of your session.
When you’re new to snorkeling, time underwater passes faster than you expect while you’re watching fish and sea life below you. That distraction means most beginners stay in the water longer than planned without noticing the sun working on their exposed back and shoulders the entire session. A rash guard removes that risk entirely without requiring you to think about it once you’re in the water.
A UPF rash guard and swim leggings are among the most practical additions to the best snorkeling gear for beginners because they protect you passively without demanding any attention mid-session.
Look for a UPF 50+ rating printed on the label rather than assumed from fabric color or thickness. Choose a four-way stretch material so the garment moves with your kick cycle instead of bunching around your torso or pulling at your shoulders.
Rash guards typically run $20 to $45, and swim leggings fall in a similar $20 to $40 range from brands like O’Neill, Rip Curl, or Columbia.
A waterproof phone pouch lets you bring your phone or camera into the water without risking damage, and a mesh gear bag gives you an organized, breathable way to carry and dry your entire kit between sessions. These two accessories do not make you a better snorkeler, but they protect your gear and your phone from the kind of damage that turns a great trip into an expensive one.
A waterproof phone pouch is a sealed PVC sleeve with a transparent front that keeps your touchscreen accessible while blocking water entry. Most pouches use a roll-top or zip-lock closure rated to at least 10 meters depth, which is far beyond anything you’ll reach while surface snorkeling. A mesh gear bag is an open-weave nylon or polyester tote that lets water drain and air circulate around your wet mask, fins, and snorkel after you exit the water.
Your mask, fins, and snorkel represent a real investment, and a mesh bag prevents that gear from sitting in a pool of saltwater at the bottom of a closed backpack, which degrades silicone and rubber faster than most people expect. The phone pouch lets you capture photos and short video underwater on your first session, which makes the experience significantly more memorable without the cost of a dedicated underwater camera.
Protecting your gear and documenting your first session are both solid reasons to add these two items to your best snorkeling gear for beginners checklist.
Check that the phone pouch lists a specific depth rating in meters, not just a vague “waterproof” label. Before committing, confirm the interior dimensions fit your exact phone model, since pouches sized for older, smaller phones will not close properly around current flagship devices.
Waterproof pouches typically run $10 to $20, and mesh gear bags cost $10 to $25 from brands like Cressi or Seavenger.
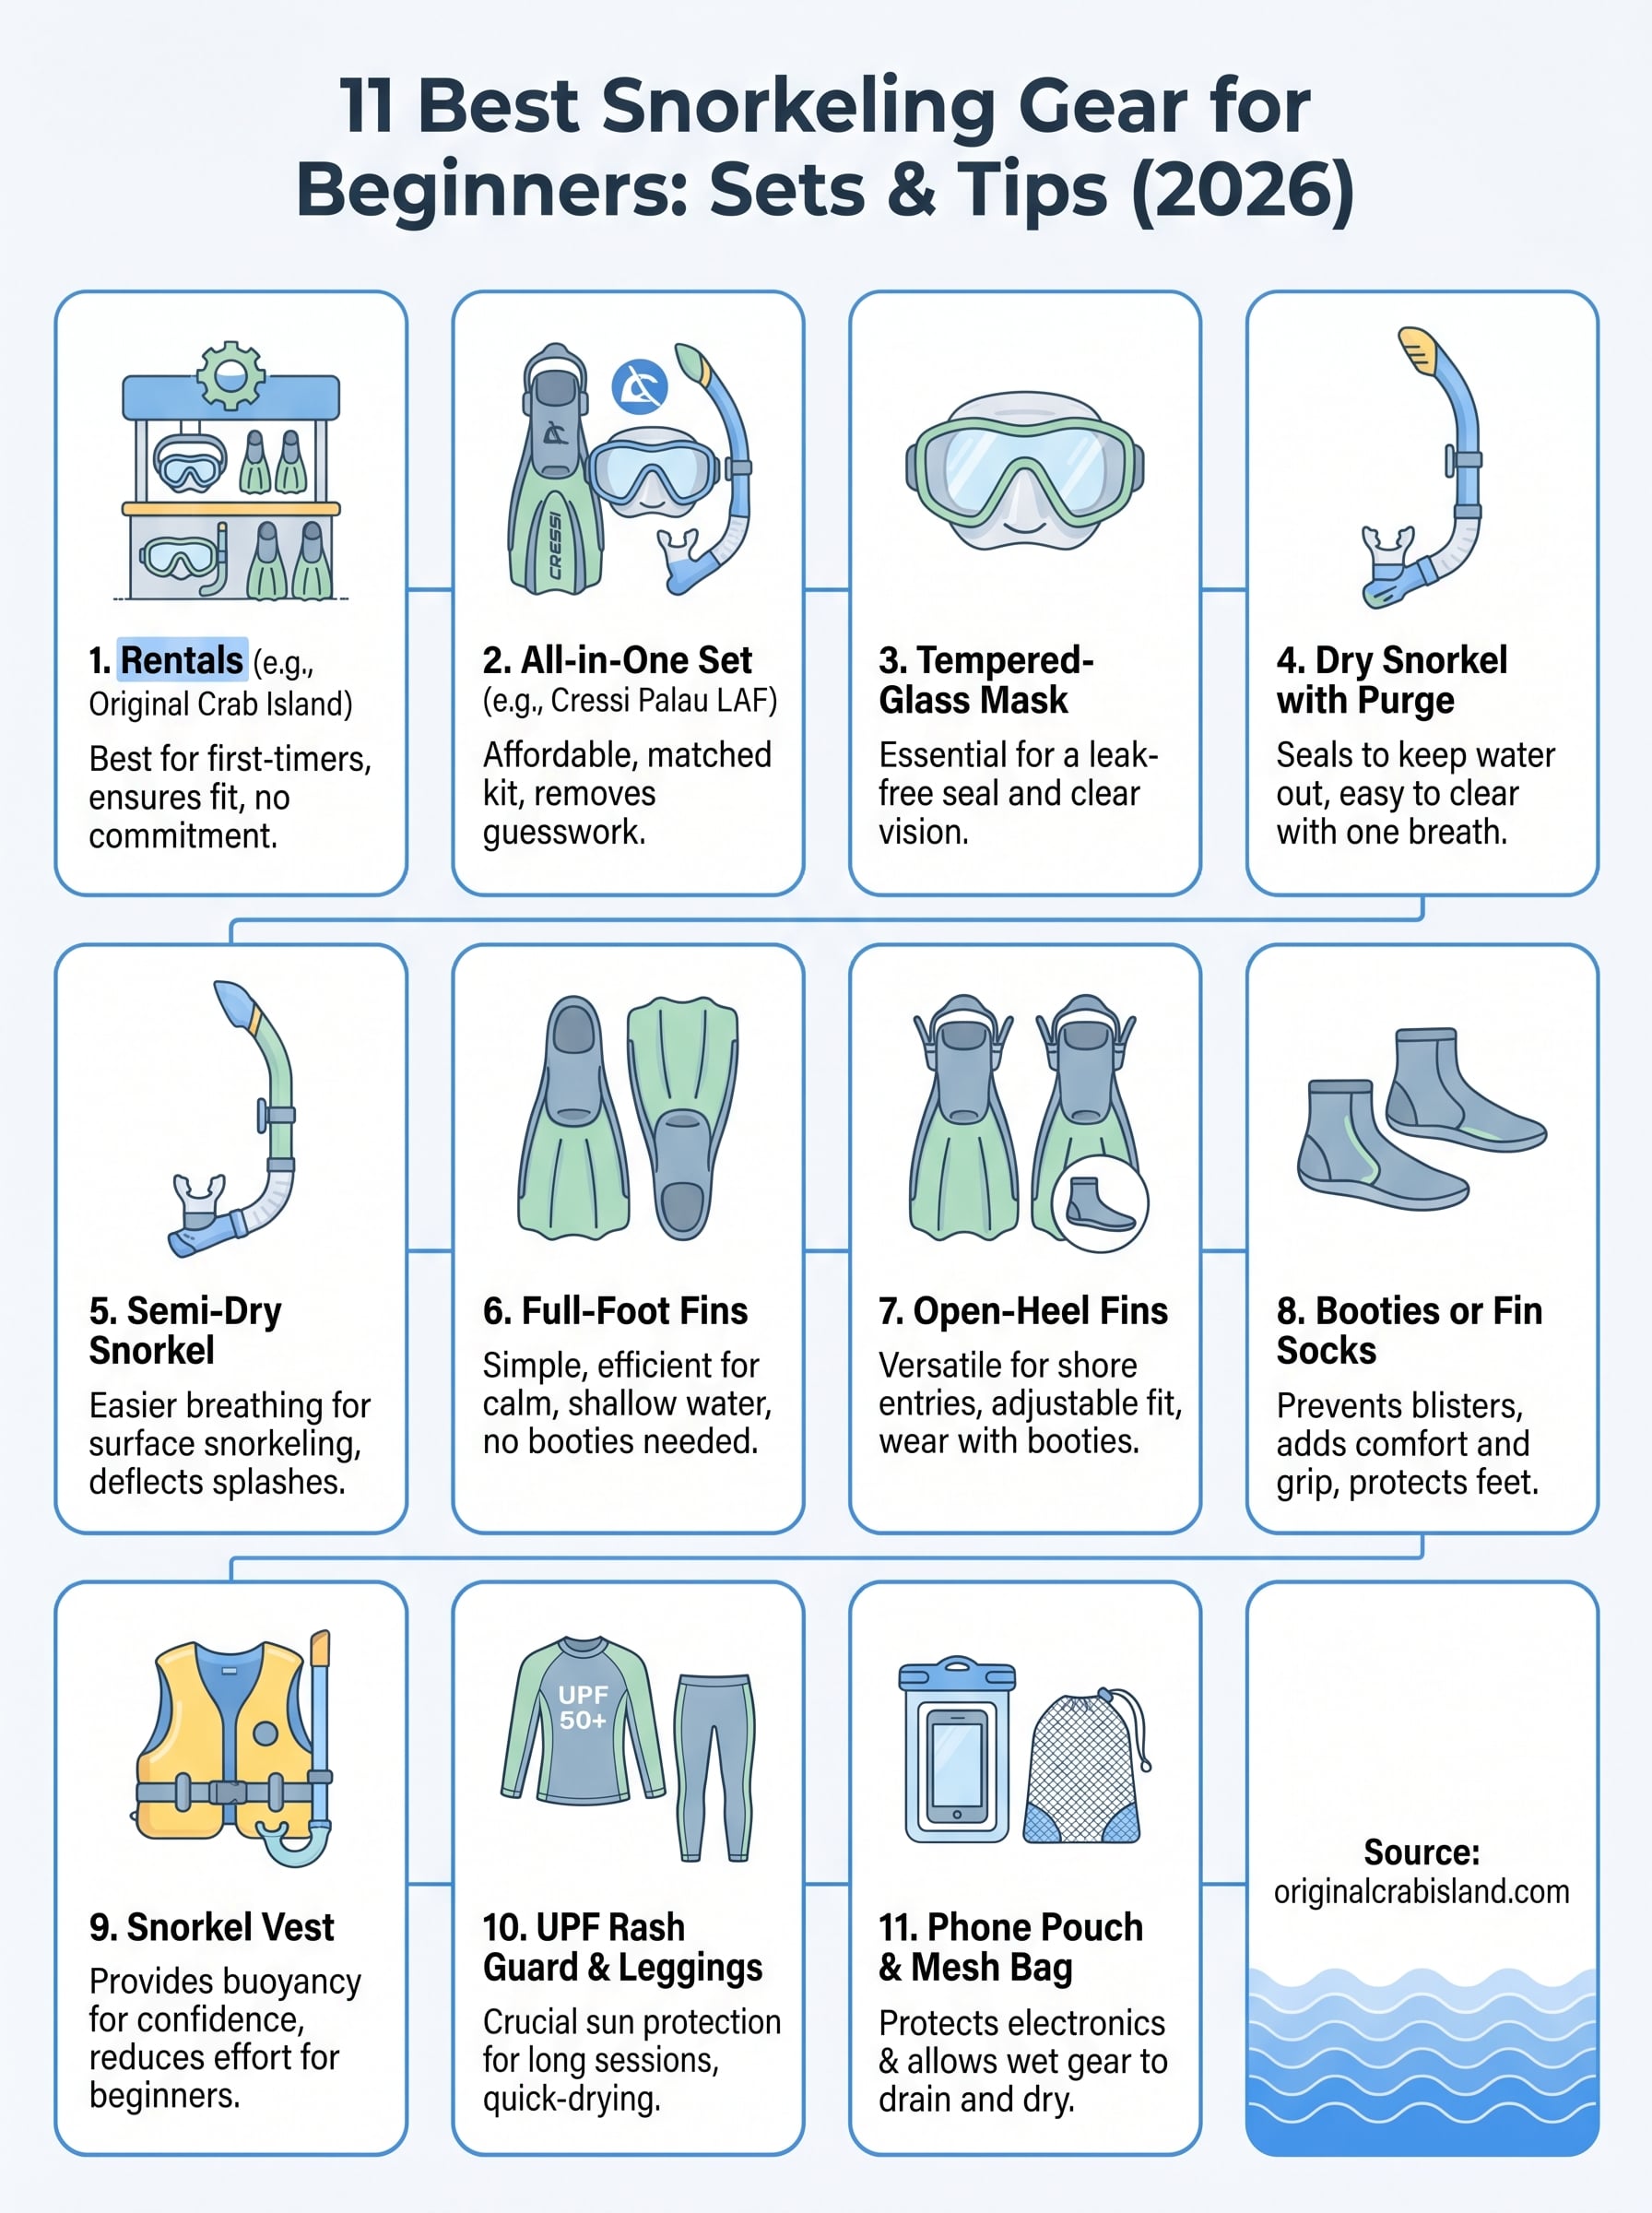
Picking the best snorkeling gear for beginners comes down to fit, simplicity, and matching your gear to the conditions where you’ll actually snorkel. A properly sealed mask, a dry or semi-dry snorkel, and fins sized to your feet solve 90% of the problems first-timers run into. Add a rash guard, a snorkel vest if you want extra confidence, and a mesh bag to protect your investment, and you’re genuinely set.
If you’re heading to Destin, skipping the guesswork entirely is easy. Renting tested, fitted gear on-site lets you focus on the water instead of worrying about whether you ordered the right size. You can pair your snorkel rental with a pontoon boat trip, dolphin cruise, or Crab Island excursion for a complete day on the Emerald Coast. Book your Crab Island water adventure and get in the water with everything you need already handled. For more options, explore our Destin, fl page. For more options, explore our our rentals page.

If you’ve ever fished the Gulf of Mexico off Destin, Florida, you know that rigging with the right terminal tackle matters as much as finding the right spot. Owner fishing hooks have earned a serious reputation among saltwater and inshore anglers for one reason: they’re sharp out of the package and they stay that way through hard-fighting redfish, snook, and snapper.
At Original Crab Island, we run fishing charters in these same waters every week. Our captains and crew have hands-on experience with dozens of hook brands, and Owner consistently ranks at the top of the tackle box. That firsthand time on the water informs every recommendation you’ll find below, these aren’t picks pulled from a spec sheet, they’re hooks that have proven themselves on real fish.
This list breaks down the 8 best Owner hooks for saltwater and inshore fishing in 2026. You’ll find options for live bait, artificial lures, and bottom rigs, along with honest notes on what each hook does well and where it falls short. Whether you’re rigging up for a charter out of Destin or loading your own tackle bag, this guide will help you pick the right Owner hook for the job.
The Owner Mutu Circle Hook is a staple in saltwater tackle boxes across the Gulf Coast. Its chemically sharpened point and in-turned tip drive penetration without requiring a hard hook set, which makes it a reliable option for both seasoned anglers and first-timers who are still learning the feel of a live bait strike.
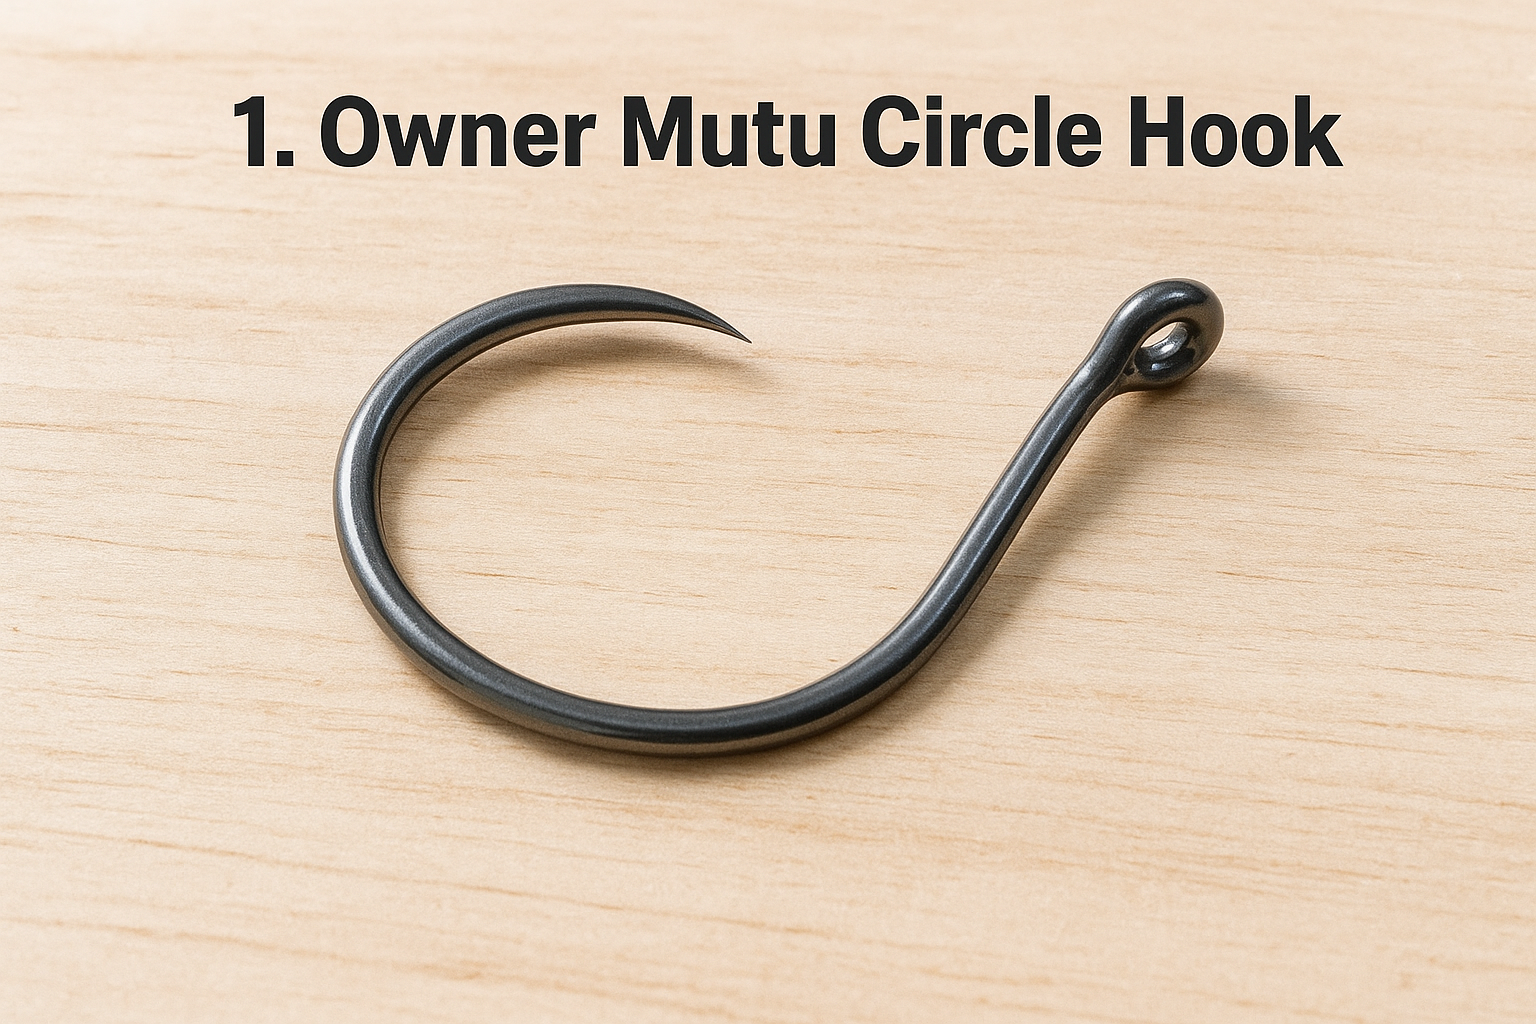
This hook performs best when you’re fishing live or cut bait on the bottom or in the water column. It’s built for species that tend to take bait deep, including redfish, grouper, snapper, and sheepshead. The circle design guides the hook naturally to the corner of the fish’s mouth, which reduces gut hooking and makes catch-and-release significantly cleaner.
The Mutu Circle’s in-turned point separates it from standard J-hooks; it nearly auto-sets on steady pressure, which means fewer lost fish during the run.
Owner offers the Mutu Circle in sizes ranging from 1/0 up to 10/0, so there’s a fit for nearly every target species. For inshore fishing targeting redfish or flounder, a 2/0 to 4/0 covers the majority of situations. When you shift offshore toward grouper or larger snapper, step up to a 5/0 or 6/0 to handle bigger bait and stronger jaws.
Your bait size should match your hook size. If the hook gap is too small for the bait you’re using, hook-up ratios drop fast because the point can’t clear the bait and reach the fish’s mouth cleanly.
The Mutu Circle works well on Carolina rigs and fish finder rigs where the hook trails on a short fluorocarbon leader off the bottom. Pair it with live pinfish, cut mullet, or fresh shrimp and give the fish a moment to run before applying steady pressure. Pulling back hard at the strike is the most common mistake anglers make with circle hooks, and it will cost you fish.
A pack of Owner Mutu Circle Hooks runs $5 to $10 depending on pack count and hook size. You’ll find them available on Amazon and at most major tackle retailers. Picking up a multipack is the smarter move if you’re heading out on a multi-day trip or stocking up for a full charter season.
The Owner Mutu Light Circle Hook shares the same proven geometry as the standard Mutu but uses lighter gauge wire throughout, which gives it a clear advantage when targeting finicky or soft-mouthed species that drop bait the moment they feel resistance on the hook.
This hook performs best with live shrimp and small finger mullet when fishing for species like speckled trout, pompano, and smaller redfish. The lighter wire creates less drag in the water, letting live bait swim naturally and stay active longer, which directly increases your strike opportunities over a full day on the water.
For most inshore applications, a 1/0 to 3/0 covers the majority of trout and pompano situations. Match your hook size to your bait size first, then factor in the target species. Going too large reduces natural bait movement and will cost you strikes on pressured fish.
Lighter wire drives faster penetration on soft-mouthed fish, but avoid this hook for hard-pulling species like large snapper where the wire can flex under a heavy load.
A popping cork rig with a short fluorocarbon leader is the standard setup for this hook. Pair it with a live shrimp just above grass flats and let the current handle most of the presentation work for you.
Packs of these owner fishing hooks run $5 to $8 depending on size and count, available on Amazon and at most major tackle retailers.
The Owner Gorilla Light Live Bait Hook is built around one priority: keeping live bait alive and swimming naturally for as long as possible. The wide gap and fine wire construction minimize damage to the bait during hooking, which translates directly into more active presentations and more fish in the boat.
This hook shines when you’re free-lining live bait in open water or drifting over structure. It’s a strong choice for snook, tarpon, and large redfish when they’re keyed in on lively baitfish like pilchards, threadfin herring, or scaled sardines. The wide gap improves hook-up rates when a fish inhales the bait at speed.
A lively baitfish on a light-wire hook outfishes a sluggish one on heavy wire almost every time, and this hook is designed with that principle in mind.
Match your hook size to your baitfish length, not just species. For pilchards and small herring, a 1/0 to 3/0 works well. Step up to a 4/0 or 5/0 when you’re working larger threadfin or when tarpon are the primary target.
Hook the bait through the nose or just ahead of the dorsal fin to preserve maximum swimming action. A light fluorocarbon leader between 20 and 40 pounds keeps the rig nearly invisible without sacrificing strength when a big fish runs.
These owner fishing hooks run $5 to $9 per pack and are available on Amazon and at most major tackle retailers.
The Owner SSW Cutting Point Hook uses a three-sided blade-like tip that slices into a fish’s jaw rather than pushing through it. That cutting point design delivers faster, cleaner hook sets on fish that crush bait and spit it quickly, which gives you a real edge in high-current situations where reaction time is short.
This hook excels in saltwater bottom fishing and handles hard-mouthed species especially well. Target black drum, sheepshead, and flounder with confidence, since the cutting point requires less force to penetrate thick bone and cartilage than a standard cone point hook requires.
The SSW cutting point drives through tough jaw structure on the first solid pull, so you waste fewer strikes on fish that only commit for a second.
For inshore bottom rigs, sizes 1 to 3/0 cover most situations. When targeting larger black drum or heavier-bodied flounder, step up to a 4/0 or 5/0 to match bigger bait and handle stronger jaw pressure without the hook bending out under load.
A fishfinder rig or knocker rig with fresh cut crab or shrimp on a short fluorocarbon leader is the go-to setup. Keep your leader in the 20 to 30-pound range when you’re fishing tight to structure where sheepshead hold.
These owner fishing hooks run $4 to $8 per pack and are available on Amazon and at most major tackle retailers.
The Owner Mosquito Hook is a light-wire, wide-gap design built for situations where presentation matters more than raw pulling power. Its slender profile and needle-sharp chemically honed point make it a strong choice for finesse fishing with soft plastics and live bait in pressured inshore environments where fish get a good look at your rig.
This hook performs best when you’re targeting speckled trout, panfish, and smaller redfish with soft plastic paddle tails, grubs, or small swimbaits. The wide gap clears bulky soft plastics cleanly on the hook set, which improves connection rates without requiring a heavy rod or an aggressive sweep.
The Mosquito Hook’s thin wire threads through soft plastics without tearing them apart, which extends your bait life significantly over a full day on the flats.
For most inshore soft plastic applications, sizes 1/0 to 3/0 cover the majority of presentations. Match your hook size to your soft plastic length first, then leave just enough point exposed to drive home cleanly on a light bite without snagging grass.
These owner fishing hooks pair well with weightless Texas-style rigs or light exposed jig heads over grass flats and sandy potholes. A 15 to 20-pound fluorocarbon leader keeps your rig subtle enough for wary fish in clear water.
Packs run $4 to $7 depending on size and count, and you’ll find them readily available on Amazon and at most major tackle retailers.
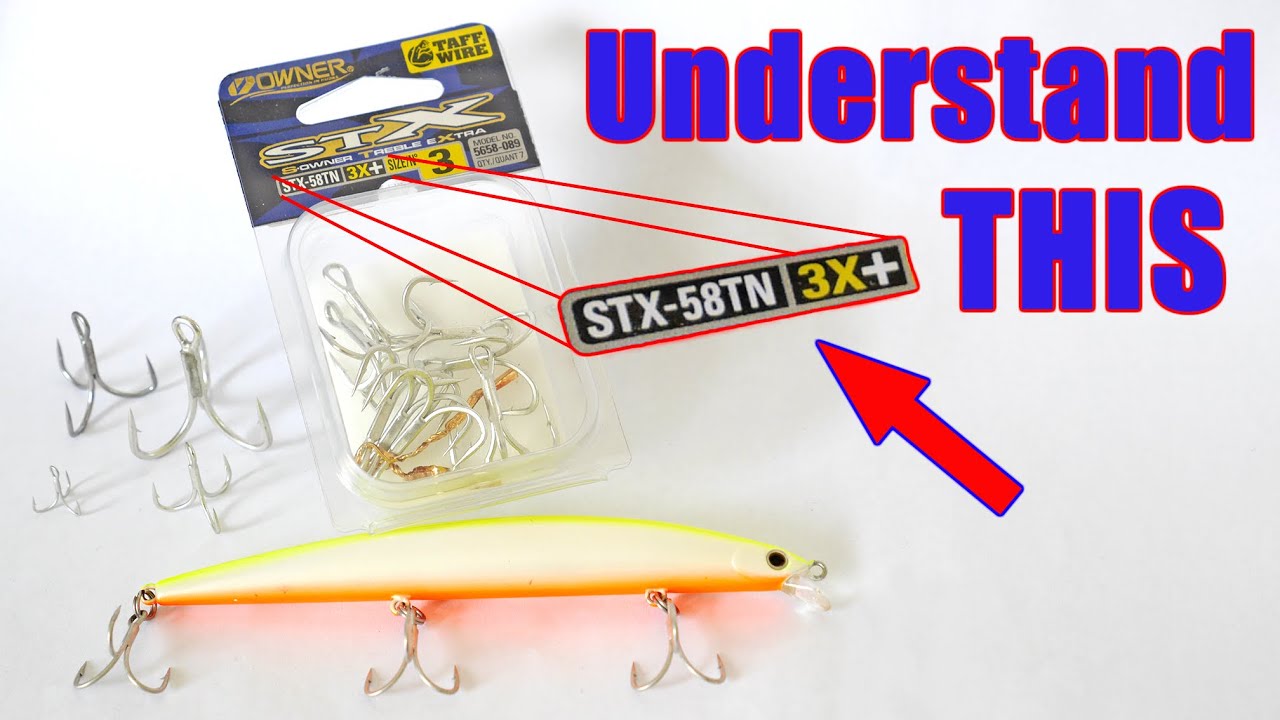
The Owner ST-36 Stinger Treble Hook is the standard-duty treble that belongs on every hard bait in your saltwater tackle box. Its chemically sharpened points stay sticky after repeated strikes, and the bronze finish holds up well in inshore and nearshore environments where hooks take regular abuse.
This treble excels as a replacement hook on hard baits like jerkbaits, topwater plugs, and crankbaits. It’s a proven option for species that strike fast and pull hard, including Spanish mackerel, bluefish, jack crevalle, and speckled trout. The ST-36 drives home on aggressive surface strikes where fish commit fully and give you a clean connection point.
Swapping factory trebles for ST-36s on your hard baits is one of the cheapest and most effective upgrades you can make before a full day on the water.
Match your hook size to your lure body size, not just the factory hook that came on the bait. Sizes 4 to 8 cover the majority of inshore hard bait applications, with size 4 working well on larger plugs and size 8 fitting smaller topwater baits used for trout and redfish.
When replacing these owner fishing hooks on hard baits, always use a quality split ring to maintain the lure’s natural action. A size-matched split ring plier makes installation fast and prevents opening the ring too wide, which weakens the connection under load.
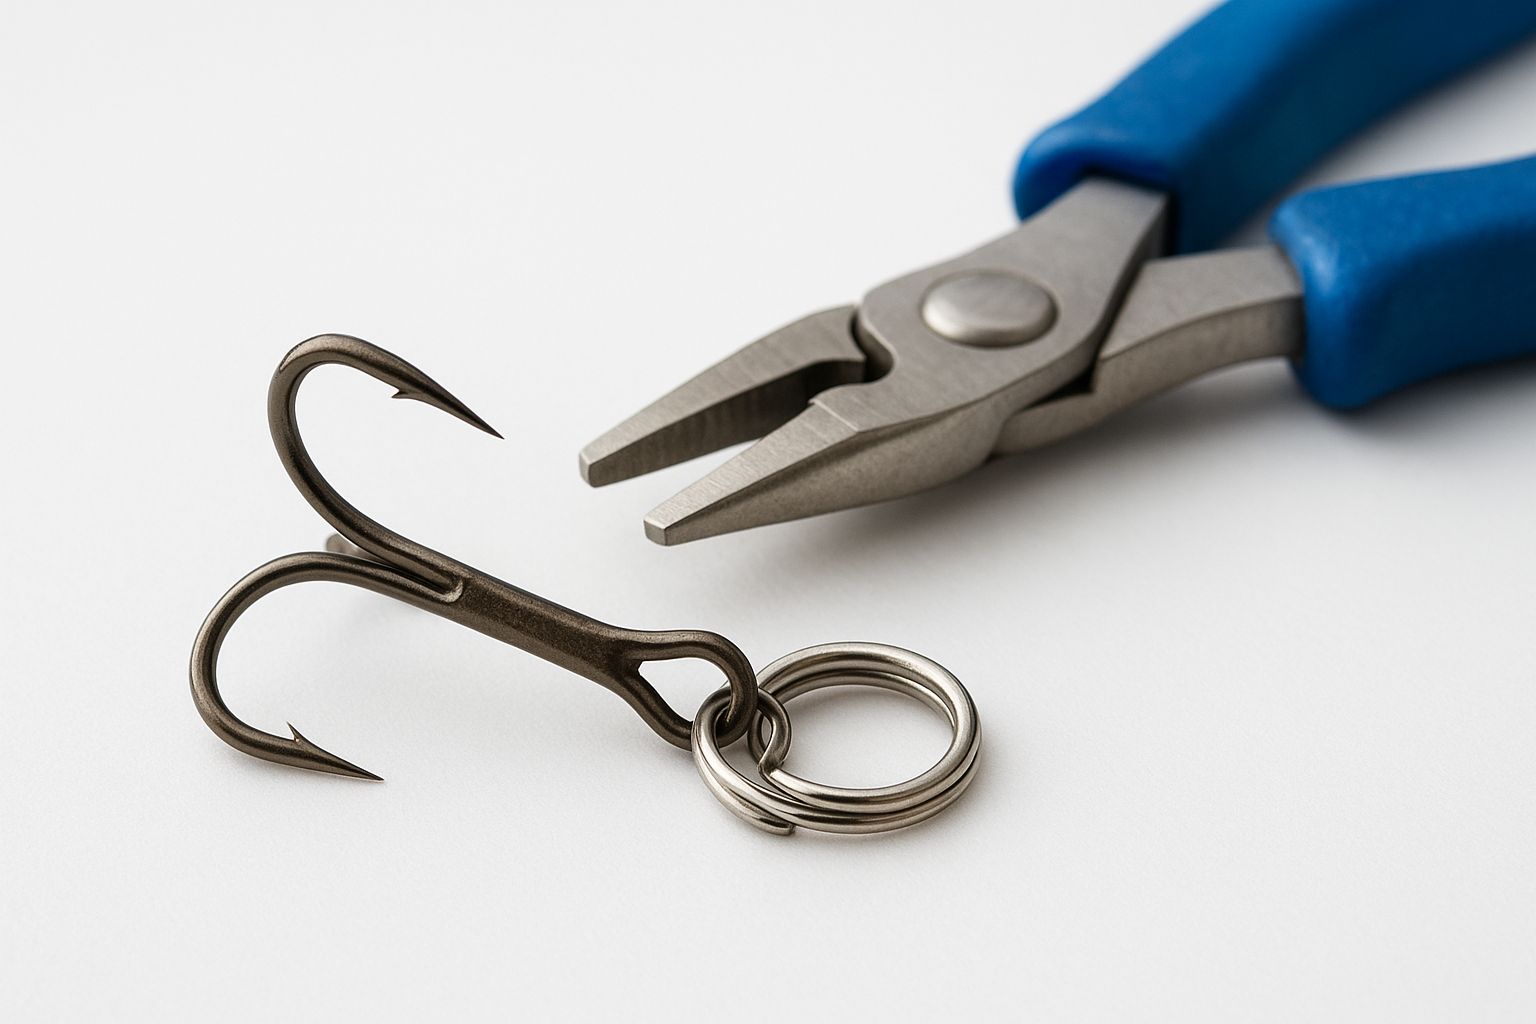
Packs of ST-36 Stinger Trebles run $4 to $8 depending on size and count, available on Amazon and at most major tackle retailers.
The Owner ST-66 4X Treble Hook is built for situations where a standard-strength treble simply won’t hold up. Its 4X wire construction gives you four times the strength of a comparable standard wire hook, making it the right choice when you’re targeting hard-pulling pelagic species or swapping hooks on heavy-duty lures designed to handle serious punishment.
This hook is purpose-built for large hard baits and heavy swimbaits used on big fish in open water. It performs best when targeting king mackerel, large amberjack, cobia, and tarpon that hit with full force and run hard without letting up. If your lure takes repeated blunt strikes from aggressive fish, the ST-66 handles that pressure without flexing out.
For most heavy hard bait setups, sizes 2 to 4/0 cover the majority of applications. Match your hook to the weight and profile of the lure body first, then confirm the gap clears the bait cleanly on a fast, powerful strike.
If you’ve bent out standard trebles on big fish before, that’s your clear signal to move up. Kingfish and cobia pushing 30-plus pounds will straighten a standard treble on a hard run, and these owner fishing hooks eliminate that exact failure point when the pressure peaks.
The ST-66 is a direct investment in fish-to-boat conversion, because a bent treble at the wrong moment costs you the fish entirely.
Packs run $6 to $10 depending on size and count, available on Amazon and at most major tackle retailers.
The Owner Open Eye Siwash Hook is built for one specific purpose: replacing treble hooks with a single hook on hard baits and spoons without sacrificing hook-up performance. Its pre-opened eye makes swapping hooks faster and cleaner than threading a standard Siwash through a split ring, which adds up over a full day of running multiple lures.
This hook works best on spoons, inline spinners, and single-hook hard baits where a treble would foul the lure’s action or create unnecessary drag. It’s a reliable choice when targeting redfish, Spanish mackerel, and striped bass, particularly in situations where catch-and-release is a priority and a single barbless point reduces handling time significantly.
Match your hook size to the weight and profile of the lure you’re rigging. Sizes 1/0 to 4/0 cover most inshore and light nearshore applications, with larger spoons requiring a 3/0 or 4/0 to maintain proportion and drive clean penetration on a fast strike.
Close the open eye with quality needle-nose pliers after threading it directly onto the lure’s existing split ring. These owner fishing hooks require no additional hardware, which keeps the connection point clean and reduces the chance of the hook binding on the ring during a hard-running fish.
Closing the eye fully before fishing is the single most important step, because a partially open eye will cost you fish under load.
Packs run $4 to $8 depending on size and count, available on Amazon and at most major tackle retailers.
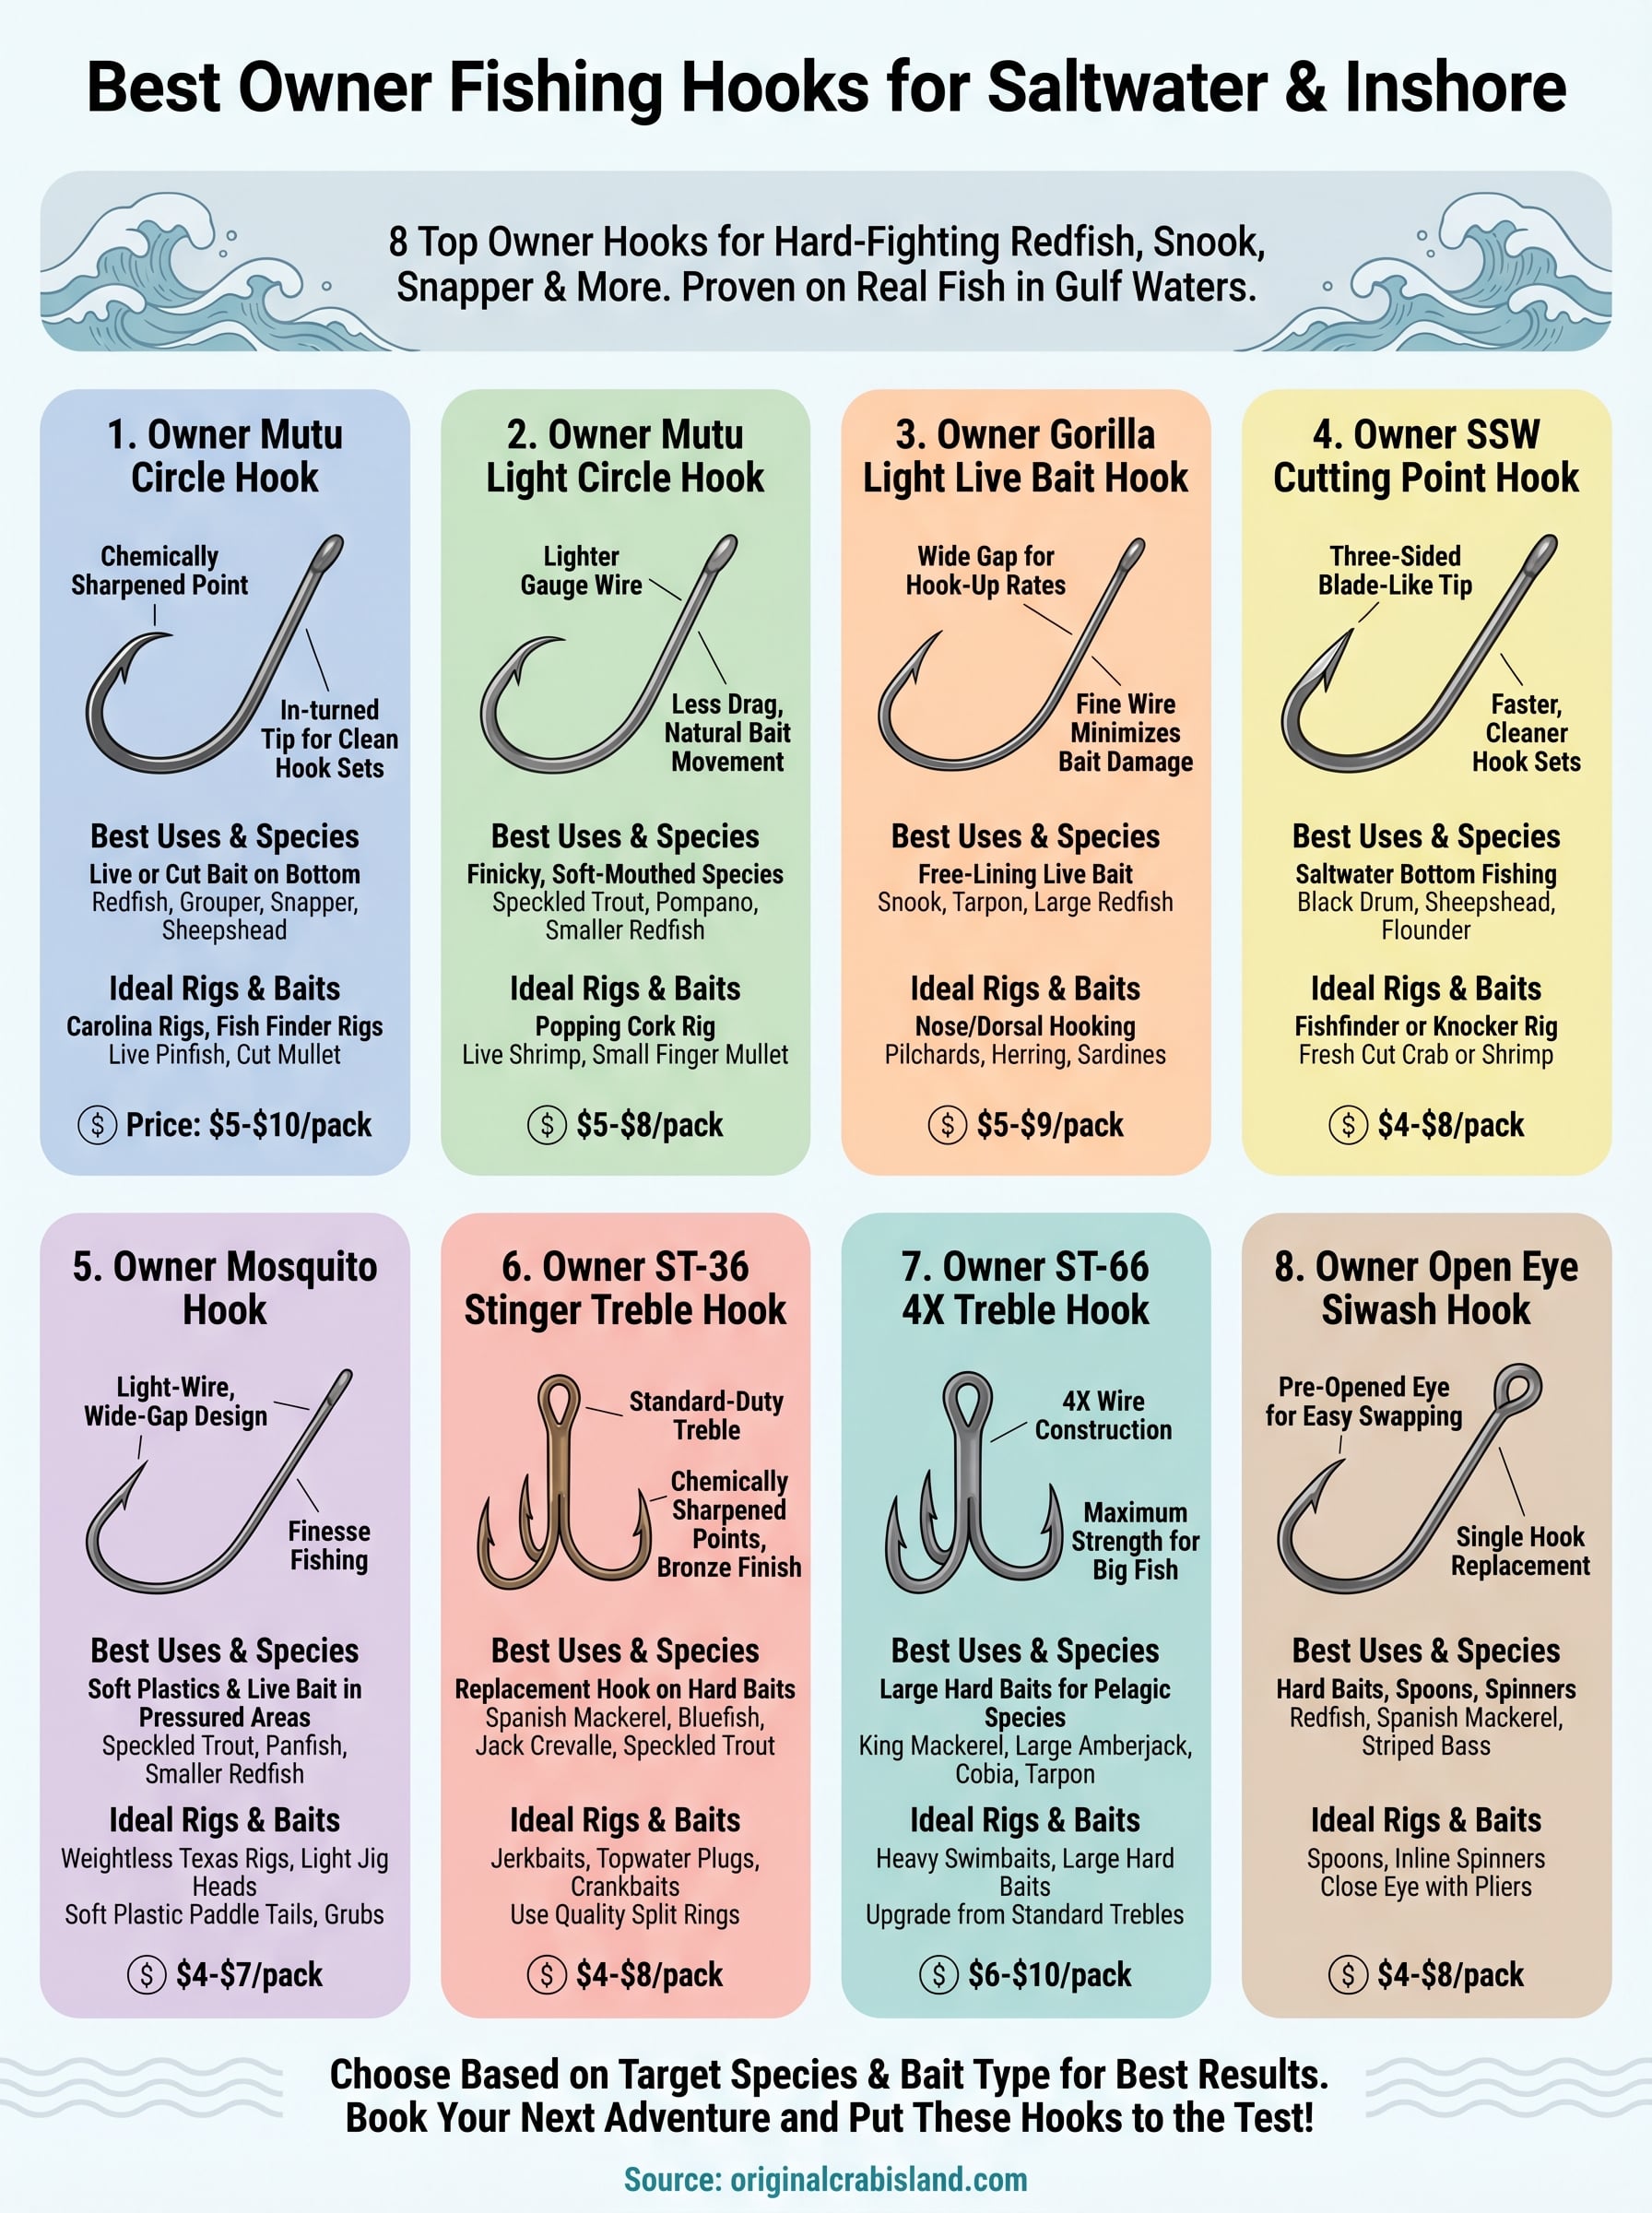
You now have eight proven owner fishing hooks to choose from, each built for a specific situation on the water. The right move is to narrow your selection based on your target species and bait type before adding anything to your cart. If you fish live bait inshore, start with the Mutu Circle or Gorilla Light. If you run hard baits on pelagic species, the ST-66 4X or Open Eye Siwash will cover you.
Once your tackle bag is sorted, the next step is getting on the water in a location where these hooks actually pay off. Destin’s Emerald Coast gives you access to redfish, snook, grouper, and more within a short run from the dock. If you want to put these hooks to work with local knowledge behind you, book a fishing charter with Original Crab Island and fish water that consistently produces. For more options, explore our our services page.

You’ve got the basics down, standing up, staying balanced, riding in a straight line behind the boat. Now comes the part that separates true beginners from progressing riders: learning how to cross the wake on a wakeboard. It’s the single skill that opens the door to everything else in wakeboarding, from carving turns to catching air.
The thing is, most people make it harder than it needs to be. They fight the wake instead of working with it, and they end up catching an edge or faceplanting at the worst possible moment. With the right technique, proper edging, correct body position, and a steady approach, crossing the wake becomes second nature faster than you’d expect. It’s more about trust and timing than raw strength.
Here at Original Crab Island, we put people on the water in Destin every single day. From pontoon rentals at Crab Island to jet skis along the Emerald Coast, we know what it takes to have a great day on the water. That hands-on experience is exactly what shaped this guide. Below, we’ll walk you through every step of crossing the wake, from your first edging drills to landing clean on the other side, so you can spend less time wiping out and more time riding.
Wake crossing is the act of riding your wakeboard from one side of the boat’s wake to the other, cutting across the two ridges of water the boat pushes up as it moves forward. The wake forms two walls of water, one on your heelside and one on your toeside, and every advanced wakeboarding move, including jumps, grabs, and spins, starts with crossing those walls with control. Until you can do that consistently, everything else in the sport stalls out.
Most riders are ready to try wake crossing after they can ride comfortably in a straight line for at least 30 seconds without losing balance. You don’t need perfect form, but you do need a baseline of body control before attempting it. Here are the key signs you’re ready:
Once you can ride flat water without gripping the handle like your life depends on it, you’re ready to start learning how to cross the wake on a wakeboard.
When you hit the wake for the first time, the impact is sharper than it looks from inside the boat. The two ridges push back against your board and can throw you off balance if you’re not prepared for it. Understanding what’s coming helps you react correctly instead of freezing up.
The key is recognizing that the wake isn’t a wall; it’s a ramp. Lean into it with a controlled edge rather than bracing against it, and the transition from one side to the other feels smooth instead of jarring.
Before you even think about how to cross the wake on a wakeboard, your body needs to be in the right position. Shoulder-width stance is your starting point: feet roughly even with your shoulders and knees bent at about 20 to 25 degrees. Keep your weight centered over both feet, not tilted too far forward or back. Locking your knees straight removes the shock absorption you need when the wake pushes up against your board, and it tends to throw beginners off balance immediately.
Your handle position directly affects your balance during the approach. Hold the rope at hip height, with your arms close to your sides and elbows slightly bent. Pulling the handle toward your chest tightens your shoulders, kills your balance, and makes the crossing harder than it needs to be.
Keeping the handle at hip level gives your core something stable to brace against when the wake pushes back.
Rope length also matters more than most beginners expect. Start with a shorter rope around 55 to 60 feet so the wake is narrower and more manageable. A longer rope widens the gap between the two ridges and adds difficulty before you’ve built the confidence to handle it.
Edging is the foundation of how to cross the wake on a wakeboard. You apply pressure through your heels or toes to angle the board and direct it toward the wake. Think of it as carving a line through water rather than steering with your arms. Edging starts from the feet up, traveling through your knees, hips, and core. Pulling the handle sideways with your arms is a common mistake that kills your edge and sends you off balance.
Start 15 to 20 feet outside the wake on your heelside. Gradually shift your weight onto your back heel while keeping your knees bent and chest upright. The edge should feel like slow, building pressure under your board, not a sharp dig. If you lean your upper body backward instead of pressing through your feet, you’ll lose the edge and skid flat across the water.
The goal is to feel resistance building steadily under your board as you approach, like coiling before a push.
Run through this checklist before committing to the crossing:
The core secret of how to cross the wake on a wakeboard is your approach angle. Crossing straight at 90 degrees hits the wake hard and gives your body no time to adjust. Aim for a 45-degree angle, which lets you ride up and over the wake like a ramp rather than slamming into it flat.
Approach at 45 degrees and the crossing becomes a controlled transition, not a collision.
Most beginners release their edge the moment they feel the wake pushing back. Don’t. Hold the edge all the way through the crest and keep your knees bent to absorb the impact. Your board will carry you to the other side if you stay committed and resist the urge to pull the handle up.
Keep your eyes on the boat, not on the wake beneath you. Looking down shifts your weight forward and breaks your edge immediately. As you clear the crest, absorb the landing with bent knees and let the board settle flat before your next approach.
Aim to land in the same spot every rep. Consistent landings confirm your angle and edge pressure are working, and they make each crossing more predictable over time.
After you clear the wake, your recovery position sets you up for the next crossing. Land with bent knees and let the board settle flat before redirecting. Give yourself two to three seconds to re-center your weight and balance on flat water before starting your next edge approach. Rushing back while still off-balance is the fastest way to fall.
Consistency beats speed at this stage of learning how to cross the wake on a wakeboard. Run the same crossing 10 to 15 times at a steady pace before asking the driver to go faster. Each rep should feel more automatic than the last. Use this checklist to track your progress:
Once your crossings feel identical rep after rep, you’re ready to push the boat speed up gradually.
Add 5 feet at a time, moving from 55 feet toward 65 or 70 feet. A longer rope gives you more flat water between the wake ridges and room to build a stronger edge before each crossing. Don’t jump rope lengths; each extension changes how the wake feels under your board, so give yourself several runs to adjust before extending again.
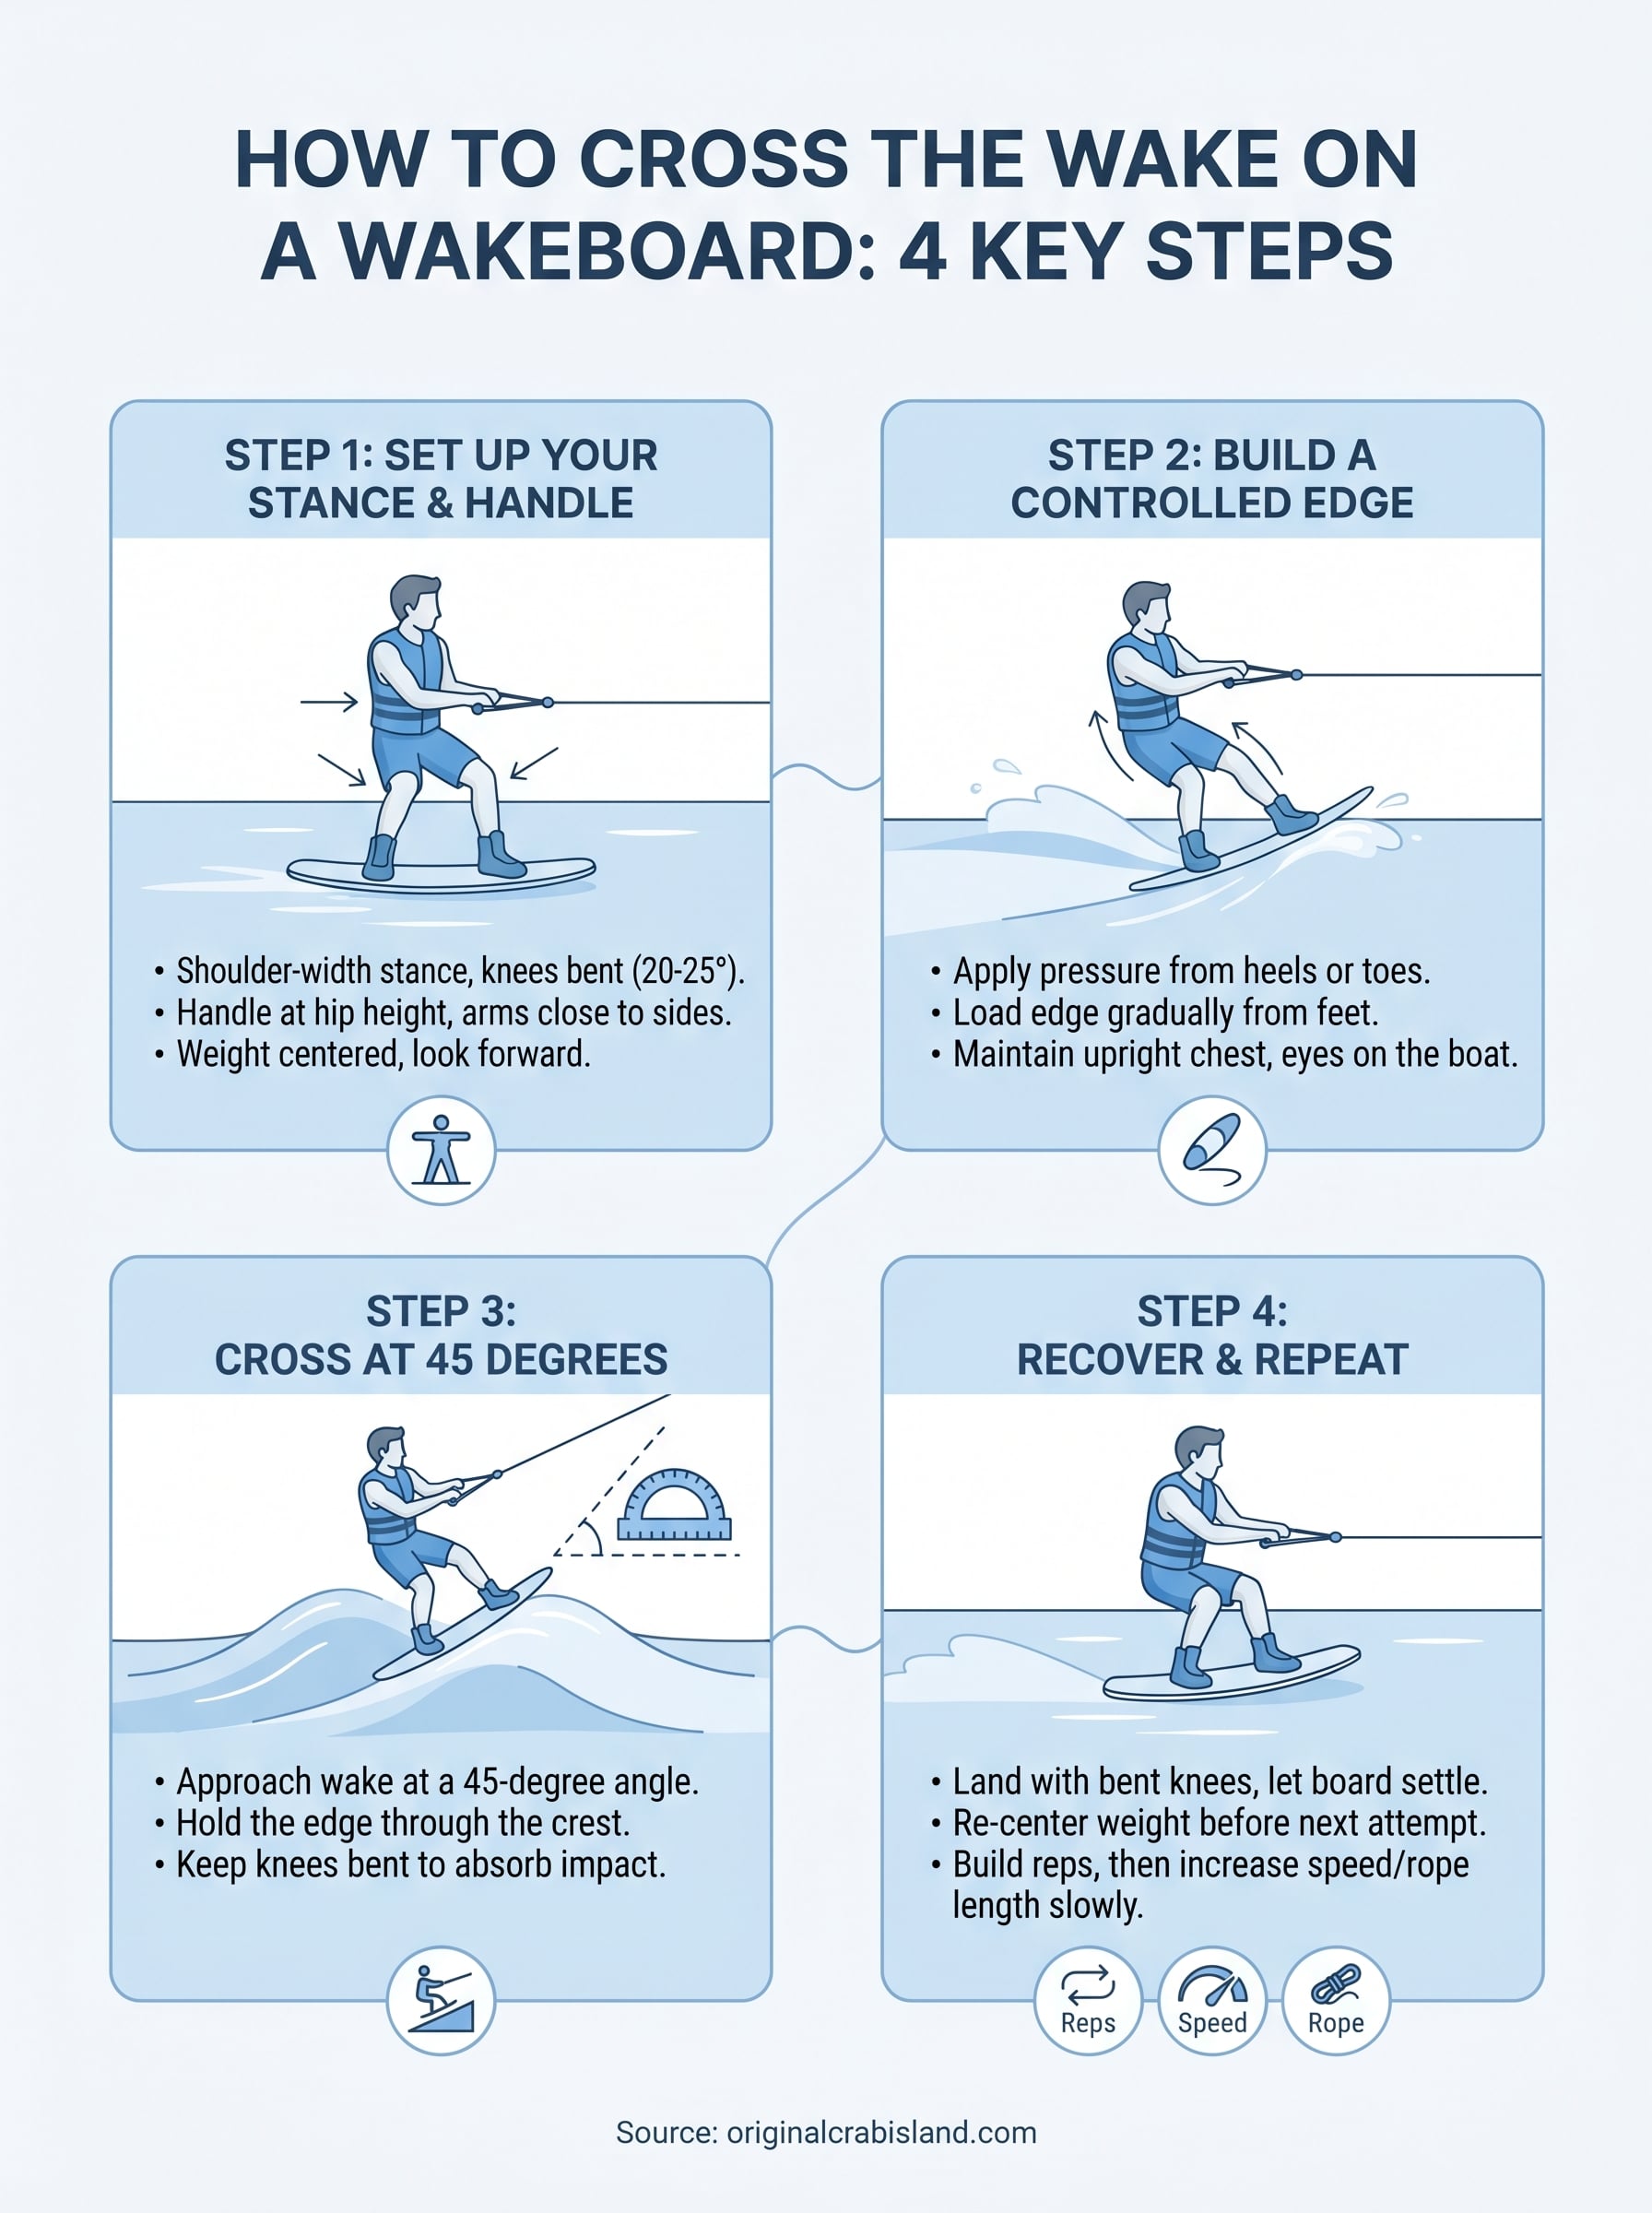
Learning how to cross the wake on a wakeboard comes down to four repeatable steps: set a stable stance, build a controlled edge, approach at 45 degrees, and recover clean before your next rep. None of these require athletic talent. They require patience and deliberate practice, run after run, until each crossing feels automatic. The technique works because every piece connects to the next. Your stance feeds your edge, your edge feeds your angle, and your angle feeds your landing.
Start slow, keep the rope short, and trust the process. Once you can land 10 clean crossings in a row, bump the speed by 2 mph and extend the rope by 5 feet. Progress stacks faster than most beginners expect when you build on a solid foundation.
Ready to put this into practice on the water? Book your session with Original Crab Island in Destin and get out there.
 CALL NOW